Introduction to Homemade Cherry Turnovers
When life gets busy, it’s easy to skip out on delicious homemade treats. That's why homemade cherry turnovers are the perfect culinary solution for young professionals looking to add a little sweetness to their hectic schedules. These delightful pastries are not just a quick snack; they’re a warm reminder of simpler times spent in the kitchen, and they bring a delightful burst of flavor with every bite.
Why Homemade Cherry Turnovers are a Must-Try for Young Professionals
Imagine coming home after a long day, and the comforting aroma of freshly baked cherry turnovers fills your space. Doesn’t that sound inviting? Making homemade cherry turnovers allows you to unwind while creating something truly special. Plus, they are incredibly versatile:
-
Quick Preparation: With ready-made pastry dough, you can whip these up in no time. They’re an excellent option when you're in a hurry or want to impress guests without spending all day baking.
-
Customizable Filling: While cherry is a classic choice, you can experiment with other fruits or even chocolate. When was the last time you indulged in your favorite flavors?
-
Perfect for Any Occasion: Whether you’re attending a brunch with friends or need a quick dessert for date night, these pastries fit the bill perfectly.
From a health perspective, making your own pastries gives you control over the ingredients. You can use fresher cherries, limit sugar, or incorporate whole grains—an advantage that store-bought options often lack. According to health experts from the Harvard T.H. Chan School of Public Health, homemade treats can be part of a healthier lifestyle as you can avoid unwanted preservatives.
Whether you enjoy them warm or at room temperature, the joy of biting into a flaky pastry filled with sweet cherries is unmatched. So, why not add a personal touch to your snacks? Homemade cherry turnovers could become your new go-to recipe, showcasing your creativity while satisfying your craving for something delightful.

Essential Ingredients for Crafting Delicious Turnovers
If you’re craving a sweet indulgence, homemade cherry turnovers are an enticing option that can brighten up any day. To whip up these delightful treats, let’s gather our essential ingredients.
-
Puff Pastry: You can use store-bought for convenience. Look for high-quality options that offer a flaky texture. If you’re feeling adventurous, you can even try making your own! Check out this easy homemade puff pastry recipe for a fun project.
-
Fresh or Frozen Cherries: The star of the show! Choose ripe cherries when in season for the best flavor. Frozen cherries work perfectly too, allowing you to enjoy these treats year-round.
-
Sugar: A touch of granulated sugar will bring out the natural sweetness of the cherries. You can adjust the amount based on your taste preferences.
-
Cornstarch: This will help thicken the cherry filling and keep it from becoming too runny.
-
Vanilla Extract: Just a splash can elevate the flavor profile, giving a delightful depth to your turnovers.
With these key ingredients, you're well on your way to creating homemade cherry turnovers that family and friends will rave about!
Preparing Homemade Cherry Turnovers
Making homemade cherry turnovers is an experience that brings together delightful flavors and the warmth of fresh-baked goodness. This guide breaks down the process into easy steps, so you can confidently create scrumptious turnovers that impress friends, family, or even just yourself!
Thawing and Rolling Out the Puff Pastry
To start, you’ll need to prepare some store-bought puff pastry. I find it’s best to plan ahead and take the pastry out of the freezer to thaw overnight in the refrigerator. If you're in a hurry, simply let it sit at room temperature for about 30 minutes. The goal here is to make sure it’s pliable but still cold.
Tip: Roll out the pastry on a lightly floured surface. This prevents it from sticking and allows for even thickness, which is crucial for those layers that create that flaky texture we all love. A rolling pin is your best friend here!
Cutting the Pastry Into Squares
Once your pastry is rolled out, it’s time to cut it into squares. Depending on how large you want your turnovers, aim for 4x4 inch squares, which create a perfect handheld snack. Use a sharp knife or a pizza cutter for clean edges.
- Pro Tip: If you want to make smaller, bite-sized turnovers, consider cutting the squares into 3x3 inches. Perfect for a quick treat with coffee or tea!
Filling Each Pastry Square
Next, let’s fill these squares with our luscious cherry filling. You can either use store-bought cherry pie filling or make your own with fresh or frozen cherries. If you choose to make your own, combine the cherries in a saucepan, along with sugar, cornstarch, and a splash of lemon juice, and cook until thick and bubbly.
For best results:
- Add about 1-2 tablespoons of filling to the center of each square, making sure to leave space around the edges to seal them properly.
- Don’t overfill or they might burst during baking!
Sealing and Crimping the Turnovers
After filling, it’s crucial to seal your homemade cherry turnovers correctly. Fold one corner of the square over the filling to meet the opposite corner, creating a triangle. Press the edges together firmly.
- For an extra touch, you can crimp the edges using a fork. This not only seals them but also adds a decorative flair!
Preparing the Egg Wash and Brushing It On
To achieve a beautiful golden-brown color, prepare an egg wash by whisking together one egg with a tablespoon of water or milk. Brush this mixture over the tops of the turnovers before baking. This little step makes all the difference in aesthetics and gives that professional pastry shop look!
Baking the Turnovers to Perfection
Finally, it’s time to bake. Preheat your oven to 400°F (200°C), placing your turnovers on a parchment-lined baking sheet to prevent sticking. Bake for about 20-25 minutes, or until they are puffed up and golden. Keep an eye on them as the baking time can vary based on your oven and the size of the turnovers.
Once they’re out of the oven, let them cool slightly. I like to dust them with powdered sugar for a sweet touch before serving. Enjoy your homemade cherry turnovers warm, or save some for later—though I doubt they’ll last that long!
By following these steps, you’ll transform simple ingredients into a delightful treat that is sure to impress. Happy baking! For more pastry inspirations, check out resources like Bon Appétit or Serious Eats for fabulous ideas on fillings and pastry techniques!

Variations on Homemade Cherry Turnovers
Customizing with Different Fruit Fillings
While homemade cherry turnovers are undoubtedly delicious, why not mix things up with different fruit fillings? The versatility of turnover dough makes it a perfect canvas for a variety of sweet treats. Consider using:
- Peaches: Juicy and fragrant, peaches add a summer vibe to your turnovers.
- Apples: With a sprinkle of cinnamon, apple turnovers become a comforting favorite any time of year.
- Blueberries: Bursting with antioxidants, these berries not only taste amazing but also add a vibrant color.
- Mixed Berries: Combine strawberries, blueberries, and raspberries for an explosion of flavor!
Filling options can transform your kitchen into a creative space, and trust me, your friends will be asking for your secret recipe. If you're curious about exploring more fruity delights, check out The Spruce Eats for inspiration.
Savory Turnover Options for a Twist
Feeling adventurous? Turnovers aren't just for sweet fillings! Savory options can introduce a delightful contrast to your palate. Imagine biting into a flaky pastry filled with:
- Chicken Ham and Cheese: This classic combo delivers a savory punch that’s perfect for lunch.
- Turkey Bacon and Spinach: The subtle smokiness of turkey bacon pairs beautifully with fresh spinach for a health-conscious treat.
- Beef and Mushroom: Earthy flavors meld together, offering a hearty and satisfying option.
These savory homemade cherry turnovers alternatives not only provide variety but also make impressive appetizers for gatherings. Plus, they’re surprisingly easy to assemble!
Next time you bake, don't limit yourself—let your imagination lead the way! There’s a world of flavors waiting to be explored.
Cooking Tips and Notes for Homemade Cherry Turnovers
Common pitfalls and how to avoid them
When it comes to homemade cherry turnovers, there are a few common pitfalls you might encounter, but don’t worry; I’ve got your back. Here’s how to steer clear of them:
-
Dough issues: If your pastry falls apart, it may be too warm or not chilled enough. Make sure to keep the dough refrigerated before rolling it out. This helps maintain its structure during baking.
-
Overfilling: Too much cherry filling can lead to leaks and a messy turnover. Aim for about a tablespoon of filling per turnover—enough to taste the cherry goodness without overstuffing.
-
Sealing properly: Always pinch the edges well to avoid leakage. You can use a fork to crimp the edges, which not only seals them but adds a cute touch.
Remember, practice makes perfect. If your first batch doesn’t turn out as imagined, try again! Check out this dough handling guide for more tips on working with pastry.
For variations, consider experimenting with other fruits like blueberries or peaches—your homemade cherry turnovers can be a canvas for your creativity!

Serving Suggestions for Homemade Cherry Turnovers
Best ways to enjoy your turnovers fresh or later
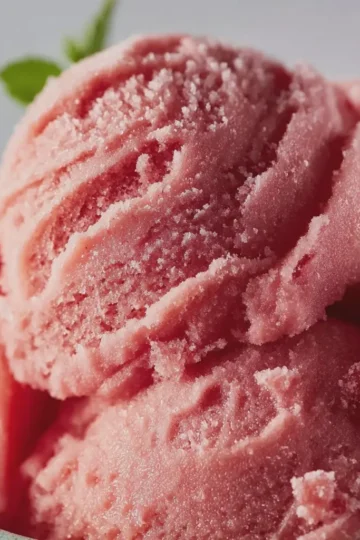
When it comes to homemade cherry turnovers, there’s no wrong way to indulge in these delightful pastries. For the freshest taste, enjoy them warm from the oven. Pairing them with a scoop of vanilla ice cream or a dollop of whipped cream elevates your experience to a whole new level. The warm cherries mixed with the cool creaminess create a delightful contrast that you won’t want to miss.
If you’re saving some for later, allow them to cool completely before storing them in an airtight container. They can be enjoyed at room temperature, but a quick reheat in the microwave or a brief stint in the oven can bring back their delightful freshness.
Want to mix it up? Serve your cherry turnovers alongside a cup of coffee or herbal tea for a cozy brunch option. For more serving ideas, check out this guide to fruit pastries that offers creative pairings and presentations!
Time Breakdown for Homemade Cherry Turnovers
When you're ready to whip up a batch of homemade cherry turnovers, it's a good idea to plan out your time in the kitchen. Here’s a simple breakdown to keep you organized:
Preparation Time
Getting started is half the fun! You'll need about 20 minutes to prepare the filling and pastry. Make sure to have everything handy for a smoother process. This is the perfect time to get your workspace tidy and set the mood with some catchy tunes.
Baking Time
Once your turnovers are assembled, pop them into the oven for roughly 25-30 minutes. This is when the magic happens, and your kitchen will be enveloped in the delightful aroma of baking cherries. To learn more about baking temperatures and methods, check out this helpful cooking guide.
Cooling Time
After baking, let those cherry turnovers cool for about 10-15 minutes. This allows the filling to set a little, making each bite even more enjoyable. Plus, it’s the perfect time to prepare a cup of coffee or tea to savor with your delicious treats.
Conclusion
With just over an hour of dedicated time, you can create mouthwatering homemade cherry turnovers that will impress your friends and family. So, what are you waiting for? Get baking!
Nutritional Facts for Homemade Cherry Turnovers
Calories per turnover
When indulging in a homemade cherry turnover, you can expect each delightful treat to contain about 200 calories. Not too shabby for a burst of fruity goodness! This makes them a great snack option or a sweet addition to your afternoon coffee.
Breakdown of key nutrients
Let’s dive a little deeper into what makes these turnovers not just tasty, but also nutritionally satisfying:
- Carbohydrates: Approximately 30g, providing that necessary energy boost.
- Fiber: Around 2g, thanks to those delicious cherries, promoting digestive health.
- Sugar: Roughly 8g, sweetening the deal while still keeping it somewhat balanced.
- Protein: About 2g, helping to keep you full for a bit longer.
These turnovers can be a delightful way to enjoy fresh fruit, and if you’re curious about the benefits of cherries, you might want to check out articles from renowned nutrition sources like the Harvard T.H. Chan School of Public Health or the USDA's FoodData Central.
So, next time you whip up a batch of homemade cherry turnovers, remember that you're munching on something that's not just delicious but also packed with vital nutrients!
FAQ about Homemade Cherry Turnovers
Can I use frozen cherries instead of canned?
Absolutely! Using frozen cherries can be a great alternative to canned ones for your homemade cherry turnovers. Just make sure to thaw them first and drain any excess liquid to prevent a soggy turnover. Frozen cherries often hold more flavor, and you might find they even enhance the freshness of your dessert! Don’t forget to check out this detailed guide on fresh versus frozen fruit for more insights.
What's the best way to store leftover turnovers?
To keep your homemade cherry turnovers fresh, store them in an airtight container. If you plan to eat them within a couple of days, just keep them at room temperature. For longer storage, place them in the refrigerator. If you've made a larger batch and want to save them for later, consider wrapping them individually in plastic wrap and placing them in the freezer. They can last for up to three months in the freezer!
How do I make turnovers crispy?
Want that perfect crispiness with your homemade cherry turnovers? Here are some tips:
- Use Cold Ingredients: Keep your butter and dough cold while preparing them.
- Brush with Egg Wash: A light brush of beaten egg on top before baking adds a beautiful golden color and an extra crunch.
- Bake on a Preheated Baking Sheet: This helps create a crisp bottom right from the start.
Remember, following these tips will elevate your baking game and satisfy your crispy cravings! For more expert tips on achieving perfect pastries, check out this article on baking techniques. Happy baking!
Conclusion on Homemade Cherry Turnovers
Recap of the Joy of Homemade Cooking and the Delight of Cherry Turnovers
Embracing the art of homemade cooking brings a sense of accomplishment and warmth to your kitchen. Homemade cherry turnovers perfectly illustrate this joy. From the first bite, the flaky crust mingles with the sweet, tangy cherry filling, creating a delightful harmony that store-bought options simply can't match.
Making these turnovers allows you to connect with the ingredients and customize them to your taste. Plus, their versatility means you can easily adapt the recipe to fit seasonal fruit availability or personal preferences. So why not treat yourself and your loved ones to these delightful pastries? Dive into the world of homemade cherry turnovers, and savor the taste of home!
For more kitchen inspiration, check out the USDA's guide on baking with fresh fruits.
Print
Homemade Cherry Turnovers: Easy Indulgence for Sweet Moments
Indulge in the delightful taste of homemade cherry turnovers, a perfect treat for sweet moments.
- Total Time: 35 minutes
- Yield: 8 turnovers
Ingredients
- 2 cups fresh or frozen cherries
- 1 cup sugar
- 1 tablespoon cornstarch
- 1 teaspoon vanilla extract
- 1 package puff pastry sheets
- 1 egg, beaten
- 1 tablespoon powdered sugar (for dusting)
Instructions
- Preheat the oven to 400°F (200°C).
- In a saucepan, combine cherries, sugar, and cornstarch. Cook over medium heat until thickened.
- Roll out the puff pastry sheets and cut into squares.
- Fill each square with a spoonful of cherry filling and fold over into a triangle.
- Seal the edges with a fork and brush with beaten egg.
- Bake for 20 minutes or until golden brown.
- Allow to cool and dust with powdered sugar before serving.
Notes
- For a sweeter filling, add more sugar to taste.
- Serve with a scoop of vanilla ice cream for an indulgent dessert.
- Prep Time: 15 minutes
- Cook Time: 20 minutes
- Category: Dessert
- Method: Baking
- Cuisine: American
- Diet: Vegetarian
Nutrition
- Serving Size: 1 turnover
- Calories: 180
- Sugar: 12g
- Sodium: 150mg
- Fat: 8g
- Saturated Fat: 3g
- Unsaturated Fat: 5g
- Trans Fat: 0g
- Carbohydrates: 25g
- Fiber: 1g
- Protein: 2g
- Cholesterol: 50mg