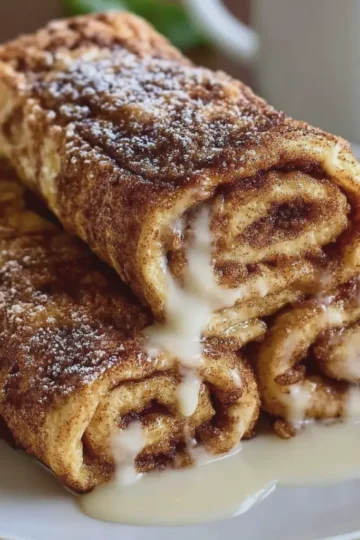
Introduction to No-Bake Cookie Bars
When you're juggling deadlines, work responsibilities, and social commitments, who has the time for complex recipes? Enter no-bake cookie bars—the perfect solution for young professionals looking for a quick, sweet treat without the hassle of baking. These delicious bars are simple to make, require minimal ingredients, and best of all, they don’t demand your precious time.
Why no-bake cookie bars are perfect for young professionals
One major appeal of no-bake cookie bars is their flexibility. Picture this: you’ve just wrapped up a long week at work, and you need a treat to wind down with over the weekend. These bars can be whipped up in as little as 20 minutes, allowing you to spend more time relaxing and less time worrying about the oven.
Additionally, there's a personal element to making these treats. You can customize your no-bake cookie bars to reflect your tastes and dietary preferences. Want to add peanut butter for protein? Go for it! Prefer a vegan option? Just swap in some plant-based ingredients. The options are endless, and they can easily accommodate any dietary restrictions you or your friends might have.
Speaking of friends, these bars are fantastic for sharing. They’re portable and easy to cut into bite-sized pieces, making them a great addition to potlucks, parties, or even just a casual evening with friends. Imagine pulling your deliciously decadent bars from the fridge and being applauded for your culinary magic—it’s a small victory worth celebrating.
If you’re new to the world of no-bake cookie bars, there are also countless resources to explore. Websites like AllRecipes and FoodNetwork are treasure troves of creative ideas. You can also find combinations of flavors that inspire you, such as adding dark chocolate chips or shredded coconut.
Ultimately, no-bake cookie bars combine convenience with creativity, making them a staple for any busy young professional's kitchen. So why not give them a try? You might just forge a new favorite recipe for those long, hectic weeks.

Ingredients for No-Bake Cookie Bars
Creating delicious no-bake cookie bars is not only easy but also a fantastic way to satisfy your sweet cravings while skipping the oven. Here’s what you’ll need:
Essential Ingredients
- Rolled oats: The backbone of your bars, providing texture and a hearty feel.
- Nut butter: Choose your favorite, whether it's almond, peanut, or sunflower seed. This adds richness and binds everything together.
- Sweetener: Honey, maple syrup, or agave nectar will give your bars that necessary sweetness.
- Chocolate chips: Dark or milk chocolate chips make for a deliciously indulgent touch.
- Ground flaxseed: A great source of omega-3 fatty acids, flaxseed boosts nutrition while adding a slight nutty flavor.
- Coconut: Unsweetened shredded coconut adds a lovely chewiness.
Feel free to get creative! Add-ins like dried fruit or seeds can elevate your no-bake cookie bars to the next level. Looking for more baking inspiration? Check out resources from the American Heart Association for healthy ingredient swaps.
Now that you have your ingredients ready, let’s dive into assembling these delightful treats!
Step-by-Step Preparation of No-Bake Cookie Bars
Creating delicious no-bake cookie bars is the perfect solution for satisfying your sweet tooth without the hassle of baking. These treats are quick to make and require minimal ingredients. Let’s walk through the steps together!
Gather your ingredients
Before diving into the kitchen, grab all the ingredients you’ll need. A well-organized workspace makes the process smoother. You should have:
- ½ cup unsalted butter
- 1 cup granulated sugar
- ½ cup milk (or your preferred milk alternative)
- 1 cup chocolate chips (semi-sweet or dark)
- 1 teaspoon vanilla extract
- 3 cups quick oats
Having these on hand will ensure that your no-bake cookie bars come together seamlessly. If you're interested in alternative sweeteners or gluten-free options, consider checking reputable sources like Healthline for some healthy swaps.
Prepare your baking dish
Choose an 8x8 inch or 9x9 inch square baking dish for your cookie bars. Line it with parchment paper, leaving some overhang on the sides. This step aids in easy removal later. If you don't have parchment paper, a light coat of cooking spray will suffice—just make sure the bars won’t stick!
Combine butter, sugar, and milk
In a moderately sized saucepan, place your butter, granulated sugar, and milk. It’s essential to mix these ingredients before heating, ensuring even distribution. This combination is what gives our no-bake cookie bars that lovely chewy texture.
Bring to a gentle boil
Place the saucepan over medium heat, stirring ingredients until they’re well combined. Once it starts to bubble gently, let it boil for about 2 minutes without stirring. This step caramelizes the ingredients slightly and enhances the flavor—don’t walk away! Failing to monitor it can lead to unwanted overboiling.
Mix in chocolate chips
After boiling, remove the saucepan from the heat. Stir in your chocolate chips while the mixture is still hot, allowing them to melt beautifully. You want a smooth, glossy texture here; so be patient as you fold in those chips. If you’re a fan of nuts, now might be a great time to sprinkle in some chopped nuts too—just remember to keep cookies nut-free if sharing with sensitive friends.
Add vanilla and oats
Once your chocolate is melted and integrated, mix in the vanilla extract followed by your quick oats. Stir until everything is ultimately combined. The oats absorb the flavors, and the mixture starts to thicken. If you love a little crunch, consider adding some shredded coconut or chia seeds at this stage for an extra nutritional boost.
Prepare the mixture for chilling
Pour the mixture into your prepared baking dish and evenly spread it out. Using a spatula to press it down firmly will ensure your bars hold together once chilled. Now, cover the dish with plastic wrap or aluminum foil and place it in the refrigerator. This chilling process usually takes about 1-2 hours—or until set.
Cut into bars and enjoy!
Once your bars are completely chilled and firm, it’s time to indulge! Use the parchment overhang to lift them out of the dish. Then, with a sharp knife, cut them into squares or rectangles, based on your preferred serving size. Feel free to finish them off with a little drizzle of melted chocolate on top for that extra touch.
So there you have it—delicious no-bake cookie bars are ready to enjoy! Whether as a snack or a dessert, these treats will surely delight anyone lucky enough to have a bite. Don't forget to share your creations with friends or family—everyone loves homemade goodies! Check out more recipes at Allrecipes for inspiration on treats you can make next. Happy cooking!

Variations on No-Bake Cookie Bars
When it comes to no-bake cookie bars, the possibilities are endless! Here are a few delightful variations to spice up your next batch, tailored for every kind of sweet tooth.
Adding Different Types of Chocolate
Why stick to one variety of chocolate when you can use multiple? Feel free to mix and match:
- Dark Chocolate: For a rich, intense flavor, opt for dark chocolate chips. They not only taste great but also add antioxidants to your treats.
- White Chocolate: If creaminess is your vibe, throw in white chocolate chips for a sweet contrast.
- Milk Chocolate: Prefer that classic, sweet flavor? Milk chocolate chips will do the trick!
Experimenting with different chocolates will not only enhance the flavor but also your experience. Try adding crushed chocolate-covered espresso beans for an extra kick of flavor and a little crunch.
Peanut Butter No-Bake Cookie Bars
Peanut butter lovers, rejoice! You can create divine no-bake cookie bars by incorporating creamy or crunchy peanut butter into your mixture. The nutty flavor complements the sweetness of your other ingredients beautifully.
- Combine equal parts peanut butter and oats for a base.
- Add a little honey or maple syrup for sweetness.
- Toss in some chopped nuts or dark chocolate chips for texture.
Not only are these bars satisfying, but they also pack a powerful protein punch!
Gluten-Free Options for Cookie Bars
For those avoiding gluten, making no-bake cookie bars is easier than you think! Substitute regular oats with certified gluten-free oats and ensure any chocolate you use is free from gluten, too.
- Consider using ground almonds or coconut flour as a base for a delicious, nutty flavor.
- Incorporate natural sweeteners like agave or coconut sugar to keep everything on the healthier side.
For more in-depth gluten-free baking tips, check out this comprehensive guide that dives into ingredient swaps and baking techniques.
By exploring these variations, you can turn the humble no-bake cookie bar into a personalized masterpiece! What flavors will you experiment with next?
Cooking Tips and Notes for No-Bake Cookie Bars
Ensuring the Best Texture
Getting the texture just right is essential for delicious no-bake cookie bars. To achieve a chewy yet firm consistency, make sure to measure your ingredients accurately. Using creamy, natural nut butter helps bind everything together beautifully. If you prefer a little crunch, consider adding chopped nuts or even a sprinkle of sea salt on top for that perfect contrast. Remember, refrigerating your bars longer allows them to set better, so be patient—good things come to those who wait!
Storing Your Cookie Bars Effectively
To keep your no-bake cookie bars fresh and tasty, store them in an airtight container in the refrigerator. They can last up to a week, making them a convenient snack for busy professionals. For longer storage, cut them into bars and freeze them; just be sure to layer wax paper between them to prevent sticking. When you’re ready to enjoy, let them sit at room temperature for a few minutes. It’s a simple yet effective way to keep your treats conveniently delicious! For more tips, consider checking out sources like The Kitchn for additional insights on storage techniques.

Serving Suggestions for No-Bake Cookie Bars
When it comes to no-bake cookie bars, the serving possibilities are as endless as your creativity! Let’s dive into how you can make these treats even more enjoyable.
Ideal Pairings with Snacks and Drinks
Perfect for any occasion, no-bake cookie bars are delicious on their own but can shine even brighter with the right pairings.
- Beverages: Enhance the flavor with creamy vanilla almond milk or a refreshing iced herbal tea. If you're in the mood for something cozy, try serving them with hot cocoa or a rich coffee blend.
- Snacks: Pair these bars with fresh fruit for a healthy twist. Consider apple slices or a vibrant fruit salad to balance the sweetness.
Serving at Parties or Gatherings
When hosting a gathering, no-bake cookie bars become the star of the dessert table.
- Plating: Cut into bite-sized squares and display them on a colorful platter. Add some decorative touches—think fresh mint leaves or a drizzle of chocolate on top.
- Interactive Stations: Set up a DIY dessert station where guests can create their flavor combinations with toppings like nuts or dried fruit.
With these ideas, your no-bake cookie bars will be a hit! Want more inspiration? Check out this guide on creative dessert ideas.
Time Breakdown for Making No-Bake Cookie Bars
When you’re diving into the world of no-bake cookie bars, understanding the time commitment can make all the difference. Here’s a handy breakdown:
Preparation Time
Getting started doesn’t take long at all! You'll spend about 15-20 minutes preparing your ingredients and mixing them together. This is a simple process; just think of it as gathering your snacks!
Cooling Time
After you’ve combined your ingredients, the hardest part is waiting. Allow the bars to chill in the fridge for about 1-2 hours. This step is crucial for achieving that perfect, firm texture.
Total Time
Combined, you're looking at approximately 1 hour and 45 minutes to 2 hours and 20 minutes for the whole process. A small investment for a delicious treat that will impress friends and family!
For more tips on making your no-bake recipes a success, check out resources from Serious Eats or BBC Good Food.
Nutritional Facts for No-Bake Cookie Bars
Caloric Content per Bar
Each serving of no-bake cookie bars typically contains around 150-180 calories. This can vary based on the ingredients you choose, like the type of nut butter or sweetener you prefer. So, if you're counting calories, keep an eye on those additions!
Key Nutrients and Benefits
These delightful no-bake cookie bars are not just tasty; they come packed with great nutrients. Here are some highlights:
- Protein: Thanks to ingredients like nut butter, these bars can provide about 5-7 grams of protein per serving. This helps keep you feeling full and satisfied.
- Healthy Fats: Ingredients such as nuts and seeds deliver heart-healthy fats, which are essential for overall well-being.
- Fiber: The oats and any added seeds boost fiber content, aiding digestion and helping maintain stable blood sugar levels.
Want to learn more about the benefits of these nutrients? Check out Healthline's article for in-depth insights!
These no-bake cookie bars offer a delicious way to satisfy your sweet tooth while also nourishing your body—perfect for busy young professionals looking for quick energy bites!
FAQs about No-Bake Cookie Bars
Can I make these bars vegan?
Absolutely! You can easily adapt your no-bake cookie bars to fit a vegan lifestyle. Simply substitute the standard butter or any dairy ingredients with plant-based alternatives like coconut oil or almond butter. For sweeteners, maple syrup or agave nectar can replace honey. Just check the labels of any toppings you choose to ensure they are also vegan-friendly. If you’re unsure where to start, many brands offer solid vegan chocolate chips, making it a breeze to keep the bars both delicious and cruelty-free.
How can I change the flavor profile?
The great thing about these no-bake cookie bars is their versatility. Want something a bit spicier? Add a dash of cinnamon or ginger. If you’re craving a tropical vibe, mix in some shredded coconut or chopped dried fruits like mango or pineapple. You can even play with nut butters; try cashew or hazelnut for a unique twist. Not to mention the toppings! Sprinkling some flaky sea salt or crushed nuts can elevate the whole experience. The flavor possibilities are almost endless!
What if I don't have quick oats?
No quick oats? No problem! You can use rolled oats instead; just blend them a bit in a food processor to create a finer texture. This will help mimic the consistency of quick oats and ensure your no-bake cookie bars hold together nicely. Oat flour is also a great option if you're in a pinch. Need more info on oats? Check out this guide on different types of oats to help you decide what to use!
By keeping these tips in mind, you're sure to whip up a batch of tasty, customizable no-bake cookie bars that suit your dietary needs and flavor preferences. Enjoy!
Conclusion on No-Bake Cookie Bars
In conclusion, no-bake cookie bars are a delightful and convenient treat that fits seamlessly into your busy lifestyle. Whether you're whipping them up for a casual gathering or indulging on a quiet evening at home, they promise both flavor and ease. With just a handful of ingredients and minimal prep time, you can create a delicious snack that rivals any baked good.
Remember, the beauty of no-bake cookie bars lies in their versatility. Feel free to experiment with mix-ins, like nuts, dried fruits, or even a splash of vanilla extract. If you’re looking for more inspiration, check out Food Network or Bon Appétit for variations that will keep you entertained in the kitchen. Happy snacking!
Print
No-Bake Cookie Bars: Easy, Indulgent Treats for Everyone
These No-Bake Cookie Bars are the perfect easy dessert that everyone will love. They're indulgent, simple to make, and require no baking!
- Total Time: 1 hour 15 minutes
- Yield: 16 bars
Ingredients
- 1 cup almond butter
- ½ cup honey
- 2 cups rolled oats
- ½ cup chocolate chips
- ¼ cup chopped nuts
- 1 teaspoon vanilla extract
Instructions
- In a mixing bowl, combine almond butter and honey until smooth.
- Stir in the rolled oats, chocolate chips, nuts, and vanilla extract until evenly mixed.
- Press the mixture into a lined baking dish.
- Refrigerate for at least 1 hour to set.
- Cut into bars and enjoy!
Notes
- Try adding different mix-ins like dried fruit or coconut for variety.
- Keep the bars stored in an airtight container in the fridge for freshness.
- Prep Time: 15 minutes
Nutrition
- Serving Size: 1 bar
- Calories: 200
- Sugar: 12g
- Sodium: 40mg
- Fat: 10g
- Saturated Fat: 2g
- Unsaturated Fat: 8g
- Trans Fat: 0g
- Carbohydrates: 24g
- Fiber: 3g
- Protein: 6g
- Cholesterol: 0mg