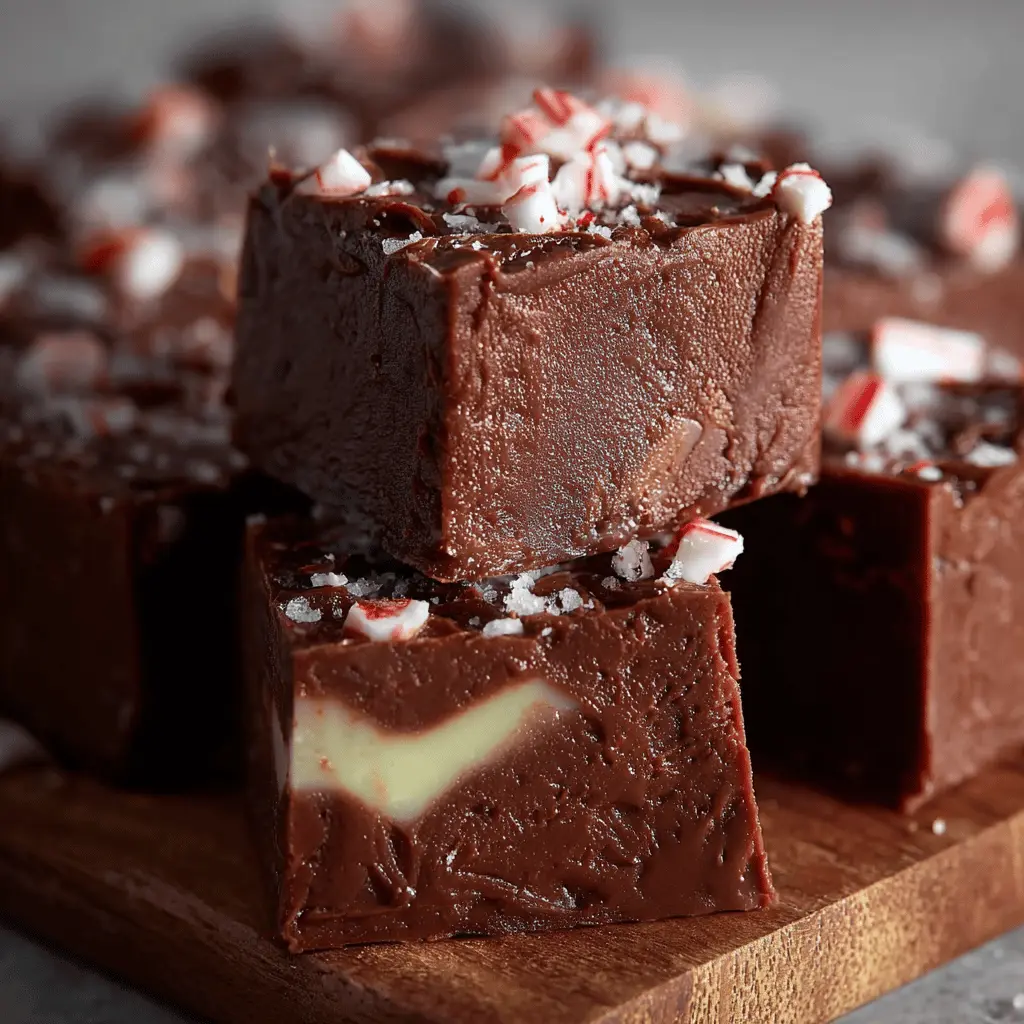
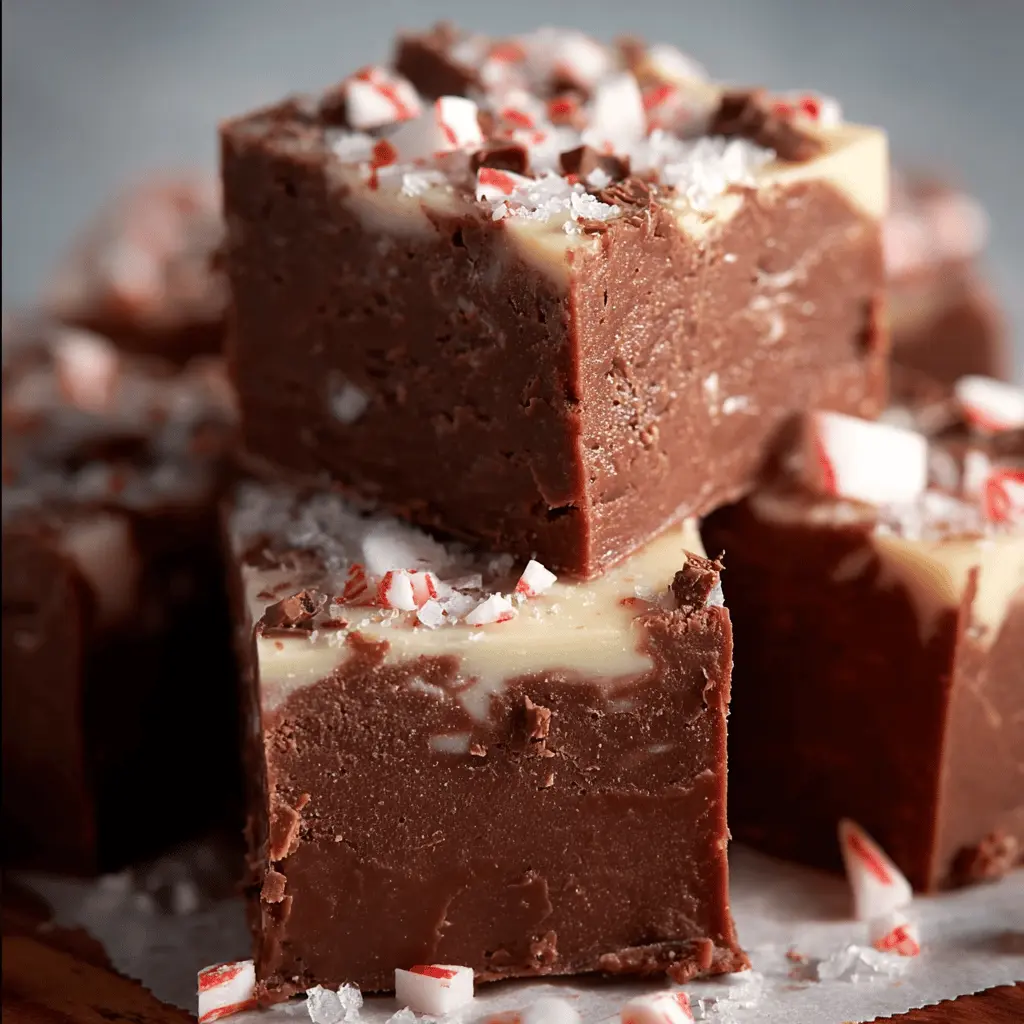
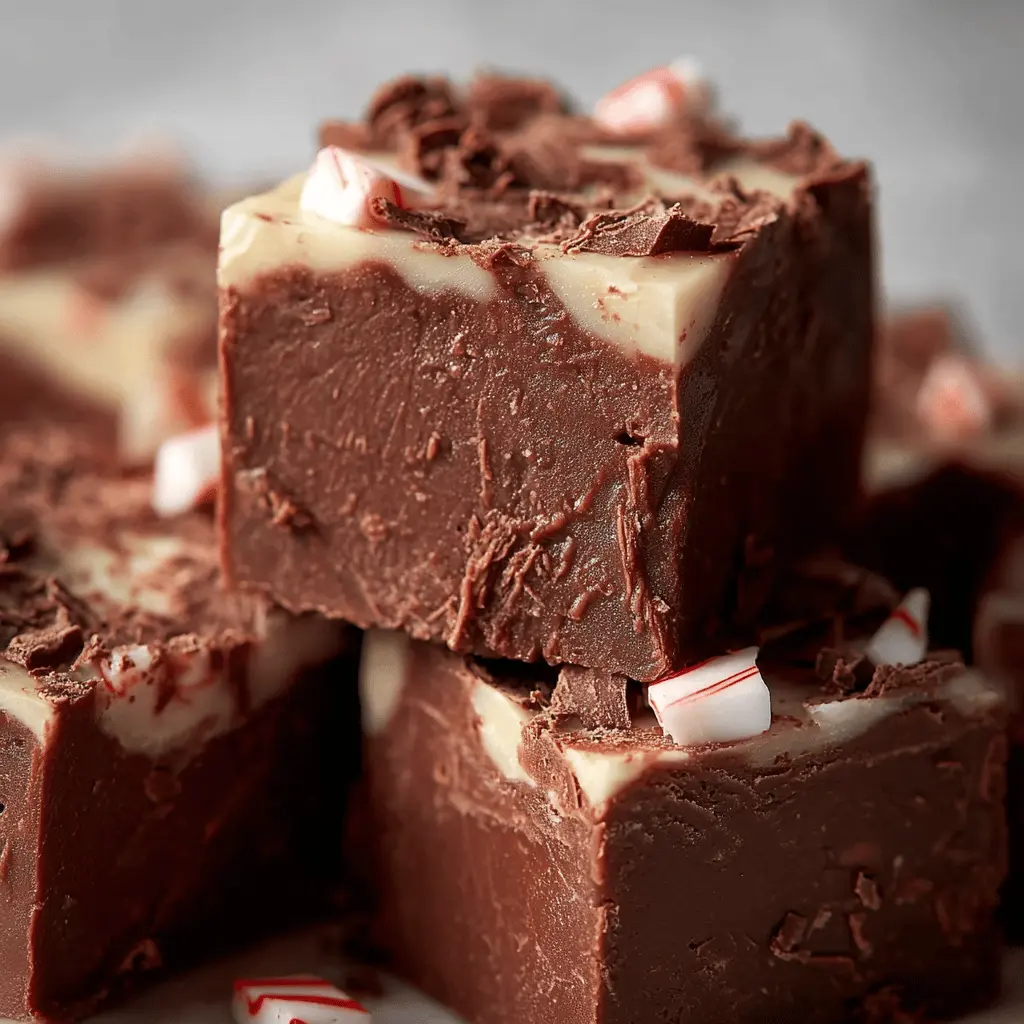
Introduction to No-Fail Chocolate Fudge
Why Homemade Fudge is a Game-Changer
If you're on the hunt for a delightful treat that elevates any occasion, look no further than no-fail chocolate fudge. This creamy, melt-in-your-mouth confection is more than just a dessert; it's a testament to the joys of homemade sweets. Making fudge at home is not only easy but also incredibly rewarding—trust me, once you try it, you'll wonder why you ever bought that pre-packaged stuff!
Homemade fudge is a total game-changer for several reasons. For one, you can customize it to fit your taste. Whether you crave the intense flavor of dark chocolate or prefer a hint of sweetness from milk chocolate, the possibilities are endless. You can even experiment with add-ins like nuts, marshmallows, or even swirls of peanut butter to personalize your creation.
Plus, making fudge at home means you can control the ingredients. Many store-bought options are laden with unnecessary additives and preservatives. By opting for a no-fail chocolate fudge recipe, you’ll be using minimal, high-quality ingredients that are easy to pronounce and better for you.
Another reason to consider jumping on the fudge-making bandwagon is the sheer joy it brings. Picture yourself in the kitchen, stirring silky chocolate, the rich aroma wafting through the air—doesn’t that sound delightful? It’s a fantastic way to bond with loved ones, involve kids in the kitchen, or impress friends with your culinary skills without needing years of experience.
And if you ever find yourself overwhelmed, fear not! The beauty of this no-fail chocolate fudge recipe lies in its simplicity. With just a few essential ingredients—chocolate, butter, and a bit of sugar—you can whip up a batch in no time. Got a craving for something sweet? You’ll have a delicious solution that’s just a stir away!
For more detailed insights into the art of candy making, check out resources like Serious Eats and Food Network to deepen your fudge-making knowledge. With the right guidance, you'll quickly become a fudge aficionado!
Essential Ingredients for Perfect Fudge
To create your no-fail chocolate fudge, you'll need a few essential ingredients. These staples are crucial for achieving the creamy, melt-in-your-mouth texture that fudge lovers crave:
- Sweetened Condensed Milk: This is your base. It adds sweetness and richness that are impossible to replicate.
- Chocolate Chips: Opt for semisweet or dark chocolate chips, depending on your taste preference.
- Butter: Unsalted butter works best as it enhances the chocolate flavor without any added saltiness.
These three ingredients come together to form the best starting point for your no-fail chocolate fudge. Trust me, you won’t look at fudge the same way again!
Optional Add-ins for Extra Flavor
Want to take your fudge up a notch? Here are some delightful optional add-ins:
- Nuts: Chopped walnuts or pecans add a lovely crunch.
- Sea Salt: A sprinkle of coarse sea salt brings a gourmet touch.
- Extracts: Vanilla or almond extract can intensify the flavor profile.
- Dried Fruit: Cranberries or cherries can provide a sweet and tart contrast.
Experimenting with these add-ins can lead to your own signature fudge recipe. The possibilities really are endless! For more tips, check out this guide on flavor pairings. Your taste buds will thank you!
Step-by-Step Preparation of No-Fail Chocolate Fudge
Making no-fail chocolate fudge at home is easier than you might think! With just a few straightforward steps, you’ll be indulging in this rich, creamy treat in no time. Let’s dive into the preparation process, ensuring that every bite is just as delightful as the last.
Preparing Your Pan for Perfect Fudge
To kick off your fudge-making adventure, you’ll need to get your baking pan prepped. It’s crucial to choose the right size to ensure everything sets perfectly.
-
Choose the Right Pan: A 9x9-inch square pan is ideal for thicker fudge, while an 8x8 inch will yield slightly thinner pieces.
-
Line It to Prevent Sticking: Use parchment paper to line the bottom and sides of your pan. This acts as a non-stick barrier, making it easy to lift out the fudge once it’s set.
-
Grease It Lightly: For an extra layer of assurance, lightly grease the parchment paper with cooking spray. This allows for effortless removal without damaging your fudge.
Taking the time to prepare your pan properly makes all the difference in achieving that perfect fudge texture.
Melting and Mixing the Ingredients
Once your pan is ready, it’s time to get cooking!
-
Gather Your Ingredients: You’ll need condensed milk, chocolate chips (semi-sweet or dark, depending on your preference), and a pinch of salt.
-
Melt Over Low Heat: In a medium saucepan, combine the condensed milk and chocolate chips. Stir constantly over low heat until thoroughly melted and smooth. This prevents any burning or clumping.
-
Add the Salt: Once melted, a pinch of salt enhances the sweetness, bringing out the rich chocolate flavor.
This melting and mixing step may seem straightforward, but it’s where you’ll lay the foundation for your delicious no-fail chocolate fudge.
Incorporating the Powdered Sugar
Now that your chocolate is perfectly melted and mixed, it’s time to take your fudge to the next level.
-
Gradually Add Powdered Sugar: In a separate bowl, sift your powdered sugar to eliminate any lumps. Gradually add it to your chocolate mixture, stirring continuously until fully combined.
-
Mix Until Smooth: The mixture will begin to thicken. Keep stirring! This is where your arm might get a little workout, but it’s totally worth it for that silky texture.
-
Avoid Overmixing: While we want a smooth, velvety fudge, be careful not to overmix, as it can become grainy.
Incorporating the powdered sugar correctly ensures that every bite of fudge is sweet and satisfying without being overly cloying.
Spreading the Fudge Mixture
With your fudge mixture complete, it's time for some fun!
-
Transfer to the Pan: Pour the mixture into your prepared pan carefully, making sure to not spill any — we want every last bit of that deliciousness!
-
Spread Evenly: Use a rubber spatula to gently spread the fudge evenly across the pan. Make sure it reaches the corners and creates a nice smooth surface on top.
-
Optional Toppings: If you want to elevate your fudge, consider adding crushed nuts, sprinkles, or even a drizzle of caramel on top before it sets.
Spreading the fudge evenly ensures a consistent texture throughout, meaning no one gets a chunk of fudge that’s too chewy or too firm.
Chilling to Perfection
The final step in this delightful journey is chilling your fudge.
-
Refrigerate: Cover the pan with plastic wrap or foil and pop it into the fridge. Allow it to chill for at least 2–3 hours, or until fully set.
-
Cut Into Squares: Once chilled, lift the fudge out of the pan using the parchment paper. Place it on a cutting board and cut it into squares of your desired size.
-
Store Properly: Keep your fudge in an airtight container in the fridge to maintain its luscious texture.
By following these steps, you can confidently make no-fail chocolate fudge that will impress friends and family alike. So why not treat yourself and give this recipe a whirl? Your taste buds will thank you! For more delicious recipes, check out this great guide on chocolate-based desserts. Happy fudge-making!
Variations on No-Fail Chocolate Fudge
When it comes to no-fail chocolate fudge, the possibilities are deliciously endless. Here are a few variations that can elevate your fudge game and impress your friends at any gathering.
Nutty Chocolate Fudge
If you love a bit of crunch in your fudge, adding nuts is a fantastic way to achieve that. Chop up your favorite nuts, such as walnuts, pecans, or almonds, and fold them in when the chocolate mixture is still warm. Not only does this add texture, but it also enhances the rich chocolate flavor. For an unexpected twist, why not try spiced nuts? A hint of cinnamon or cayenne pepper can bring warmth and depth to your fudge.
Flavor-Infused Chocolate Fudge
Why stop at just chocolate? Infusing your fudge with other flavors can take it to the next level. Consider adding extracts like mint, orange, or even espresso for a delightful surprise. A great tip is to steep your flavorings in the cream for several minutes before mixing with chocolate; this step amplifies the flavor. For more ideas on flavor combinations, check out sources like BBC Good Food.
Swirled Chocolate Fudge
Swirling in flavors can create visual appeal and taste variety in your no-fail chocolate fudge. You can create stunning layers by swirling in peanut butter, caramel, or even a raspberry puree just before the fudge sets. Use a knife to create beautiful patterns—it's as satisfying to make as it is to eat! The contrasting flavors will delight your taste buds and can make for a stunning presentation when served.
Experimenting with these variations can make your fudge uniquely yours every time. Have fun with it and don’t hesitate to mix and match ideas! Ready to get started? Enjoy the process and happy fudging!
Cooking Tips and Notes for No-Fail Chocolate Fudge
Common Mistakes and How to Avoid Them
Making no-fail chocolate fudge sounds easy, but there are a few pitfalls even seasoned cooks can fall into. One common mistake is not using the right pan. A heavy-bottomed saucepan helps ensure even heat distribution—so you're not left with burned edges and gooey centers. Also, don’t skip the stirring! Stirring the mixture continuously while it cooks promotes a smooth texture and prevents crystallization.
Essential Tools for Success
To make your no-fail chocolate fudge truly shine, having the right tools is essential. Here’s what you’ll need:
- A sturdy saucepan: Opt for heavy-duty materials like stainless steel to withstand heat.
- A candy thermometer: This is key to checking the right temperature, ensuring the fudge sets perfectly.
- Silicone spatula: Great for mixing and scraping down the sides without damaging your pan.
These tools not only make the process easier but also contribute to the overall quality of your fudge. For more information on kitchen tools, check out this helpful guide.
Remember, practice makes perfect, so don’t be afraid to experiment with flavors or toppings. Happy fudging!
Serving Suggestions for No-Fail Chocolate Fudge
Creative Ways to Serve Fudge
When it comes to presenting your no-fail chocolate fudge, creativity can turn a simple treat into a showstopper. Try cutting your fudge into fun shapes using cookie cutters—think stars or hearts. Layer the fudge with graham crackers and marshmallows for an easy s’mores-style dessert. You might also consider drizzling it with caramel or white chocolate for a beautiful contrast. Guest coming over? Setting out an elegant platter of fudge with some fresh berries can elevate the occasion, making it both delightful and visually appealing. For more inspiration, check platforms like Pinterest for creative serving ideas.
Pairing Suggestions for a Dessert Spread
Your no-fail chocolate fudge can shine on its own, but it also pairs wonderfully with other desserts. Consider serving it alongside:
- Fresh fruit: Strawberries and raspberries especially bring a refreshing contrast.
- Cheesecake bites for a rich, creamy addition.
- Turkey bacon or chicken ham wrapped in a sweet glaze for a savory touch.
- An herbal tea or a rich coffee to balance the sweetness.
By mixing flavors and textures, you’ll create a well-rounded dessert spread that delights every palate. Excited to host your next gathering? Your guests will surely adore your delicious creations.
Time Breakdown for No-Fail Chocolate Fudge
When you're diving into the world of making no-fail chocolate fudge, knowing how much time you’ll need can help you plan better. Here’s a quick breakdown for a stress-free fudge experience.
Preparation Time
In just about 20 minutes, you can gather all your ingredients and get your fudge mixture ready. This includes measuring out the chocolate, butter, and any extras like nuts or marshmallows. No rush, just take it easy and enjoy the process!
Chilling Time
After pouring your mixture into a pan, let it chill in the refrigerator for 2 hours. This step is crucial – it's where the magic happens, turning your gooey mixture into delectable fudge.
Total Time
All in all, you’re looking at roughly 2 hours and 20 minutes from start to tasty treat. If you're feeling adventurous, check out some flavor variations here for an extra twist on your no-fail chocolate fudge masterpiece!
Nutritional Facts for No-Fail Chocolate Fudge
When indulging in no-fail chocolate fudge, it's important to keep track of those delicious but sneaky nutritional factors. Here’s a quick breakdown:
Calories
Each piece of this scrumptious fudge packs about 120 calories. It's perfect for those moments when you want a sweet treat without going overboard.
Sugars
With approximately 18 grams of sugar per serving, this no-fail chocolate fudge isn’t shy on sweetness. If you're watching your sugar intake, consider enjoying a smaller portion or pairing it with some fresh fruit.
Fat
Expect around 8 grams of fat, primarily from the rich chocolate and butter. While the fat content may seem high, the quality of the ingredients makes it a delightful treat when enjoyed in moderation.
Remember, balance is key! Want to learn more about healthy eating habits? Check out resources like the Harvard T.H. Chan School of Public Health for more insights.
FAQs about No-Fail Chocolate Fudge
Can I use dark chocolate chips instead?
Absolutely! Substituting dark chocolate chips for milk chocolate will give your no-fail chocolate fudge a richer flavor profile. If you prefer a bittersweet taste, dark chocolate is the way to go. Just be mindful that different cocoa percentages can affect the sweetness, so adjust the sugar in the recipe accordingly. A good rule of thumb is to start with 60% cacao chocolate chips for balanced sweetness!
How do I store leftover fudge?
To keep your leftover no-fail chocolate fudge fresh, place it in an airtight container at room temperature for up to a week. If you want to extend its shelf life, consider wrapping each piece in wax paper or plastic wrap, then placing them in a container. This way, you won’t have to deal with a sticky mess when you are ready to enjoy it again.
Can I freeze chocolate fudge?
Yes, you can freeze your no-fail chocolate fudge! To do so, cut the fudge into individual pieces and wrap them tightly in plastic wrap. Then, place them in a freezer-safe container or bag. This method can preserve your fudge for up to three months. When you're ready to indulge again, just thaw it in the refrigerator overnight for the best texture.
If you're looking for more dessert ideas or tips on how to perfect your fudge, check out resources like the Food Network or Serious Eats. Happy fudging!
Conclusion on No-Fail Chocolate Fudge
Why You Should Try Making Fudge Today
Indulging in homemade no-fail chocolate fudge is a delightful experience that anyone can enjoy. Imagine the satisfaction of creating a rich, creamy treat without the fear of it going wrong. This recipe is perfect for novice cooks and experienced bakers alike, making it a fantastic option for gifting or celebrating special moments.
Here’s why you should whip up a batch today:
- Quick and Easy: It requires minimal ingredients and just a few simple steps.
- Customizable: You can add nuts, flavors, or even swirls of caramel for a personal touch.
- Perfect for Sharing: Fudge makes a thoughtful gift or a sweet surprise for friends and family.
Don’t miss out on this rich culinary experience. Dive into the world of no-fail chocolate fudge and discover a delicious passion today! For more delectable dessert ideas, check out resources from sites like Food Network or Serious Eats.
Print
No-Fail Chocolate Fudge: The Decadent Treat You’ll Love to Make
Indulge in this easy-to-make no-fail chocolate fudge that is sure to impress. With a rich chocolate flavor and a smooth, creamy texture, it's the perfect treat for any occasion.
- Total Time: 2 hours 20 minutes
- Yield: 16 servings
Ingredients
- 2 cups semisweet chocolate chips
- 1 can (14 ounces) sweetened condensed milk
- 1 teaspoon vanilla extract
- ¼ cup unsalted butter
- ½ cup chopped walnuts (optional)
Instructions
- In a medium saucepan over low heat, combine the chocolate chips, sweetened condensed milk, and butter. Stir until melted and smooth.
- Remove from heat and stir in the vanilla extract and walnuts, if using.
- Pour the mixture into a greased 8x8 inch pan and spread evenly.
- Refrigerate for at least 2 hours or until firm.
- Cut into squares and enjoy!
Notes
- For best results, use high-quality chocolate chips.
- Feel free to add other mix-ins like dried fruit or marshmallows.
- Prep Time: 10 minutes
- Cook Time: 10 minutes
- Category: Dessert
- Method: Stovetop
- Cuisine: American
- Diet: Vegetarian
Nutrition
- Serving Size: 1 square
- Calories: 150
- Sugar: 18 grams
- Sodium: 30 milligrams
- Fat: 8 grams
- Saturated Fat: 5 grams
- Unsaturated Fat: 2 grams
- Trans Fat: 0 grams
- Carbohydrates: 20 grams
- Fiber: 1 gram
- Protein: 2 grams
- Cholesterol: 10 milligrams