Introduction to Manicotti Recipe
If you're looking to impress your friends or family with a delightful Italian dish, homemade manicotti is a must-try! Unlike the store-bought varieties that can be bland and uninspiring, crafting your own manicotti is truly a game changer. Not only does it allow you to control the flavors and ingredients, but the fresh taste and texture will leave your guests raving about your cooking skills.
Why Homemade Manicotti is a Game Changer
First off, the satisfaction of creating something from scratch is unbeatable. Picture this: you roll up your sleeves, fill each delicate pasta tube with a creamy ricotta filling, and watch as they transform into a magnificent meal. Homemade manicotti gives you endless possibilities. You can stuff them with flavorful combinations like spinach and feta cheese or even Turkey Bacon and Chicken Ham.
Here are some fantastic reasons to embrace making your own:
- Quality Ingredients: When you make it yourself, you can opt for fresh, organic ingredients. When you choose whole milk ricotta or add some herbs, you’re elevating your dish right from the start.
- Customization Options: You’re the chef here! Got a vegetarian in the group? Make a veggie mix with zucchini and mushrooms. Want to go hearty? Add ground beef and a zesty tomato sauce. The options are limitless.
- Healthier Choices: By making your own manicotti, you can reduce sodium and make healthier choices regarding fats and carbohydrates. It’s a win-win for flavor and wellness.
Plus, with this manicotti recipe, you can often save money compared to artisan pasta shops. And who doesn’t love saving some bucks while impressing the dinner guests?
So, if you're ready to dive into the world of homemade manicotti, keep reading for a step-by-step guide that will not only sharpen your culinary skills but also create cherished memories for you and your loved ones. Want to learn more about the history of manicotti? Check out this article from The Spruce Eats for insights that will enrich your cooking experience.
Ingredients for Manicotti
Essential ingredients for the perfect manicotti
Creating a delicious manicotti recipe starts with gathering the right ingredients. Here’s what you’ll need to whip up a satisfying and comforting dish that impresses family and friends alike.
- Manicotti shells: The star of the show! Look for sturdy shells that can hold up under generous fillings.
- Ricotta cheese: Creamy and rich, this cheese brings texture and flavor to the filling.
- Mozzarella cheese: Shredded mozzarella adds a gooey, melty experience that’s hard to resist.
- Parmesan cheese: For that salty, nutty finish, grated Parmesan is essential.
- Turkey bacon: For a delightful crunch and smoky flavor, incorporate chopped turkey bacon.
- Chicken ham: Diced chicken ham provides a savory note that complements the other ingredients beautifully.
- Fresh herbs: Don’t skip on the fresh basil or parsley—they elevate the filling with brightness.
- Tomato sauce: A good quality marinara will tie it all together, making each bite irresistible.
With these ingredients at your fingertips, you're all set to dive into your manicotti journey! Don't forget to check out resources like Serious Eats for additional tips and tricks on preparation and cooking! Happy cooking!
Preparing Manicotti
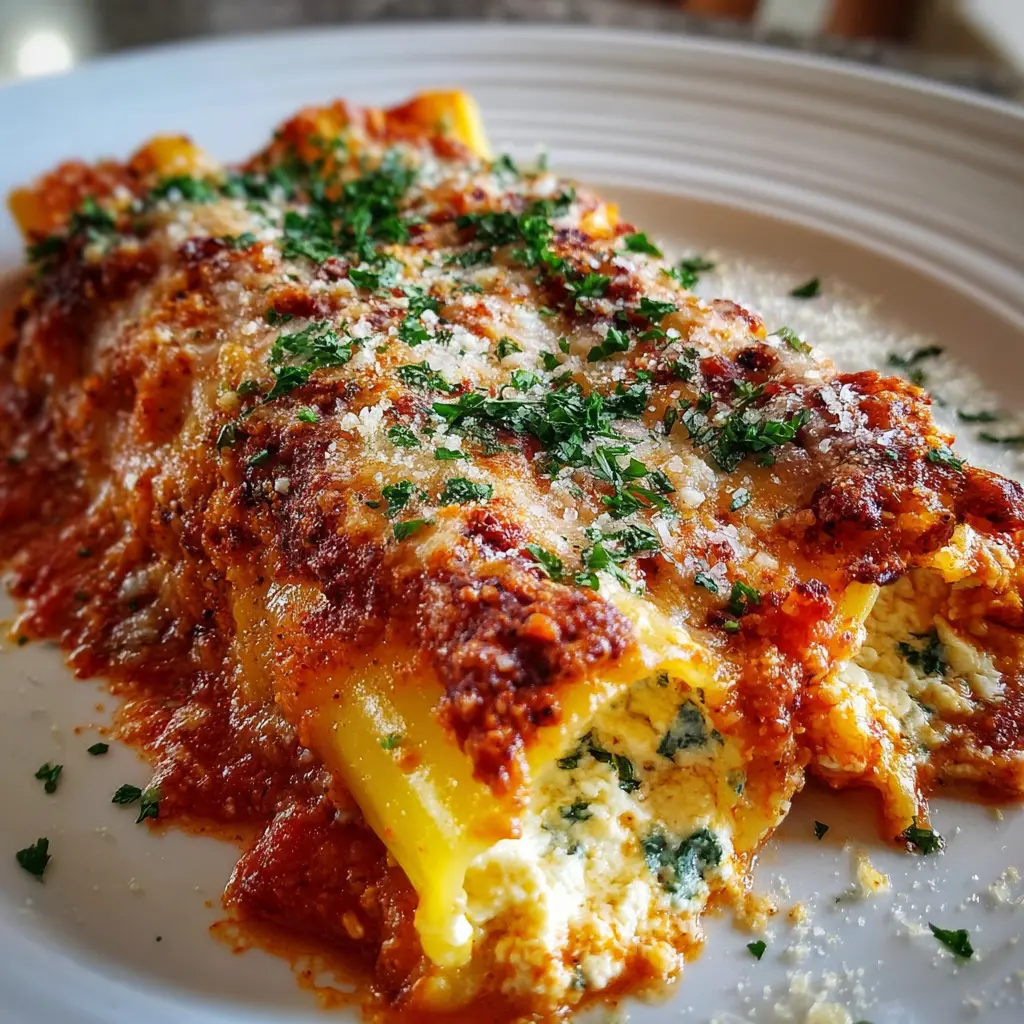
If you’re ready to dive into the world of Italian comfort food, you’ve landed in the right spot! Manicotti is a delightful dish that combines tender pasta tubes with creamy cheese filling, topped with rich sauce and baked to perfection. Let’s go through the manicotti recipe step-by-step to help you create a meal that will impress your friends and family.
Gather Your Ingredients
First things first: gather all your ingredients. A smooth cooking experience starts with preparation. For a basic manicotti filling, you’ll need:
- 12 manicotti tubes: These are usually found in the pasta aisle.
- 2 cups ricotta cheese: Go for whole milk ricotta for creamier results.
- 1 cup mozzarella cheese, shredded: This adds that gooey texture we all love.
- ½ cup grated Parmesan cheese: For that extra depth of flavor.
- 1 large egg: This helps bind your filling together.
- 2 cups marinara sauce: Store-bought or homemade—just make sure it's flavorful!
- Salt and pepper: To taste.
- Chopped fresh basil or parsley: For garnish and added freshness.
With your ingredients on hand, you’re ready to start your cooking adventure. If you're curious about making your marinara sauce from scratch, check out this fantastic homemade marinara sauce recipe which complements manicotti beautifully.
Cook the Manicotti Pasta
Next, let’s cook the manicotti pasta to the right tenderness. Bring a large pot of salted water to a rolling boil. Add the manicotti tubes and cook according to the package directions, usually about 8-10 minutes or until al dente.
Tip: Don’t overcook them! They’ll continue to soften in the oven. Once they’re done, drain them and allow them to cool on a baking sheet lined with parchment paper. This prevents them from sticking together and keeps them from tearing when you’re ready to stuff them.
Prepare the Rich Cheese Filling
While the pasta is cooling, it’s time to whip up a delicious filling. In a mixing bowl, combine the ricotta cheese, shredded mozzarella, and grated Parmesan. Add the egg and season with salt and pepper.
Mix everything thoroughly until it’s nice and creamy. If you’re feeling adventurous, consider incorporating spinach, sautéed mushrooms, or even pieces of turkey bacon for an extra twist. You could also check out a nutritious alternative like adding kale or zucchini to boost the dish's flavor and health!
Stuff the Manicotti Tubes
Now comes the fun part—stuffing the manicotti! Use a piping bag or a spoon to fill each manicotti tube carefully. Don’t worry if some spills out; it happens! Place the filled tubes upright in a baking dish coated with a bit of marinara sauce to keep them from sticking.
Assemble and Bake the Manicotti
Preheat your oven to 375°F (190°C). Once your manicotti are stuffed and arranged in the dish, cover them with the remaining marinara sauce and sprinkle more mozzarella on top, making your dish a cheesy masterpiece.
Cover the dish with aluminum foil to trap moisture. Bake for 25 minutes, then remove the foil and bake for an additional 10-15 minutes until the cheese is melty and golden brown.
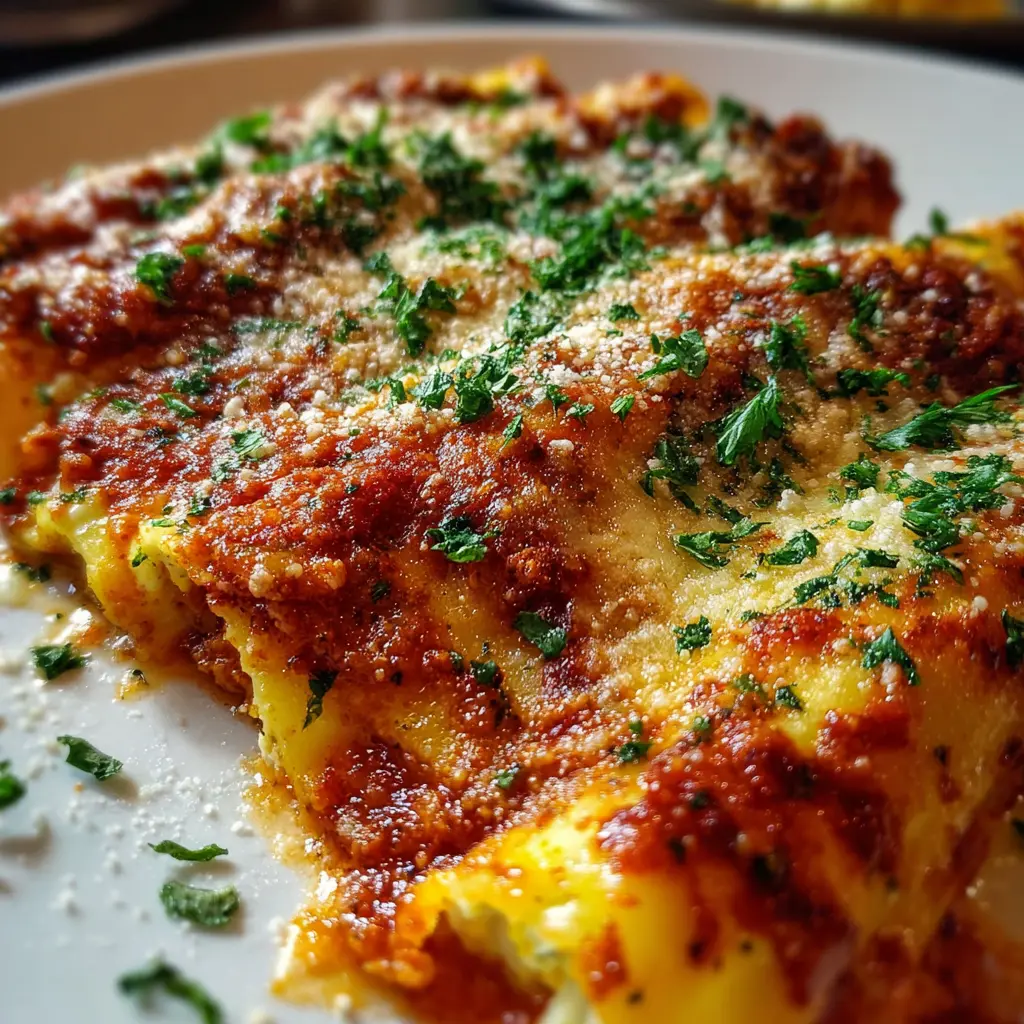
And voilà! You’ve created a manicotti dish that’s sure to be a crowd-pleaser. Let it cool for a few minutes before serving, and don’t forget to garnish with fresh herbs for that extra touch.
Now it’s your turn! Share your manicotti experience—we’d love to hear how it turned out.

Variations on Manicotti
Exploring manicotti can be a delightful culinary journey! This dish is versatile and can adapt to various tastes and dietary needs. Let’s dive into two popular variations that might inspire your next manicotti recipe.
Manicotti with Spinach and Ricotta
For a lighter twist, consider filling your manicotti with a spinach and ricotta mixture. Sauté fresh spinach until wilted, mix it with creamy ricotta cheese, and season with nutmeg, salt, and pepper. Not only does this combination deliver a rich, savory flavor, but it also adds nutritional value. Did you know that spinach is packed with vitamins K and A? This option is perfect for those looking for a meatless meal that still satisfies. When baked with marinara sauce and a sprinkle of mozzarella, you have a dish that’s both comforting and nourishing.
Meat-Filled Manicotti Options
If you’re more in the mood for something heartier, why not try meat-filled manicotti? Ground beef or turkey bacon can create a delicious filling. Mix it with your favorite tomato sauce, onions, and Italian herbs for a flavorful punch. Some people love to incorporate chicken ham into their mixture, balancing the taste beautifully. The contrasting textures of the creamy cheese and the meat will have you coming back for seconds, maybe even thirds! For tips on perfectly cooking your beef, check out resources like the USDA’s meat preparation safety.
Each variation of manicotti offers a chance to bring something unique to your dinner table, so feel free to experiment with flavors and ingredients. What’s your favorite twist on this classic dish?
Cooking Tips for Manicotti
Preventing Sticky Pasta
When it comes to making your manicotti recipe shine, ensuring your pasta doesn’t stick is crucial. Here are a few easy tips to prevent sticky situations:
- Use Plenty of Water: Boil your pasta in a large pot filled with salted water. This helps keep the noodles separate.
- Cook Al Dente: Since manicotti is baked after boiling, cook your pasta just until it’s al dente. Overcooking it now will lead to mushy pasta later.
- Rinse with Cold Water: After draining, give your manicotti noodles a quick rinse under cold water to halt the cooking process and stop them from sticking together.
Getting the Best Flavor from Your Sauce
A delicious sauce is the heart of any good manicotti recipe. To maximize flavor, consider these tips:
- Use Fresh Ingredients: Fresh herbs, garlic, and high-quality tomatoes will elevate your sauce’s taste. If you're unsure about which tomatoes to choose, consult resources like Serious Eats.
- Simmer for Depth: Letting your sauce simmer for at least 30 minutes allows the flavors to meld together beautifully.
- Balance Your Flavors: Adding a pinch of sugar can help cut acidity in your tomato sauce, creating a well-rounded flavor profile that your guests will love.
By following these tips, your manicotti will not only look stunning but taste incredible too! Happy cooking!
Serving Suggestions for Manicotti
Pairing with a Fresh Salad
To complement your delicious manicotti recipe, consider serving it with a crisp, fresh salad. A simple mix of arugula, cherry tomatoes, and cucumber drizzled with a light vinaigrette adds vibrant flavors and balances the richness of the pasta. For a heartier option, think about including elements like roasted vegetables or chickpeas. This not only diversifies textures but also boosts nutritional value.
You might find inspiration for your salad in this guide to fresh salad ingredients.
Creative Garnishes for Presentation
Presentation matters, especially when you're cooking for friends or that special someone. To elevate your manicotti, think about garnishing with:
- Fresh basil or parsley for a pop of color
- Shaved Parmesan or a drizzle of olive oil for extra richness
- Crushed red pepper flakes for those who enjoy a touch of heat
These simple touches can make your humble manicotti recipe look gourmet! Not only do they enhance visual appeal, but they also add layers of flavor that will impress your guests. Remember, we eat with our eyes first!
Time Breakdown for Manicotti
Preparation time
Getting started with your manicotti recipe is simple and enjoyable! You’ll need about 20 minutes for preparation. This includes gathering your ingredients, preparing your filling, and stuffing those pasta tubes. While it may seem daunting, take your time to ensure everything is just right—after all, cooking is all about joy and creativity!
Cooking time
Once everything is prepped, plan on about 30 minutes for cooking. This involves baking your manicotti in the oven until it's beautifully bubbly and golden. The aroma will fill your kitchen, making it hard to resist the temptation to sneak a bite!
Total time
In total, you're looking at roughly 50 minutes from start to finish. Perfect for a weekday dinner or a weekend gathering. You can even check out more tips on efficient meal planning from resources like The Kitchn to streamline your cooking experience. So, ready to dive into this comforting classic?
Nutritional Facts for Manicotti
Calories per serving
Indulging in a hearty manicotti recipe can be both satisfying and nutritious! Typically, a single serving of manicotti contains around 300 to 400 calories, depending on the ingredients you choose. This makes it a filling option without completely derailing your health goals.
Key nutrients and vitamins
What makes manicotti a delightful choice for your dinner table? Here are some essential nutrients it offers:
- Protein: With cheese and options like Turkey Bacon or Chicken Ham, manicotti packs a protein punch to keep you full longer.
- Calcium: Cheese not only adds flavor but also delivers a good dose of calcium for strong bones.
- Fiber: Consider whole wheat pasta for a fiber boost, which supports digestive health.
- Vitamins A and C: Adding veggies, like spinach or mushrooms, can increase the vitamin content, contributing to your daily vegetable intake.
For further nutrition insights, the USDA’s FoodData Central is a great resource for detailed food composition. This way, you can enjoy your homemade manicotti while staying mindful of your nutritional intake!
FAQs about Manicotti
How can I make manicotti ahead of time?
Making your manicotti recipe ahead of time is a great way to save time during busy weekdays or special occasions. Here’s how you can do it:
- Prepare the filling: You can mix the filling ingredients and store them in the refrigerator for up to two days before assembly.
- Assemble, but don’t bake: Fill the manicotti shells with the prepared filling, then place them in a baking dish. Instead of baking right away, cover with foil and refrigerate for up to 24 hours.
- Baking time adjustments: If you're baking straight from the fridge, add a few extra minutes to the cooking time to ensure they’re heated through.
Can I freeze leftover manicotti?
Absolutely! Freezing leftover manicotti is a fantastic way to prevent waste. Here’s how to do it effectively:
- Cool completely: Allow the manicotti to cool down to room temperature before freezing.
- Wrap well: Use an airtight container or heavy-duty freezer bags to prevent freezer burn.
- Storage duration: You can freeze manicotti for up to three months. When you’re ready to enjoy, thaw in the fridge overnight and reheat in the oven.
What can I substitute in the filling?
If you’re looking to mix it up or accommodate dietary preferences, there are plenty of delicious substitutions for your manicotti filling:
- Cheese options: Instead of ricotta, try cottage cheese for a lighter option, or use vegan cheese if you're going dairy-free.
- Protein alternatives: You could swap in Turkey Bacon or Chicken Ham for a leaner meat option, or go full vegetarian with sautéed mushrooms and spinach.
- Herbs and spices: Don’t hesitate to add fresh herbs like basil or parsley to elevate the taste.
Experimenting with different ingredients not only personalizes your dish but can also lead to delightful new discoveries! For more tips on recipe variations, consider visiting Food Network or Serious Eats for culinary inspiration.
Conclusion on Manicotti Recipe
In wrapping up this delightful manicotti recipe, it's clear that this dish is more than just comfort food; it’s a canvas for your culinary creativity. The combination of tender pasta, creamy cheese, and your choice of fillings—like Turkey Bacon or Chicken Ham—creates a flavor profile that’s sure to please everyone at the table.
Whether you opt for a hearty meat sauce or a zesty marinara, every bite offers warmth and satisfaction. Have you tried pairing your manicotti with a crisp salad or a flavorful garlic bread? Don’t hesitate to experiment! This dish is perfect for gatherings or a cozy weeknight dinner. Reflecting on it, what's your favorite way to elevate your manicotti?
For more culinary inspiration, check out Food Network for tips and tricks that can help take your cooking to the next level!
Print
Cheesecake Fruit Salad with Caramel Drizzle: A Sweet Delight!
A delightful combination of creamy cheesecake flavors and fresh fruits topped with a luscious caramel drizzle.
- Total Time: 30 minutes
- Yield: 4 servings
Ingredients
- 1 cup cream cheese
- ½ cup powdered sugar
- 1 teaspoon vanilla extract
- 2 cups mixed fruits (strawberries, blueberries, pineapple)
- ¼ cup caramel sauce
Instructions
- In a mixing bowl, combine cream cheese, powdered sugar, and vanilla extract until smooth.
- Gently fold in the mixed fruits until well coated.
- Drizzle caramel sauce on top before serving.
- Chill for at least 30 minutes before serving to allow flavors to meld.
Notes
- This salad can be customized with your favorite fruits.
- If you prefer a lighter version, consider using Greek yogurt instead of cream cheese.
- Prep Time: 15 minutes
Nutrition
- Serving Size: 1 cup
- Calories: 210
- Sugar: 22g
- Sodium: 130mg
- Fat: 8g
- Saturated Fat: 5g
- Unsaturated Fat: 2g
- Trans Fat: 0g
- Carbohydrates: 30g
- Fiber: 2g
- Protein: 3g
- Cholesterol: 30mg