Introduction to Red Velvet Brownies
Red velvet desserts have taken the culinary world by storm, captivating hearts and taste buds alike. But what’s the story behind these eye-catching treats? Originating in the 1920s, red velvet cakes gained popularity thanks to their striking color and rich flavors. The term “red velvet” refers to a soft, luxurious texture, which is accomplished through a unique mix of ingredients, including cocoa powder, buttermilk, and, of course, that iconic red hue often achieved with food coloring. Over time, bakers and dessert enthusiasts have embraced red velvet in various forms, from classic cakes to brownies, bringing a delightful twist that keeps fans coming back for more.
When we talk about red velvet brownies, we’re diving into a fusion of flavors and textures that’s simply irresistible. Imagine biting into a fudgy brownie with a velvety texture, topped with a creamy frosting that perfectly balances the flavor profile. This delightful dessert offers the best of both worlds: the richness of a brownie combined with the elegant essence of red velvet. For a rich flavor profile, consider using high-quality cocoa powder and pure vanilla extract, which can elevate your brownies to gourmet levels.
These brownies not only look stunning but also serve as a conversation starter at gatherings. Whether you're hosting friends for game night, preparing a treat for a potluck, or simply wanting to indulge yourself, red velvet brownies are sure to impress. The vibrant color isn’t just for show—research shows that colors can impact mood and appetite, making these brownies not just a treat but also a delightful experience.
Want to dive deeper into baking? Check out resources from trusted culinary sites such as America’s Test Kitchen or Serious Eats for expert tips and recipes. With a bit of practice, you’ll find that making the perfect red velvet brownies is not just rewarding but also a lot of fun. So, roll up your sleeves and get ready to create a dessert that’s as delightful to make as it is to enjoy. Let’s get baking!

Ingredients for Red Velvet Brownies
Key ingredients for the ultimate red velvet experience
To dive into the world of red velvet brownies, you'll want to gather these key ingredients for a truly delightful treat:
- All-purpose flour: Provides the base for that rich, moist texture.
- Cocoa powder: Adds depth and that classic chocolate flavor.
- Sugar: Sweetens your brownies; opt for granulated sugar for the best results.
- Butter: Richness is key—melted butter works perfectly here.
- Eggs: Enhances the fudgy consistency and binds everything together.
- Red food coloring: The star of the show! Use gel food coloring for vibrant results.
- Vanilla extract: A splash elevates the flavor beautifully.
- Salt: Balances the sweetness and enhances all those glorious flavors.
Optional ingredients for added flavor
Want to kick your red velvet brownies up a notch? Consider adding:
- Chocolate chips or chunks: For an extra chocolatey bite.
- Cream cheese: Swirl in a cream cheese mixture for a tangy twist that complements the sweetness.
- Walnuts or pecans: Introduce some crunch and nuttiness.
These optional additions not only enhance the flavor but also provide delightful textures. Explore more on ingredient variations from sources like Food Network to inspire your kitchen creativity!
Preparing Red Velvet Brownies
Red velvet brownies are an indulgent twist on the classic brownie, blending the rich, chocolatey flavor with the distinct tartness of buttermilk and a touch of red food coloring. Preparing these delicious treats is straightforward, and with my step-by-step guide, you'll be well on your way to impressing your friends and family in no time!
Gather and Prepare Your Ingredients
The first step in your baking adventure is to collect all the ingredients you'll need. Here’s a handy list:
-
Dry Ingredients:
-
1 cup all-purpose flour
-
⅓ cup unsweetened cocoa powder
-
1 teaspoon baking powder
-
½ teaspoon salt
-
Wet Ingredients:
-
½ cup unsalted butter, melted
-
1 cup granulated sugar
-
2 large eggs
-
1 teaspoon vanilla extract
-
1 tablespoon red food coloring
-
½ cup buttermilk (if you don’t have buttermilk, you can make a quick substitute by mixing one cup of milk with one tablespoon of vinegar or lemon juice)
-
Toppings (optional):
-
Cream cheese frosting (for drizzling)
-
White chocolate chips or chopped pecans for added texture
Make sure to have your baking pan ready as well! A 9x9 inch square pan is ideal for these red velvet brownies.
Create the Perfect Brownie Batter
Once you've gathered your ingredients, it's time to make the batter, which is truly the heart of any brownie!
-
Mix Dry Ingredients: In a medium bowl, whisk together the flour, cocoa powder, baking powder, and salt until everything is well combined. This step is crucial to avoid any clumps of cocoa that could impact the texture.
-
Combine Wet Ingredients: In another bowl, whisk together the melted butter and sugar until smooth. Add in the eggs one at a time, followed by the vanilla extract and buttermilk. This mixture should feel velvety and rich.
-
Blend Together: Gradually add the dry ingredients to the wet mixture, stirring gently until just combined. Don't overmix—this can lead to tougher brownies. If desired, you can fold in any toppings like chocolate chips for an extra surprise.
Infuse the Red Velvet Twist
Here’s where the magic begins! It’s time to add that signature red coloring that makes these brownies so special.
-
Incorporate the red food coloring into the wet mixture. This step not only gives your brownies that beautiful hue but also enhances the taste with the slight tang of buttermilk. The color will be more vibrant if you’ve mixed it well, so take your time here.
-
If you're feeling adventurous, consider adding a dash of vinegar. It reacts with the baking powder and will intensify the red color even more!
Bake to Perfection
Now that your delicious batter is ready, pour it into your prepared baking pan, smoothing it out with a spatula.
- Preheat your oven to 350°F (about 175°C). Bake your brownies for 20-25 minutes, or until a toothpick inserted into the center comes out with a few moist crumbs (not wet batter). Trust me, checking them about 5 minutes before the timer goes off is a smart move!
Cool and Slice Your Brownies
As tempting as it may be to dig in right away, allowing your brownies to cool is essential for achieving the ideal fudgy texture.
-
Once baked, remove them from the oven and let them cool in the pan for about 10 minutes.
-
After cooling slightly, transfer them to a wire rack if you can. This step helps maintain their chewy texture.
-
When completely cool, slice your red velvet brownies into squares. For an extra touch, drizzle with cream cheese frosting to enhance that classic red velvet dessert flavor!
These brownies are perfect for any occasion, whether you're celebrating a birthday or just want a delicious treat after a long day. Enjoy your baking adventure, and don't forget to share!
For more tips on creating the perfect homemade cake or brownie recipes, check out Baker's Journal for insights and inspiration. Happy baking!

Variations on Red Velvet Brownies
When it comes to red velvet brownies, the classic recipe is just the beginning! If you're looking to expand your dessert repertoire, consider these delightful variations that add a unique twist to the traditional treat.
Cream Cheese Frosted Red Velvet Brownies
Imagine sinking your teeth into a warm, fudgy brownie topped with a luscious cream cheese frosting. This variation elevates the standard red velvet brownies to a whole new level. To make this treat, simply prepare your brownies as usual, and while they're cooling, whip up a simple frosting using cream cheese, powdered sugar, and a splash of vanilla extract. Once your brownies have cooled completely, spread a generous layer on top for that iconic red velvet contrast. Not only does the cream cheese add a rich flavor, but it also creates a beautiful visual appeal.
For an extra touch, sprinkle some crushed walnuts or pecans on top before serving, or incorporate some white chocolate chips into your brownie batter for subtle bursts of sweetness. If you're keen for more ideas, check out the American Heart Association for inspiration on ingredient substitutions that keep indulgence in check.
Red Velvet Brownie Cookies
Looking for a fun way to enjoy red velvet brownies? Enter the red velvet brownie cookie! These cookies combine the best traits of brownies and cookies, resulting in a chewy, decadent treat. Start with your classic brownie recipe but adjust the baking time. Scoop the brownie batter onto a baking sheet and bake just until the edges set.
Add in some chocolate chips for that melty texture and consider drizzling them with cream cheese icing after they cool. These cookies are perfect for sharing at gatherings or simply indulging in at home. Plus, they offer a bite-sized way to enjoy your favorite red velvet brownies, making it easy to have just one more!
With these variations, you can keep your desserts fresh and exciting. So, which one will you try first?
Baking notes for Red Velvet Brownies
Baking the perfect red velvet brownies can feel like a delightful challenge. Here are some friendly notes to help you shine in the kitchen!
Common mistakes to avoid
- Ignoring measurements: Precision is key! A simple miscalculation can turn your brownies into a disaster.
- Overmixing the batter: This can lead to dense brownies. Stir just until the ingredients are combined for that heavenly fudgy texture.
Tips for achieving the perfect texture
- Use room temperature ingredients: Eggs and butter should be at room temperature. This helps create a smooth batter.
- Check your oven temperature: An oven thermometer can ensure that your brownies bake evenly. Trust me, a few degrees can make a difference!
- Let them cool: Resist the temptation to slice them too early. Cooling completely helps the flavors meld beautifully.
For more tips on baking and texture, consider checking out King Arthur Baking or The Spruce Eats for expert insights. Happy baking!

Serving Suggestions for Red Velvet Brownies
Pairing Ideas for Enhanced Enjoyment
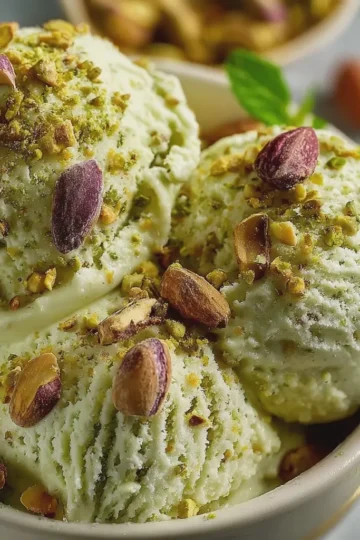
If you're eager to take your red velvet brownies to the next level, consider pairing them with a scoop of vanilla or cream cheese ice cream. The creamy texture of the ice cream beautifully contrasts the rich, fudgy brownies. Want something a bit more decadent? Drizzle some warm caramel sauce or a dollop of whipped cream on top for a luxurious touch. For a refreshing contrast, try serving these brownies alongside fresh berries—strawberries or raspberries work wonders!
Creative Presentation Tips
How you present your red velvet brownies can elevate the entire dessert experience. Slice the brownies into fun shapes, maybe even heart-shaped, if you're feeling romantic. Dust them lightly with powdered sugar for an elegant finish. Another eye-catching idea is to serve them on a rustic wooden board with an array of toppings, like chopped nuts, chocolate sauce, or even sprinkles. This not only looks inviting but also encourages guests to customize their dessert!
For more creative dessert ideas, check out resources like Food52 for enticing recipes and presentation tips!
Time details for Red Velvet Brownies
Preparation time
Getting ready to whip up your red velvet brownies won’t take long at all! You’ll need about 15 minutes to gather your ingredients and get everything measured out. Plus, that’s just enough time to preheat the oven and get your mixing bowls ready.
Baking time
Once your batter is beautifully mixed and poured into your baking dish, pop it in the oven for 25 to 30 minutes. This is when your kitchen will start smelling heavenly! A quick check with a toothpick will help you know if they’re perfectly baked.
Total time
In total, you’re looking at about 45 minutes from start to finish. Just enough time to make a cup of coffee or herbal tea while you wait. Trust me, these red velvet brownies will be well worth every second!
For some additional tips to elevate your brownie game, check out resources from Serious Eats and Bon Appétit.
Nutritional Information for Red Velvet Brownies
Calories
If you’re wondering how many calories are tucked away in these lovely red velvet brownies, a standard serving typically contains around 200 calories. It’s always good to balance indulgence with mindful eating, right? For those special occasions, these brownies can definitely fit into a well-rounded diet.
Protein
Each delicious portion of red velvet brownies offers about 2-3 grams of protein. While they might not be a primary source of protein, pairing them with a protein-rich snack like Greek yogurt or a handful of nuts can make for a fun and satisfying treat.
Sugar Content
As for the sweetness, expect around 15-20 grams of sugar per brownie. We all love a good dessert, but it’s essential to enjoy it responsibly. If you're interested in lowering the sugar content, consider substituting with alternatives like mashed bananas or unsweetened applesauce. For a deeper dive into sugar and its effects, check out the American Heart Association’s guide on sugar intake.
Remember, it's all about balance! Enjoy your treats while being mindful of your overall nutritional goals.
FAQs about Red Velvet Brownies
Can I use different types of cocoa powder?
Absolutely! When making red velvet brownies, you can use natural cocoa powder or Dutch-processed cocoa. However, it’s essential to know that the type of cocoa you choose can affect the flavor. Natural cocoa powder tends to provide a more intense chocolate flavor, while Dutch-processed cocoa yields a milder taste and deeper color. If you want to maintain that classic red velvet flavor, choose high-quality cocoa.
What’s the best way to store leftover brownies?
Storing your red velvet brownies properly can keep them fresh and delicious. Here are some tips:
-
Room Temperature: If you plan to enjoy them within a few days, you can store your brownies in an airtight container at room temperature. Just beware of humidity!
-
Refrigerator: For longer storage, pop them in the fridge. They should stay good for about a week. Just remember to bring them to room temperature before indulging for the best taste!
-
Freezing: Need to stash some for later? Wrap individual brownies in plastic wrap, then place them in a freezer-safe container. They can last up to three months in the freezer! When ready, simply thaw them at room temperature.
Can I make these brownies gluten-free?
Indeed, you can! To create gluten-free red velvet brownies, simply substitute all-purpose flour with a gluten-free blend. Look for one that contains xanthan gum to mimic the structure of regular flour. Many people are surprised to discover how delicious and satisfying gluten-free brownies can be!
For expert tips on gluten-free baking, check out resources like King Arthur Baking. Happy baking!
Conclusion on Red Velvet Brownies
As you wrap up your culinary journey into the world of red velvet brownies, I encourage you to roll up your sleeves and try making these delicious treats at home. Mixing the vibrant colors with mouthwatering flavors adds a unique twist to your dessert game. Imagine presenting these rich, fudgy brownies at your next gathering—how impressive would that be?
Whether it's a special occasion or just a mid-week pick-me-up, these brownies are sure to delight. For inspiration and tips, you might check out resources like Food Network or BBC Good Food. Dive into this baking adventure; you won’t regret it!
Print
Red Velvet Brownies: Indulgent Treats for Any Occasion
Indulge in the rich, luxurious flavor of red velvet brownies that are perfect for any occasion.
- Total Time: 40 minutes
- Yield: 12 servings
Ingredients
- 1 cup all-purpose flour
- ½ cup cocoa powder
- 1 cup granulated sugar
- ½ cup unsalted butter, melted
- 2 large eggs
- 1 tablespoon red food coloring
- 1 teaspoon vanilla extract
- ½ teaspoon baking powder
- ¼ teaspoon salt
Instructions
- Preheat the oven to 350°F (175°C) and grease a baking pan.
- In a bowl, mix the melted butter and sugar until combined.
- Add in the eggs, red food coloring, and vanilla extract, and stir well.
- In another bowl, whisk together flour, cocoa powder, baking powder, and salt.
- Gradually combine the dry ingredients with the wet mixture until smooth.
- Pour the batter into the prepared baking pan and spread evenly.
- Bake for 20-25 minutes or until a toothpick comes out clean.
- Let it cool before cutting into squares.
Notes
- Serve with cream cheese frosting for an extra treat!
- Store in an airtight container for freshness.
- Prep Time: 15 minutes
- Cook Time: 25 minutes
- Category: Desserts
- Method: Baking
- Cuisine: American
- Diet: Vegetarian
Nutrition
- Serving Size: 1 brownie
- Calories: 220
- Sugar: 18 grams
- Sodium: 100 milligrams
- Fat: 10 grams
- Saturated Fat: 6 grams
- Unsaturated Fat: 3 grams
- Trans Fat: 0 grams
- Carbohydrates: 30 grams
- Fiber: 1 gram
- Protein: 3 grams
- Cholesterol: 40 milligrams