Introduction to Thumbprint Cookies
Whether it’s the warmth of a cozy evening or the festive spirit of the holidays, thumbprint cookies have a special place in many hearts. If you’ve ever stepped into a kitchen filled with the enchanting aroma of baked goods, you’ll know the joy that comes with making—or simply enjoying—these delightful treats.
What Makes Thumbprint Cookies a Holiday Favorite?
Thumbprint cookies stand out for several reasons, and it’s no surprise they have cemented their status as holiday favorites.
-
Tradition and Nostalgia: Many people have fond memories tied to these cookies, often made in the family kitchen. The simplicity of making thumbprint cookies, where young and old can participate, contributes to their lasting charm. Families often pass down their unique recipes, making every batch a little piece of history.
-
Customizable Flavors: One of the best aspects of thumbprint cookies is their versatility. Whether you prefer classic raspberry jam, creamy chocolate, or even zesty lemon curd, you can tailor these cookies to suit any palate. This personalization makes them a hit at holiday gatherings, ensuring there’s a flavor for everyone.
-
Appealing Presentation: These cookies are beautiful as they are delicious. The central indent, filled with bright colors and textures, makes them visually striking. Consider adding a light dusting of powdered sugar or drizzling with chocolate to elevate their presentation further.
For the culinary piece of advice, check out The Kitchn’s guide to cookie baking techniques for even more tips on perfecting your thumbprint cookies.
A Simple Recipe to Share
The joy of creating a batch of thumbprint cookies is in the process. Gather your ingredients: flour, sugar, butter, and your choice of filling. As you combine these elements, take a moment to savor the experience—after all, baking is as much about the journey as it is about the destination.
Impress your friends at your next holiday gathering with these delightful cookies. The simple recipe can make a significant impact, bringing people together and creating lasting memories. So, are you ready to bake your way into the hearts of your loved ones with thumbprint cookies?

Ingredients for Thumbprint Cookies
Essential ingredients for classic thumbprint cookies
Creating mouthwatering thumbprint cookies is simpler than you might think! Here’s what you’ll need:
- All-purpose flour: This forms the foundation of your cookie.
- Unsalted butter: A must for rich flavor and the perfect texture.
- Granulated sugar: Sweetens the deal, naturally.
- Brown sugar: Adds a hint of caramel and moisture.
- Egg yolk: Helps bind everything together, contributing to a tender crumb.
- Vanilla extract: For that comforting, warm flavor.
- Jam or preserves: Choose your favorite for the iconic thumbprint filling. Raspberry and strawberry are popular choices!
Optional inclusions for enhanced flavor
Want to take your thumbprint cookies to the next level? Consider these optional ingredients:
- Chopped nuts: Walnuts or pecans add a delightful crunch.
- Citrus zest: A bit of lemon or orange zest brightens up the taste.
- Chocolate chips: For a touch of indulgence, mix in mini chocolate chips before baking.
Don’t hesitate to experiment or check out this comprehensive guide on enhancing cookie recipes from Professional Bakers. There’s always room for creativity in the kitchen!
Preparing Thumbprint Cookies
Baking thumbprint cookies is not just a treat; it’s a delightful experience that brings warmth to any kitchen. If you're ready to embark on this delicious journey, follow these simple yet effective steps to create the perfect thumbprint cookies.
Gather and Measure the Ingredients
Before you dive into mixing and baking, it’s crucial to ensure you have all your ingredients ready. Here’s what you’ll need:
- 1 cup unsalted butter, softened
- ⅔ cup granulated sugar
- 1 teaspoon vanilla extract
- 1 teaspoon almond extract (optional)
- ⅛ teaspoon salt
- 2 cups all-purpose flour
- Your choice of jam or preserves for filling (raspberry, apricot, or even caramel!)
Make sure to measure everything accurately. Baking is a science, and precision makes all the difference.
Cream the Butter and Sugar
Once you have your ingredients, it’s time to cream together the butter and sugar. Using a stand mixer or hand mixer, beat the softened butter and sugar on medium speed until the mixture is light and fluffy. This usually takes about 3-5 minutes.
Why is this step so important? Well, creaming incorporates air into the batter, which helps your thumbprint cookies achieve that delightful light texture. If you’re short on time, you can always check out more tips on butter consistency and creaming techniques.
Mix in the Extracts and Salt
After achieving a fluffy mixture, it’s time to add flavor! Pour in the vanilla extract and almond extract, followed by the salt. The salt will enhance the flavors and balance the sweetness. Mix these ingredients on low speed until combined.
The extracts will infuse your dough with a rich, aromatic smell that will make your kitchen inviting. Take a moment to inhale that sweet aroma—this is what baking joy feels like!
Incorporate the Flour
Now comes the flour. Gradually add in the all-purpose flour, mixing on low speed until the dough just comes together. Avoid overmixing, as it can lead to tough cookies.
If you notice the dough seems a bit too crumbly, don’t panic! Just gently knead it by hand for a minute to help it come together. Your thumbprint cookie dough should be soft yet manageable.
Chill the Dough for Better Texture
Here’s a pro tip: for the best cookie texture, wrap the dough in plastic wrap and chill it in the refrigerator for at least 30 minutes. This not only makes it easier to shape but also enhances the flavors as they meld together.
Chilling is essential; I learned this the hard way! The first time I skipped this step, my cookies didn't hold their shape as well. Trust me, it’s worth the wait!
Shape and Fill the Cookies
Once your dough is well-chilled, preheat the oven to 350°F (175°C). Now you can start shaping the cookies! Roll the dough into 1-inch balls and place them on a baking sheet lined with parchment paper.
Now for the quintessential step: press your thumb or the back of a spoon into the center of each ball to create a little divot—this is where the filling will go. Fill each indentation with your preferred jam or preserves.
Bake to Perfection
Finally, it’s time to bake your thumbprint cookies! Place the baking sheet in the oven and let them bake for about 10-12 minutes, or until the edges are lightly golden.
Keep an eye on them, as oven temperatures can vary. When you pull them out, you should see the jam bubbling gently in the center. Allow them to cool on a wire rack before serving.
Creating thumbprint cookies can transform an ordinary day into a special occasion. So gather your ingredients, embrace the process, and enjoy the sweet rewards of your labor. Happy baking!

Variations on Thumbprint Cookies
If you're looking to add a twist to traditional thumbprint cookies, you're in for a treat! This classic cookie is incredibly versatile, allowing you to create numerous variations that suit any palate or occasion.
Fruit Jam Variations
One of the most popular ways to customize your thumbprint cookies is by experimenting with different jams and preserves. While the classic raspberry or apricot options are divine, why not try:
- Blueberry or blackberry jam for a burst of tangy flavor.
- Lemon curd for a zesty twist that adds brightness.
- Fig jam for an elegant, sophisticated profile.
These fruity alternatives not only enhance the aesthetic appeal but also introduce a burst of flavor with each bite. Check out Food52 for an incredible selection of homemade jams to inspire your next baking adventure.
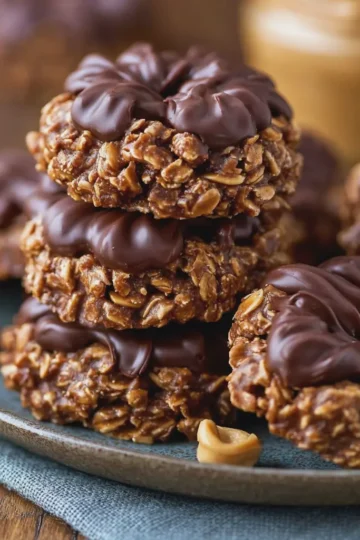
Nut-Filled Thumbprint Cookies
For nut enthusiasts, adding chopped nuts can elevate your thumbprint cookies to a new level. Consider incorporating:
- Toasted walnuts or pecans into the dough for extra richness.
- A layer of creamy nut butter (like almond or peanut) in the center, topped with a chocolate drizzle.
This combination not only offers delightful flavor but adds texture too. For more tips on incorporating nuts into your baking, visit the Olive Nutrition blog, which provides great insights on healthy eating.
Decadent Chocolate Thumbprint Cookies
If you have a sweet tooth, chocolate thumbprint cookies might just become your favorite. Use cocoa powder in the cookie dough or even dip the finished cookies in chocolate! Here’s how:
- Swirl melted chocolate ganache into the thumbprints before baking.
- Fill with chocolate fudge or Nutella for a gooey surprise.
These variations make perfect treats for parties or dessert tables, appealing to chocolate lovers everywhere.
With these creative takes on thumbprint cookies, you’ll be ready to please any crowd and keep everyone guessing what delightful flavors you’ll come up with next!
Baking tips for Thumbprint Cookies
Baking the perfect thumbprint cookies is all about achieving a delightful balance of texture and flavor. Here are some helpful tips to guide your baking adventure.
Tips for perfect dough consistency
For luscious thumbprint cookies, ensure your dough is soft but not sticky. If it feels too wet, add a touch more flour, but do it gradually to avoid overdoing it. Chilling the dough for about 30 minutes can also help it firm up, making it easier to handle.
Ensuring even baking
To achieve beautifully baked thumbprint cookies, space them evenly on your baking sheet. Think about using parchment paper for a non-stick surface and even heat distribution. Rotate the pan halfway through baking for perfectly golden edges every time!
Storage and longevity tips
Once cooled, store your thumbprint cookies in an airtight container at room temperature for up to a week. For longer storage, consider freezing them—simply layer between parchment paper, put them in a freezer bag, and they’ll last up to three months. Check out this guide on cookie freezing for more details!
These baking tips will help you create scrumptious thumbprint cookies that you and your friends will adore!

Serving suggestions for Thumbprint Cookies
Pairing thumbprint cookies with beverages
When enjoying thumbprint cookies, think beyond just coffee. A delightful herbal tea, such as chamomile or peppermint, can complement the sweet, fruity filling beautifully. Did you know that tea consumption can enhance your mood? According to studies from the Tea Association of the United States, sipping herbal teas can reduce stress, making them a great match for your baking moments.
If you're in a cozy mood, a glass of cold milk never goes out of style, especially when those cookies are fresh out of the oven. For a twist, try pairing them with almond or oat milk, which can add a nutty flavor to your experience.
Presentation ideas for gatherings
When it comes to showcasing your thumbprint cookies, think vibrant! Arrange them on a colorful platter, perhaps adorned with fresh fruits or edible flowers. This not only elevates the presentation but also makes them inviting for guests.
Consider wrapping a few cookies in clear treat bags tied with beautiful ribbons as party favors. It’s a simple yet heartfelt way to share the joy of your baking! For more tips on festive presentations, check out this resource on creative food arrangements that can surely inspire you.
So, whether you’re enjoying them solo or at a gathering, these suggestions will surely make your thumbprint cookies the star of any occasion!
Time details for Thumbprint Cookies
Preparation time
Making thumbprint cookies is a delightful activity that typically requires around 15-20 minutes for preparation. This includes gathering your ingredients, mixing the dough, and shaping your cookies. Having everything ready to go makes the process smoother and a lot more enjoyable.
Baking time
Once your cookie dough is ready, the baking process takes about 12-15 minutes. You'll know they’re done when the edges are lightly golden but the centers remain soft.
Total time
In total, you’re looking at about 30-40 minutes from start to finish. Perfect for a cozy afternoon treat or an unexpected guest! So, why not gather some friends and share the joy of baking these scrumptious cookies? For more baking tips, check out this useful resource from King Arthur Baking. Happy baking!
Nutritional Information for Thumbprint Cookies
Calories Per Cookie
When you're indulging in thumbprint cookies, it's helpful to know the nutritional details. Each cookie typically contains around 100–120 calories. That’s a sweet treat you can feel good about enjoying in moderation!
Macros Overview
Understanding the macros can make all the difference in your baking decisions. For an average thumbprint cookie, here’s what to expect:
- Carbohydrates: Approximately 14-16 grams
- Protein: About 1-2 grams
- Fat: Ranging from 5-7 grams
These numbers can vary based on the specific ingredients or fillings you choose, like using healthier nut butters or opting for lower-sugar jams. If you’re curious about a more in-depth look at cookie nutrition, the USDA FoodData Central offers a wealth of information on various ingredients.
So, whether you’re whipping up a batch for a party or enjoying one with your morning coffee, remember to savor every last bite!
FAQs about Thumbprint Cookies
Why are they called thumbprint cookies?
The name thumbprint cookies comes from the classic technique used to make them. Traditionally, bakers use their thumb to create an indentation in the dough before filling it with jam or preserves. This simple act not only gives them their signature look but also helps create the perfect pocket for the delicious filling. It’s an endearing and memorable method that has stood the test of time!
Can I use different types of jam?
Absolutely! One of the great things about thumbprint cookies is their versatility. While you might find classic recipes calling for raspberry or strawberry jam, you can get creative with flavors. Consider using:
- Apricot preserves
- Lemon curd
- Chocolate ganache
- Nut butters
Don’t hesitate to experiment with seasonal fruits or even store-bought options. Just remember, the filling should be a bit thick to maintain its shape and not spill out during baking.
How do I store leftover thumbprint cookies?
Storing leftover thumbprint cookies is easy!
- Room Temperature: Place them in an airtight container at room temperature for up to one week. They’ll stay soft and chewy, making them perfect for snacking.
- Refrigerator: For longer freshness, pop them in the fridge. They can last up to two weeks this way.
- Freezing: If you want to keep them longer, freeze the cookies! Lay them flat in a single layer on a baking sheet, freeze until solid, and then transfer to a freezer-safe bag. They’ll retain their quality for about three months.
For further guidance on baking and cookie storage, check out resources like the National Baking Association. Enjoy your baking adventures!
Conclusion on Thumbprint Cookies
Final thoughts on creating the perfect batch
Creating your ideal thumbprint cookies is all about embracing the process. Each batch brings a unique opportunity to experiment with flavors, from rich chocolate ganache to zesty lemon curd. Don't hesitate to adjust the nut fillings or even try out new jams based on your tastes—they might surprise you!
Consider sharing your cookies with friends or at gatherings; these delightful treats are sure to be a hit. And remember, the joy of baking is just as fulfilling as the finished product! For more tips on enhancing your baking skills, check out this baking guide. Enjoy every bite!
Print
Thumbprint Cookies: Easy and Irresistibly Delicious Treats
Thumbprint cookies are a delightful treat, perfect for any occasion. With their buttery texture and sweet filling, they are sure to become a favorite!
- Total Time: 35 minutes
- Yield: 24 cookies
Ingredients
- 1 cup unsalted butter, softened
- ¾ cup granulated sugar
- 2 large egg yolks
- 1 teaspoon vanilla extract
- 2 cups all-purpose flour
- ¼ teaspoon salt
- ½ cup jam or preserves of your choice
Instructions
- Preheat the oven to 350°F (175°C).
- In a large bowl, cream together the butter and sugar until light and fluffy.
- Add the egg yolks and vanilla, mixing well.
- Gradually add the flour and salt, mixing until just combined.
- Roll the dough into small balls and place them on a baking sheet.
- Use your thumb to create an indentation in the center of each cookie.
- Fill each indentation with your chosen jam.
- Bake for 12-15 minutes or until the edges are lightly golden.
- Let cool before serving.
Notes
- For a variation, try using different flavors of jam.
- These cookies can be frozen for later enjoyment.
- Prep Time: 20 minutes
- Cook Time: 15 minutes
- Category: Dessert
- Method: Baking
- Cuisine: American
- Diet: Vegetarian
Nutrition
- Serving Size: 1 cookie
- Calories: 150
- Sugar: 10g
- Sodium: 50mg
- Fat: 8g
- Saturated Fat: 5g
- Unsaturated Fat: 2g
- Trans Fat: 0g
- Carbohydrates: 20g
- Fiber: 0g
- Protein: 2g
- Cholesterol: 30mg