Introduction to Butterfinger Fudge
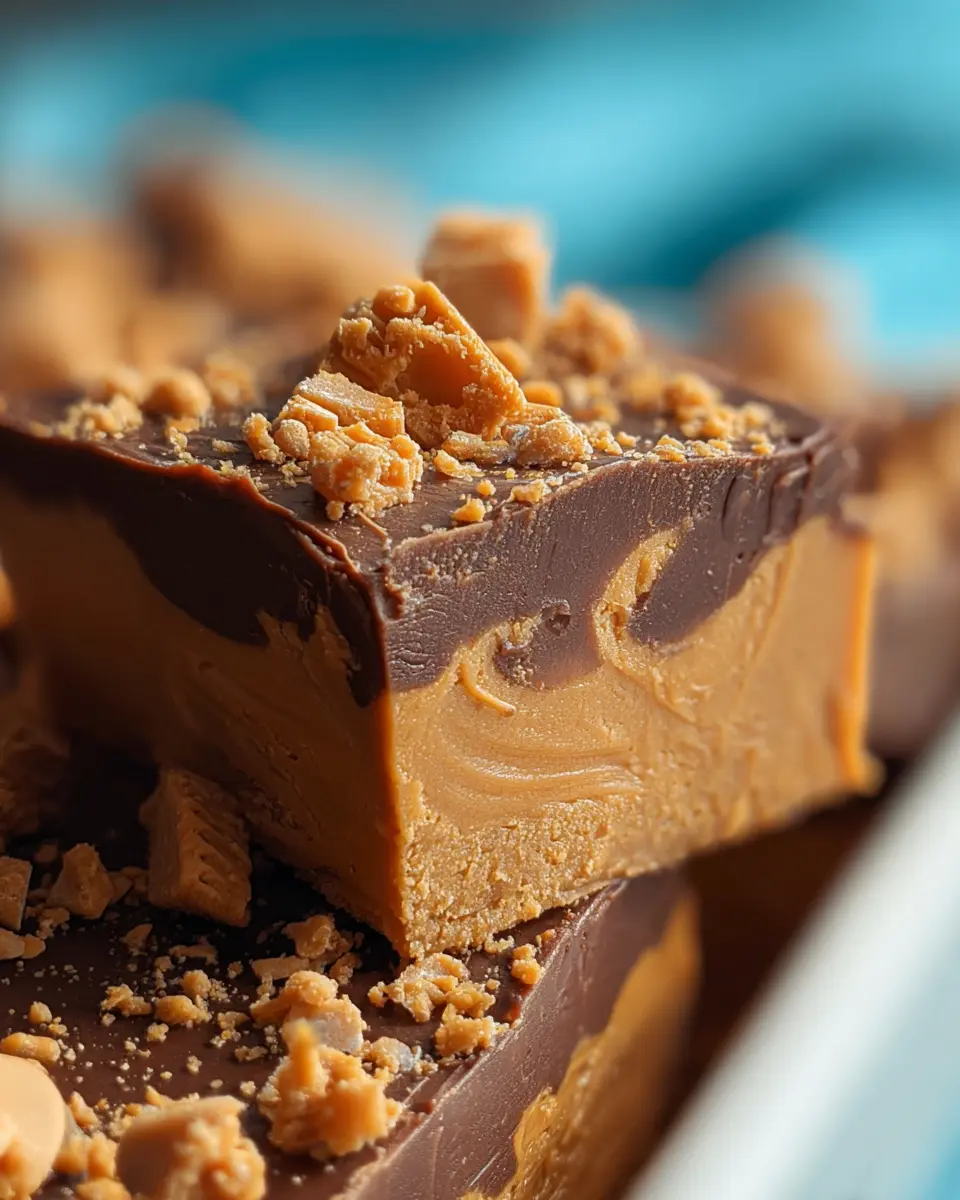
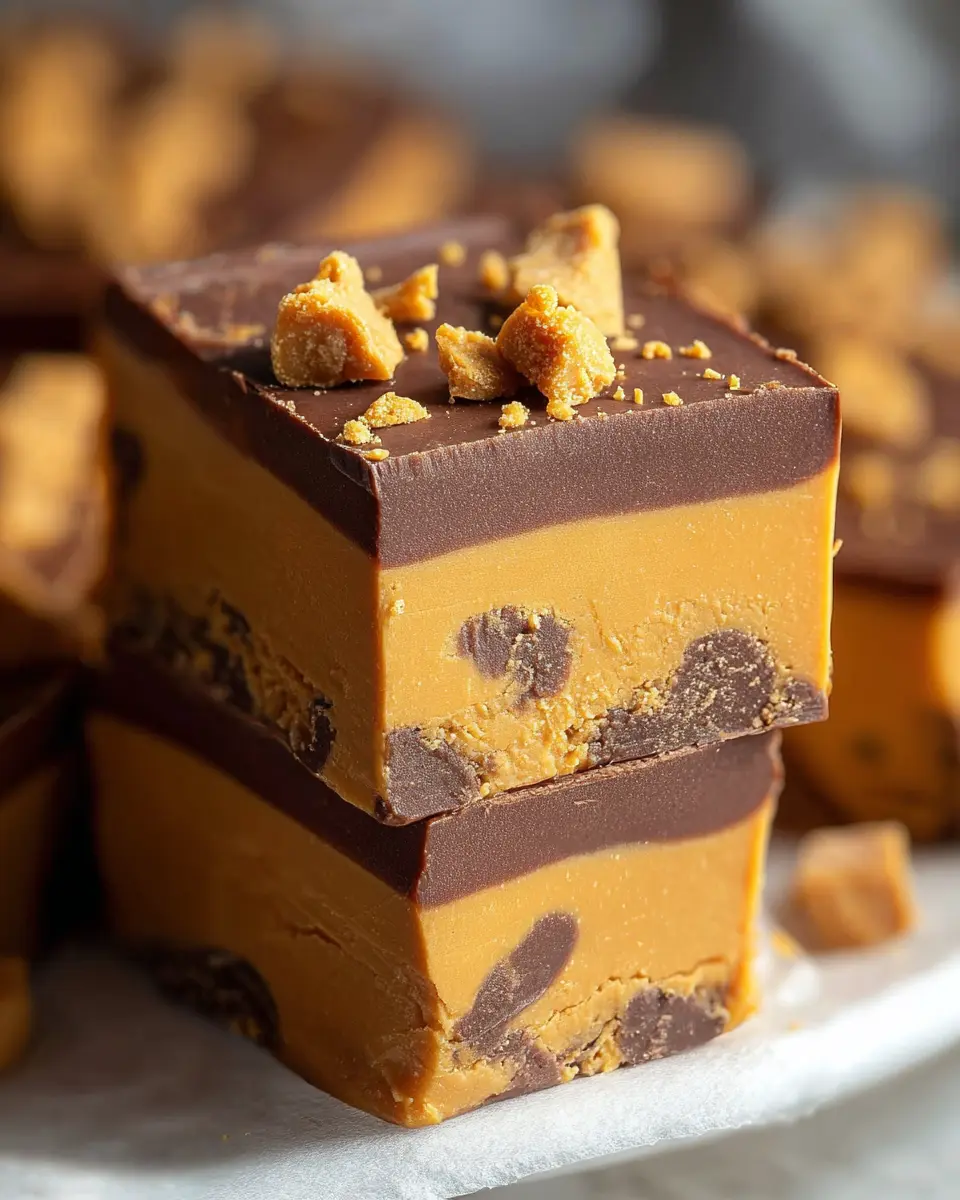
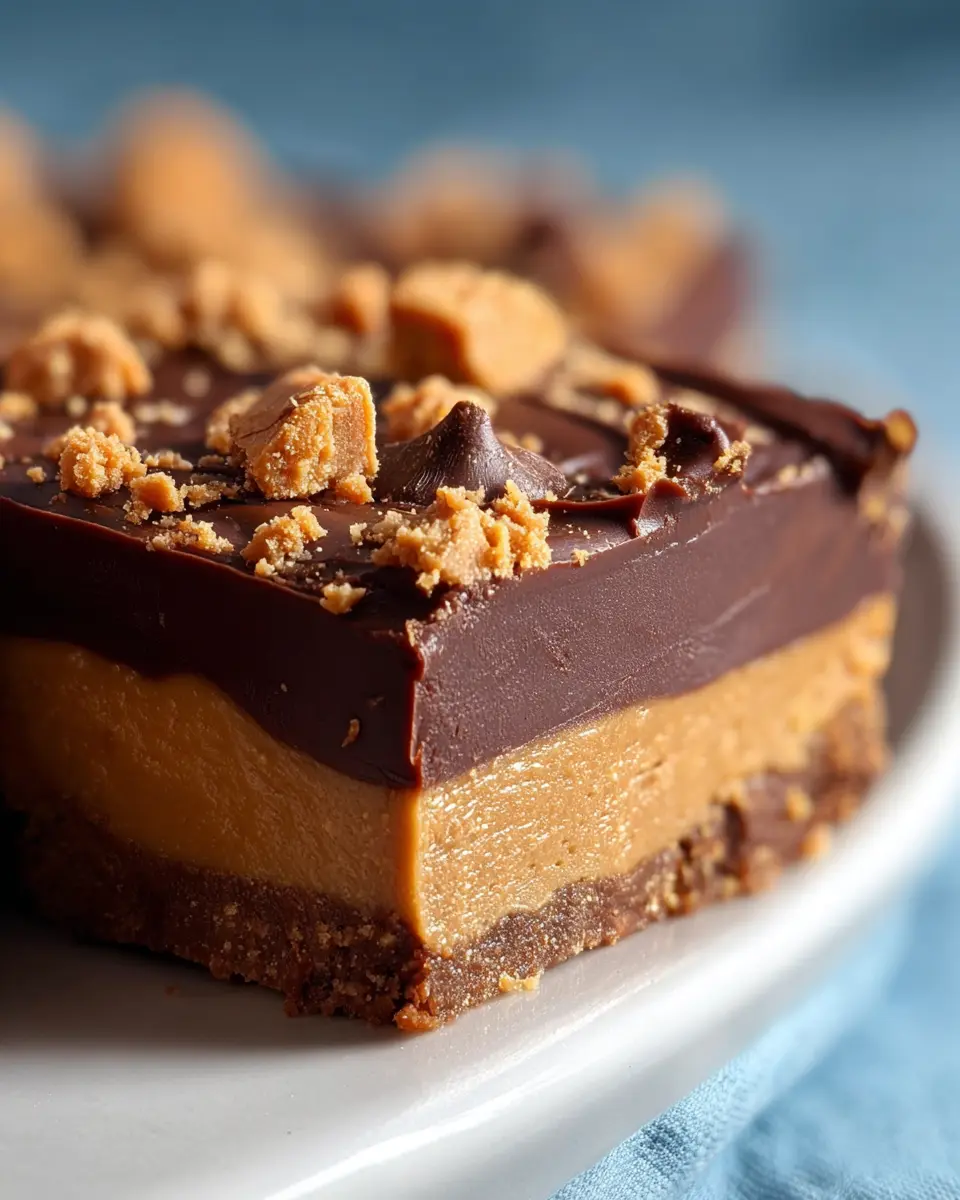
When it comes to satisfying your sweet tooth, butterfinger fudge is undoubtedly a game-changer. This delightful treat combines the rich, velvety texture of fudge with the irresistible crunch and unique flavor of Butterfinger candy bars. If you've ever found yourself torn between your love for fudge and your admiration for Butterfinger, then this recipe is your perfect match.
Why Butterfinger Fudge is a Must-Try
So, why should you whip up a batch of butterfinger fudge today? For starters, it’s incredibly easy to make. With just a handful of ingredients, you can create a dessert that feels luxurious without spending hours in the kitchen. Who doesn’t love that?
Here are a few key reasons why you should give it a shot:
- Decadent Flavor: The combination of creamy chocolate and the crispy peanut butter filling makes this fudge an absolute delight. It strikes the perfect balance between sweet and salty, leaving you wanting more.
- Quick and Simple: In less than an hour, you can have a delightful dessert ready for a gathering, a family movie night, or even just a cozy evening at home. The charm of butterfinger fudge is that it's perfect for any occasion.
- Great for Sharing: This fudge is a crowd-pleaser. Slice it into bite-sized pieces, package it up in a festive tin, and you’ve got a fantastic homemade gift idea for friends and family.
To heighten your fudge-making experience, check out this guide on perfecting your fudge and discover various ways to elevate the vanilla base. Remember, the joy of cooking often comes from experimentation!
And let's not forget how versatile butterfinger fudge can be. You can easily adapt the recipe by adding nuts, using different types of chocolate, or incorporating other candies. With this recipe, the possibilities are endless!
Ready to dive in and make your own delectable batch of butterfinger fudge? Let's gather our ingredients and get started! With these tasty morsels, you'll not only impress your friends but also create unforgettable moments of indulgence right in your kitchen.
Ingredients for Butterfinger Fudge
Essential Ingredients for the Perfect Fudge
When it comes to making the ultimate Butterfinger fudge, having the right ingredients on hand is key. This delectable treat combines smooth chocolate with the rich, crunchy taste of Butterfinger candy bars, and you'll want to ensure each element shines. Here’s what you’ll need to bring this delightful dessert to life:
- Condensed Milk: The backbone of your fudge, providing creaminess and sweetness.
- Chocolate Chips: Semi-sweet or milk chocolate chips work wonders for that silky texture.
- Peanut Butter: Creamy peanut butter enhances the fudge’s richness while complementing the Butterfinger flavor.
- Butter: Just a bit of unsalted butter boosts the fudge's creaminess and flavor.
- Butterfinger Bars: Crush up these bars to sprinkle in, giving your fudge that iconic crunch.
With these ingredients, you’re all set to create a sweet indulgence that your friends and family will rave about. If you want to explore more dessert inspirations, check out this guide on creating irresistibly rich fudge.
Immerse yourself in the process and enjoy the delightful aroma wafting through your kitchen—Butterfinger fudge is sure to become a favorite!
Step-by-Step Preparation of Butterfinger Fudge
Creating the perfect Butterfinger fudge is a delightful journey into the world of sweet treats. This creamy, rich confection combines the flavors of chocolate with the iconic crunch of Butterfinger candy bars, making it a surefire hit at parties or simply as a sumptuous treat for yourself. Follow these simple steps, and you'll have a batch of delectable fudge ready in no time!
Gather Your Tools and Ingredients
Before diving into the delightful world of Butterfinger fudge, it's essential to prepare your workspace. Here’s what you’ll need:
Tools:
- Mixing bowl
- Microwave-safe dish or double boiler
- Rubber spatula or wooden spoon
- Baking pan (8x8 inches works perfectly)
- Parchment paper (optional, but recommended for easy removal)
Ingredients:
- 2 cups semi-sweet chocolate chips
- 1 can (14 ounces) sweetened condensed milk
- 1 teaspoon vanilla extract
- 5 Butterfinger candy bars, crushed
- A pinch of salt
Having everything at hand will not only streamline the process but also make the experience more enjoyable. Plus, you’ll avoid those frantic last-minute dashes!
Melt the Chocolate Mixture
Now it’s time to melt the chocolate! This stage is crucial, as the texture and flavor of your Butterfinger fudge hinge on this perfectly melted mix:
- In your microwave-safe dish or double boiler, combine the semi-sweet chocolate chips and the sweetened condensed milk.
- Heat the mixture in 30-second increments in the microwave, stirring between each interval. If you’re using a double boiler, keep stirring until it melts beautifully and smooths out.
- Once melted, add the pinch of salt and the vanilla extract. Mix everything thoroughly until it’s silky and rich.
This chocolate marriage isn’t just about melting; it’s about creating a divine foundation for your fudge.
Incorporate Butterfinger Candy Bars
This is where the magic of Butterfinger fudge happens! Those crunchy, peanut-buttery flavor bombs play a crucial role in making your fudge memorable.
- Gently fold in the crushed Butterfinger candy bars, making sure they are evenly distributed throughout the melted chocolate mixture.
- Be careful not to overmix; you want those crunchy bits to remain intact for that beloved texture contrast.
If you’ve never crushed Butterfinger bars before, remember to use a sturdy plastic bag and a rolling pin or something similar! It’s a fun way to release any stress you might have.
Pour into the Baking Pan
Your delicious fudge mixture is now ready to take shape! Here’s how:
- Line your baking pan with parchment paper, leaving some overhang (this will help you lift the fudge out later).
- Pour the chocolate mixture into the prepared pan, spreading it evenly with your spatula.
- Tap the pan gently on the counter to remove air bubbles, and smooth the surface for a tidy finish.
This step is all about presentation. A well-poured fudge looks just as tempting as it tastes!
Chill and Cut the Fudge
Now, patience is key. Your Butterfinger fudge needs some time to firm up:
- Refrigerate the fudge for at least 2 hours or until completely set.
- Once firm, lift the fudge out of the pan using the parchment paper and transfer it to a cutting board.
- Use a sharp knife to slice it into squares or rectangles, depending on your serving preference.
Guess what? You've just made your very own Butterfinger fudge! Enjoy a square (or two) with a hot cup of coffee or tea. And remember, homemade treats like these make for fantastic gifts — wrap them up and surprise a friend or family member!
Whether you’re craving something sweet or hoping to impress, this easy recipe will surely become a cherished favorite in your kitchen. Happy cooking!
Creative Variations of Butterfinger Fudge
Peanut Butter Butterfinger Fudge
If you’re a fan of butterfinger fudge, this peanut butter twist is sure to be a hit! Combining the creamy richness of peanut butter with the crunchy, chocolaty goodness of Butterfingers takes this treat to a whole new level. Here’s a simple way to make it:
- Ingredients:
- 1 cup of peanut butter
- 1 cup of sweetened condensed milk
- 2 cups of Butterfinger pieces
- 2 cups of chocolate chips
Instructions: Melt the sweetened condensed milk and chocolate chips, stirring until smooth. Mix in the peanut butter until blended, then fold in the crunchy Butterfinger pieces. Pour the mixture into a greased pan and let it chill until set. You’ll love how the sweet, nutty flavors blend into each slice!
Vegan Butterfinger Fudge
Don’t let a plant-based diet stop you from enjoying delicious butterfinger fudge! This vegan version uses simple substitutes to keep it dairy-free and just as tasty.
- Ingredients:
- 1 cup almond butter or cashew butter
- 1 can full-fat coconut milk
- 1 cup dairy-free chocolate chips
- 2 cups crushed vegan Butterfingers or nuts for crunch
Instructions: In a saucepan, heat the coconut milk and dairy-free chocolate chips until melted and smooth. Stir in the almond or cashew butter for that creamy texture. Mix in the crushed vegan Butterfinger pieces (or your nut of choice) and spread the fudge in a lined dish. Allow it to cool, then slice and enjoy the guilt-free treat.
Feeling inspired? Experiment with your own variations or check out some fun recipes on The Spruce Eats for more ideas!
Cooking Tips and Notes for Butterfinger Fudge
Avoiding Common Mistakes
Making butterfinger fudge might seem straightforward, but a few common pitfalls can turn your sweet project into a sticky situation. Here are some tips to help you succeed:
- Measure Accurately: Ensure you use the right amounts of ingredients. Too much sugar can cause an overly sweet fudge, while not enough can impact texture.
- Stay on the Heat: Melt your ingredients slowly over medium-low heat. Rushing can lead to burning or uneven consistency. Remember, patience is key!
- Don’t Skip the Cooling Stage: Allow your fudge to cool completely in the pan before cutting it into squares. This helps achieve that perfect texture.
For more insights, check out this guide on fudge-making techniques.
Storage Tips for Freshness
Once you've mastered your butterfinger fudge, proper storage is essential to keep it fresh. Here’s how:
- Cool Before Storing: Allow your fudge to cool completely at room temperature.
- Airtight Containers: Store it in an airtight container to prevent it from drying out.
- Refrigeration: If you want to keep it fresh longer (up to 2 weeks), consider refrigerating it, but be mindful that this can alter the texture slightly.
Following these simple steps can help you enjoy your delicious fudge for days to come!
Serving Suggestions for Butterfinger Fudge
Pairing with Beverages
When it comes to enjoying your butterfinger fudge, the right drink can elevate the experience. Try pairing it with a warm cup of coffee or hot cocoa for a cozy treat that will make your taste buds dance. The rich chocolatey flavors of the fudge complement the robust notes of coffee beautifully. For a lighter option, consider a creamy vanilla or caramel milkshake. The sweetness of these drinks balances the richness of the fudge. If you want something refreshing, I recommend a glass of iced tea with a hint of lemon.
Creative Presentation Ideas
To impress guests or simply treat yourself, presentation can make all the difference. Cut your butterfinger fudge into cute bite-sized squares and arrange them on a decorative platter. Garnish with crushed Butterfinger bars for an extra pop of color. Consider using mini cupcake liners to give each piece its own little space, which is perfect for parties. A sprinkle of sea salt on top can also enhance the flavor and add visual appeal.
For more creative serving ideas, check out this entertaining guide that offers unique presentation tips and tricks for desserts!
Time Breakdown for Butterfinger Fudge
Preparation Time
Making your Butterfinger fudge is simple and quick! Start with about 15-20 minutes to gather your ingredients and mix everything together. This includes melting the chocolate and incorporating those delicious crushed Butterfinger bars.
Chill Time
After combining all the ingredients, you'll need to be patient for around 2-3 hours. This step is crucial as it allows the fudge to set properly, so resist the temptation to dig in too soon!
Total Time
In total, expect to spend about 2 hours and 20 minutes to 3 hours and 20 minutes to enjoy your Butterfinger fudge. This makes it a perfect treat for any gathering or simply when you're craving something sweet. If you're interested in more desserts, consider checking out resources on America’s Test Kitchen for further inspiration!
Nutritional Facts for Butterfinger Fudge
Calories per Serving
When indulging in your homemade butterfinger fudge, it’s good to keep an eye on the calories. Each serving typically contains around 150–200 calories, depending on the specific recipe and portion size. It’s a delightful treat, but moderation is key to enjoying it without the guilt. Remember, satisfying your sweet tooth doesn't mean you have to compromise your health!
Key Nutrients
Aside from calories, let’s break down some of the crucial nutrients found in butterfinger fudge:
- Fat: This treat is rich in fats, primarily from butter and peanut butter, which adds to its creamy consistency.
- Sugars: With a significant amount of sugar, it provides a quick energy boost but should be enjoyed in moderation.
- Protein: The inclusion of peanut butter does contribute some protein, making it a tad more filling.
For detailed nutritional insights, resources like MyFitnessPal can help track your intake effectively. Happy fudging!
FAQs about Butterfinger Fudge
Can I use other types of chocolate for this recipe?
Absolutely! While the classic Butterfinger fudge recipe shines with milk chocolate, feel free to experiment with dark chocolate or even white chocolate for a different flavor profile. Each type of chocolate will lend its unique sweetness and richness, enhancing the Butterfinger flavor, so don’t hesitate to try out your favorites.
How do I make fudge softer or firmer?
The texture of your Butterfinger fudge largely depends on the ratios of ingredients and how you cook it. If you want a softer fudge, consider these tips:
- Use more condensed milk: This will create a creamier texture.
- Shorten cooking time: Avoid overcooking the mixture, as prolonged heat can lead to a firmer consistency.
On the flip side, if you prefer firmer fudge:
- Add more chocolate: This can help enhance the structure.
- Cook it a little longer: Just keep an eye on it to prevent burning.
What’s the best way to store leftover fudge?
To keep your Butterfinger fudge fresh and delicious, store it in an airtight container at room temperature for up to one week. If you want it to last longer, consider placing it in the refrigerator, where it can stay good for around two weeks. For longer storage, you can wrap the fudge in plastic wrap and then in foil before freezing it for up to three months. Just remember to let it thaw at room temperature before enjoying!
For detailed guidance on fudge-making, check out this helpful resource on fudge textures and techniques.
Conclusion on Butterfinger Fudge
Why You'll Love Making Butterfinger Fudge at Home
Crafting your own Butterfinger fudge is not just a delicious endeavor; it's a fun, rewarding experience. Imagine the joy of combining creamy chocolate with that iconic crunch of Butterfinger bars. It’s a treat that’s perfect for sharing at parties, gifting to friends, or simply indulging in after a long day.
- Simplicity: With just a few ingredients, you can whip up this decadent dessert in no time.
- Customizable: Feel free to tailor it to your taste—add sprinkles or nuts for that extra flair!
- Quality Control: You can ensure your fudge is made with the best ingredients, avoiding preservatives.
So, why wait? Dive into the world of homemade Butterfinger fudge and experience the delight it brings. For more tips and tricks, check fantastic sites like Serious Eats. Your taste buds will thank you!
Print
Butterfinger Fudge: The Indulgent Treat You Can't Resist
Indulge in the rich and creamy taste of Butterfinger fudge, a delightful treat that satisfies your sweet tooth.
- Total Time: 2 hours 25 minutes
- Yield: 36 pieces
Ingredients
- 1 cup creamy peanut butter
- 1 cup sweetened condensed milk
- 3 cups powdered sugar
- 1 cup Butterfinger candy bars, crushed
- 1 teaspoon vanilla extract
Instructions
- In a medium saucepan, combine the peanut butter and sweetened condensed milk over medium heat.
- Stir continuously until the mixture is smooth and creamy.
- Remove from heat and stir in powdered sugar, crushed Butterfinger bars, and vanilla extract until well combined.
- Spread the mixture into a greased 8x8 inch pan, smoothing it out evenly.
- Refrigerate for at least 2 hours or until firm.
- Once set, cut into squares and serve.
Notes
- For an extra crunch, add more crushed Butterfinger pieces on top before refrigerating.
- Prep Time: 15 minutes
- Cook Time: 10 minutes
- Category: Dessert
- Method: Stovetop
- Cuisine: American
- Diet: Dessert
Nutrition
- Serving Size: 1 piece
- Calories: 120
- Sugar: 20g
- Sodium: 50mg
- Fat: 6g
- Saturated Fat: 2.5g
- Unsaturated Fat: 3g
- Trans Fat: 0g
- Carbohydrates: 17g
- Fiber: 0g
- Protein: 2g
- Cholesterol: 5mg