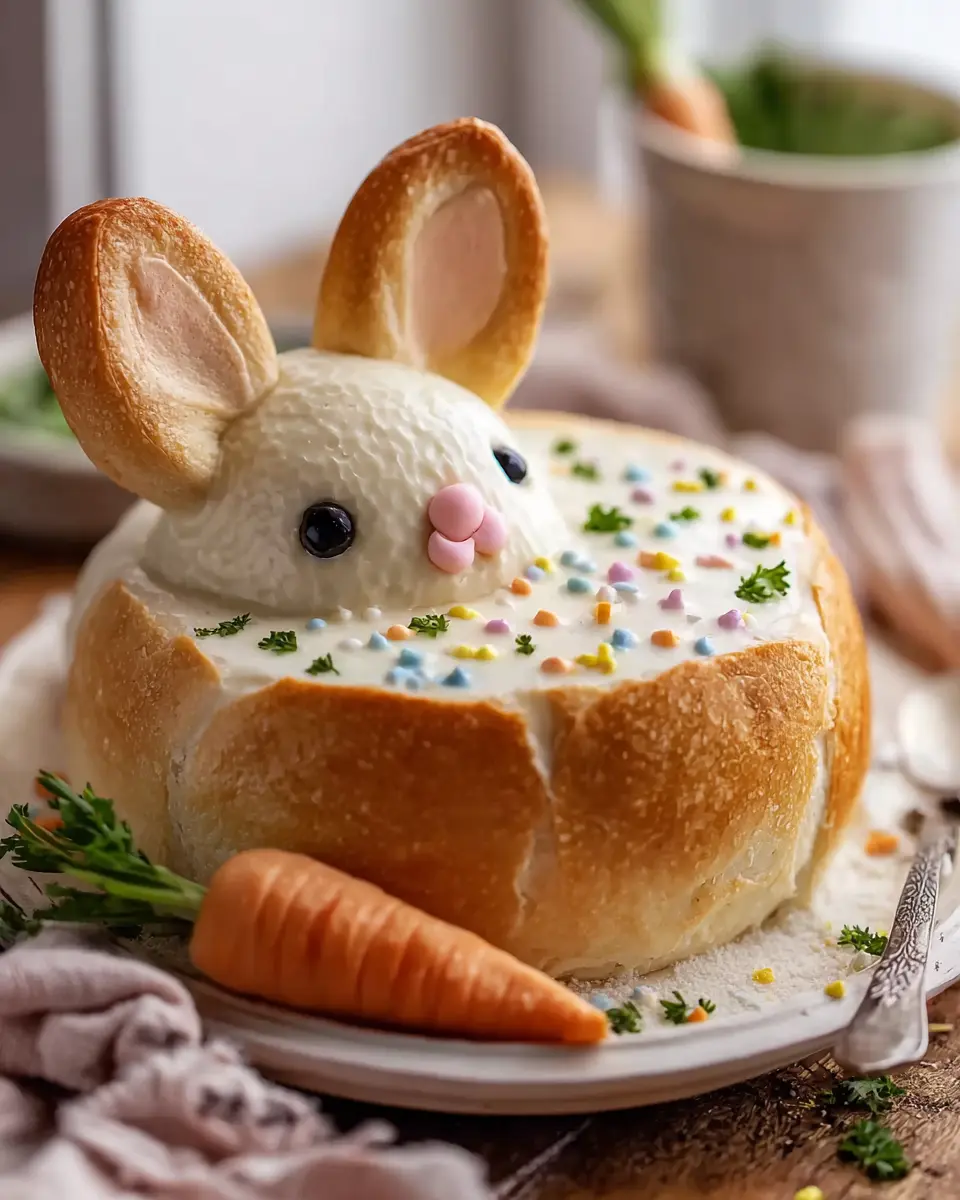
Introduction to Easy Bunny Cake Recipe
As spring finally rolls around, so does one of the most delightful traditions in many households: the Bunny Cake. This whimsical dessert has become a staple during Easter celebrations, bringing joy to both children and adults alike. But why is this easy bunny cake recipe cherished year after year?
The Joy of Tradition
The Bunny Cake isn't just a dessert; it embodies the spirit of Easter. Families gather around the dinner table to share laughter, stories, and their creative cake designs. Traditionally shaped to represent a bunny, this cake usually features delightful frosting and playful decorations that excite the little ones. It's hard not to smile when you see a cake that is not only delicious but also bursts with personality!
Families often recall fond memories tied to making this cake together, passed down through generations. According to a study by the American Psychological Association, engaging in these shared culinary experiences can strengthen family bonds and create lasting memories. So, when you whip up your easy bunny cake, you're not just baking; you're nurturing connections.
Tips for Getting Started
When preparing your Bunny Cake, keep the following in mind:
- Choose Your Flavor: Vanilla, chocolate, or even carrot cake can make fantastic bases. Consider what your family enjoys most.
- Gather Supplies: You'll need basic baking supplies, including flour, sugar, and eggs, as well as some creative decorations like coconut flakes or colorful candies.
- Involve Everyone: Let kids get their hands dirty! They can help with mixing and decorating, making it a fun family project.
For inspiration, check out moments shared by other bakers on platforms like Pinterest, where countless variations of Bunny Cakes inspire creativity.
More Than Just Cake
Creating an easy bunny cake recipe also provides an opportunity to teach children about baking and sharing food. It's a fun way to discuss the significance of holidays and the fun ways people celebrate around the world.
Why not embrace this tradition in your home? By incorporating this easy and delightful recipe into your Easter festivities, you're not just serving a cake; you're creating an experience full of joy, nostalgia, and togetherness. So, are you ready to hop into the kitchen and make your Bunny Cake a reality?
Ingredients for Easy Bunny Cake
Essential baking components for your bunny masterpiece
Creating your easy bunny cake recipe starts with gathering a few essential ingredients. Trust me, you’ll want to have these on hand for a fluffy, delightful cake that’s perfect for any occasion:
- 2 cups all-purpose flour: This will form the cake’s base, giving it structure and that light, fluffy texture.
- 1 ½ cups granulated sugar: A touch more sweetness elevates the flavor.
- 1 cup unsalted butter (softened): Adds richness and depth to your cake.
- 4 large eggs: Bind everything together for a moist and fluffy treat.
- 1 cup buttermilk: For that tender crumb and delightful tang.
- 2 teaspoons baking powder: Essential for achieving rise and fluffiness.
- 1 teaspoon vanilla extract: Just a hint to enhance all those sweet flavors.
Optional decoration extras for a personal touch
When it comes to decorating your easy bunny cake, don’t be afraid to let your creativity flow. Here are some fun extras:
- Coconut flakes: For that fluffy cotton-tail appearance, sprinkle some coconut on the top!
- Colored sprinkles: Make your cake festive and lively for any spring gathering.
- Fresh fruit: Strawberries or blueberries can add not just color but a burst of natural flavor.
- Cream cheese frosting: For a tangy complement, this works wonders as a finishing touch.
By experimenting with these simple components, you'll craft a beautiful bunny cake that looks as good as it tastes! For more inspiration, check out how to incorporate seasonal fruit by visiting EatingWell. Happy baking!
Step-by-Step Preparation of Easy Bunny Cake
Making an easy bunny cake is a delightful way to bring seasonal cheer to your gatherings or celebrations. This whimsical dessert not only looks adorable but is surprisingly simple to make, even for those who may not consider themselves baking experts. Let’s dive into the process, step by step!
Gather Your Ingredients and Tools
Before diving into your baking adventure, it's crucial to set up a well-organized workspace. Here’s what you’ll need:
Ingredients:
- 2 round cake layers (store-bought or homemade)
- White frosting (store-bought or homemade)
- Candy decorations (like mini chocolate eggs or jelly beans for the eyes and nose)
- Coconut flakes (optional, for a fluffy look)
- Food coloring (pink and black for decorating)
Tools:
- Two 9-inch round cake pans
- Mixing bowls
- Spatula
- Piping bags (optional)
- Serving platter
Having everything ready will make the process much smoother and more enjoyable. Online resources like Cooking Light can provide additional tips on ingredient selection.
Bake the Two Round Cake Layers
Whether you decide to go for a homemade recipe or opt for store-bought cakes, the first step is baking your two round cake layers. If you’re making them from scratch, a simple vanilla or chocolate cake recipe will work beautifully.
- Preheat your oven to 350°F (175°C).
- Prepare your cake pans by greasing them and dusting with flour to prevent sticking.
- Mix your batter as per the recipe or instructions on the package.
- Pour the batter into the pans evenly and smooth the tops with a spatula.
- Bake for about 25-30 minutes, or until a toothpick inserted in the center comes out clean.
It’s amazing how such simple ingredients (flour, sugar, eggs) can be transformed into something so delightful! Once baked, it’s time for the next step.
Cool the Cakes Before Decorating
Cooling your cakes properly is essential for easy frosting application.
- Let them sit in the pans for about 10 minutes.
- Gently run a knife around the edges and flip them onto a cooling rack.
Allow the cakes to cool completely at room temperature. You wouldn’t want your frosting to melt, right? While you wait, you could research more about different frosting techniques on reliable websites like Serious Eats.
Assemble the Bunny Face and Ears
Now for the fun part! When the cakes are cool, it’s time to shape the bunny.
- Take one cake layer and place it on your serving platter. This will be the bunny's face.
- Cut the second cake layer in half to create the ears. Position the two halves on top of the first layer.
- If you like, you can shave off a little of the cake layers to achieve a rounded ear shape.
Visualizing how the final cake will look can be helpful here. Don't hesitate to check out inspiration on platforms like Pinterest for creative plating ideas.
Frost the Bunny and Add Details
Now comes the magic of frosting!
- Spread a generous layer of white frosting over the face and ears. A spatula works great for this!
- Use the food coloring to tint some frosting pink for the inner ears.
- Decorate with candy for the eyes and nose. Coconut flakes can be sprinkled around for added fluff.
Want to give it a personal touch? A piping bag can help you create beautiful borders or patterns.
The final touch can be a sprinkle of edible glitter or extra candy decorations. It’s all about making it uniquely yours, and there’s truly no right or wrong way to do this!
Creating an easy bunny cake is both enjoyable and rewarding. The smiles it brings to family and friends make every step worthwhile. So gather your materials and let your creativity shine!
Variations on the Easy Bunny Cake
Chocolate Bunny Cake Alternative
If you're a chocoholic (like I am), why not switch up the traditional easy bunny cake recipe with a delicious chocolate twist? Simply replace the vanilla cake mix with a chocolate cake mix, and use chocolate frosting to give your bunny a rich, dark appearance. For an extra touch, consider adding mini chocolate chips throughout the batter for that perfect gooey texture. Maybe even sprinkle some crushed chocolate cookies on top to resemble dirt – talk about an adorable dessert! To truly elevate your chocolate bunny cake, try bringing in flavors like mint or orange zest. You'll be pleasantly surprised at how a little creativity can turn a simple cake into a delightful treat.
Allergic-Friendly Bunny Cake Ideas
Catering to guests with allergies doesn’t have to be a hassle, and your easy bunny cake recipe can be customized to fit various dietary needs. For those avoiding gluten, using a gluten-free cake mix can be a seamless substitute. Instead of traditional eggs, consider using flaxseed meal or silken tofu, which work wonderfully as binding agents.
Here are a few substitutions to keep in mind:
- To make your cake dairy-free, switch to almond or oat milk and use a plant-based frosting.
- For nut allergies, simply stick to alternatives like sunflower seed butter for frosting or decorating.
- If you're making the cake for kids, focus on colorful fruits to avoid any allergens — think berries or bananas for a playful touch!
With these adaptations, you can create a cake that everyone can enjoy. Plus, if you need a detailed guide on gluten-free baking, check out sources like Celiac Disease Foundation for more tips. Embrace the spirit of creativity while making sure every guest feels included!
Cooking Tips and Notes for Easy Bunny Cake
Achieving the Perfect Frosting Finish
When it comes to the easy bunny cake recipe, perfecting your frosting is key. Start with a chilled cake; this helps the frosting set better. Use a combination of whipped butter and cream cheese for a smooth, creamy texture that holds its shape. Spreading the frosting with an offset spatula not only gives an even layer but adds a lovely finishing touch. If you're feeling decorative, consider piping some small flowers or simple borders using a piping bag.
Saving Time Without Sacrificing Flavor
Busy professionals, rejoice! To make this easy bunny cake recipe quicker without compromising on taste, opt for store-bought cake mixes to save time. Enhance the flavor by adding an extra egg or substituting water with milk. For a burst of freshness, fold in some finely grated lemon or lime zest. Don't forget, using fresh ingredients will never steer you wrong. Check out this article on the benefits of fresh ingredients for more insights!
Why not consider prepping the ingredients the night before? This simple trick can cut down your kitchen time significantly while still allowing you to enjoy a delightful homemade dessert.
Serving Suggestions for Easy Bunny Cake
Creating an easy bunny cake recipe is just the beginning of your dessert experience! To enhance your celebration, consider these serving suggestions:
Pairing Your Bunny Cake with Complementary Sides
A bunny cake is delightful on its own, but pairing it with the right sides can elevate your dessert table. Try serving it alongside:
- Fresh Berries: Raspberries, strawberries, or blueberries bring a pop of color and a burst of freshness that complements the sweetness of the cake.
- Whipped Cream: A dollop of light whipped cream balances out the cake’s richness and adds a lovely texture.
- Ice Cream: Vanilla or coconut ice cream is a crowd-pleaser and makes for a delightful contrast, especially if you enjoy warm cake!
Creative Ways to Present Your Bunny Cake
Presentation matters! Consider these fun ideas to make your easy bunny cake recipe even more appealing:
- Decorative Platter: Place your cake on a colorful, themed platter. Surround it with edible flowers or additional fruits for visual allure.
- Cake Toppers: Use cute bunny-shaped cake toppers or seasonal figures to enhance the festive feel.
- Slice it Up: Cut the cake into bunny-shaped slices for guests—fun, unique, and guaranteed to be a hit!
For more inspiration on creative presentations, check out Food52’s entertaining tips or Martha Stewart’s dessert ideas. Your bunny cake will surely become the highlight of any gathering!
Time Breakdown for Easy Bunny Cake
Creating a delightful easy bunny cake recipe can be a fun and rewarding experience. To help you plan your baking adventure, here’s a breakdown of the time involved:
Preparation Time
Get ready to dive into the fun! You’ll need about 20-25 minutes to gather your ingredients, preheat the oven, and mix the batter. This is your chance to unleash your inner baker! Don’t forget to prep your baking pans with non-stick spray or parchment paper for easy cake removal.
Cooking Time
Once your cake batter is ready, it’s time for the oven magic! Bake your bunny cake for 30-35 minutes. Keep an eye on it; you want that perfect golden brown!
Total Time
In total, carve out about 1 hour for your delicious creation, including prep and baking. Just imagine the joy of presenting this charming cake to friends and family! If you want more tips on baking cakes, check out this resource for expert baking advice.
Now, who’s ready to get baking?
Nutritional Facts for Easy Bunny Cake
Calories per serving
If you're wondering about the guilt factor, the easy bunny cake recipe offers about 250 calories per slice. This makes it a delightful treat without completely derailing your dietary goals. Enjoying a slice here and there can definitely fit into a balanced diet, especially if you’re active and mindful of portion sizes.
Other nutritional highlights
This scrumptious cake isn't just about calories; it can also be enjoyed with a sense of nutritional balance. Here are some highlights:
- Fat: Approximately 10g per serving, primarily from the frosting.
- Sugars: Around 20g, adding that delightful sweetness.
- Protein: Roughly 3g, thanks to the eggs and any dairy used.
For those mindful of added sugars, consider using natural sweeteners to make modifications. Also, if you’re interested in the health benefits of baking at home versus store-bought options, you might want to read more from sources like the American Heart Association about making healthier ingredient swaps.
Remember, enjoying this cake is about balance. Indulge in moderation, and you’ll find the joy in every bite!
FAQs about Easy Bunny Cake
Can I make the bunny cake in advance?
Absolutely! The easy bunny cake recipe is perfect for prep-ahead enthusiasts. You can bake the cake layers a day or two in advance. Just wrap them tightly in plastic wrap and store them in the refrigerator or at room temperature if they’re properly covered. This not only saves you time but can also enhance the flavor as the cake tends to settle and become moister. Assemble and decorate the cake closer to the event to keep it looking fresh and fabulous.
What can I substitute for chocolate icing?
If chocolate isn’t your thing (or you’re trying to minimize sugar), there are delightful alternatives. Consider using a simple vanilla buttercream icing or a fluffy cream cheese frosting. For a lighter option, a whipped Greek yogurt frosting can be an excellent substitute that cuts down on sugar and calories—perfect for those health-conscious guests! You could even drizzle over some fruit compote for a splash of color and flavor. Explore more options for frosting here.
How do I store leftover bunny cake?
Leftover bunny cake? Lucky you! It can be stored in an airtight container in the fridge for up to five days. If you want to keep it fresh for a longer period, you can freeze the cake slices. Just wrap them individually in plastic wrap and place them in a freezer-safe bag. When you’re ready to indulge again, let them thaw at room temperature or pop them in the microwave for a few seconds. With each bite, it’ll taste as good as new! Explore more on cake storage techniques here.
Taking the time to think through these FAQs can help ensure your easy bunny cake becomes the highlight of any gathering. Enjoy baking and sharing this sweet masterpiece!
Conclusion on Easy Bunny Cake
Creating an easy bunny cake is not just about baking; it's an experience filled with joy and creativity. From the delightful aroma of the cakes to the excitement of decorating, every step invites you to engage in a fun culinary adventure.
Remember, this cake is perfect for any occasion—birthdays, holidays, or just a cheerful weekend treat. The beauty of this easy bunny cake recipe lies in its simplicity; even if baking isn't your forte, you can whip it up with ease.
So, gather your loved ones and make lasting memories. For more tips and inspiration, check out Taste of Home and Allrecipes for even more delightful desserts!
Print
Easy Bunny Cake Recipe: A Fun and Delightful Spring Dessert
A delicious and fun bunny cake that is perfect for spring celebrations.
- Total Time: 1 hour
- Yield: 12 servings
Ingredients
- 2 cups all-purpose flour
- 1 ½ cups granulated sugar
- 1 cup unsalted butter, softened
- 4 large eggs
- 1 cup milk
- 2 ½ tsp baking powder
- 1 tsp vanilla extract
- Food coloring (optional, for decoration)
- 2 cups powdered sugar
- ¼ cup milk
- Marshmallows (for decoration)
Instructions
- Preheat your oven to 350°F (175°C).
- In a large bowl, cream together the butter and sugar until light and fluffy.
- Add the eggs one at a time, beating well with each addition.
- Mix in the vanilla extract.
- In another bowl, combine the flour and baking powder, then add it to the creamed mixture alternately with the milk.
- Pour the batter into prepared cake pans and bake for about 30 minutes.
- Let the cakes cool before frosting.
- Prepare the frosting by beating powdered sugar and milk together until smooth.
- Assemble the cakes and decorate them as a bunny.
Notes
- Let the cakes cool completely before frosting to avoid melting the frosting.
- Prep Time: 30 minutes
- Cook Time: 30 minutes
- Category: Dessert
- Method: Baking
- Cuisine: American
- Diet: Vegetarian
Nutrition
- Serving Size: 1 slice
- Calories: 400
- Sugar: 30g
- Sodium: 200mg
- Fat: 20g
- Saturated Fat: 10g
- Unsaturated Fat: 8g
- Trans Fat: 0g
- Carbohydrates: 50g
- Fiber: 1g
- Protein: 4g
- Cholesterol: 50mg