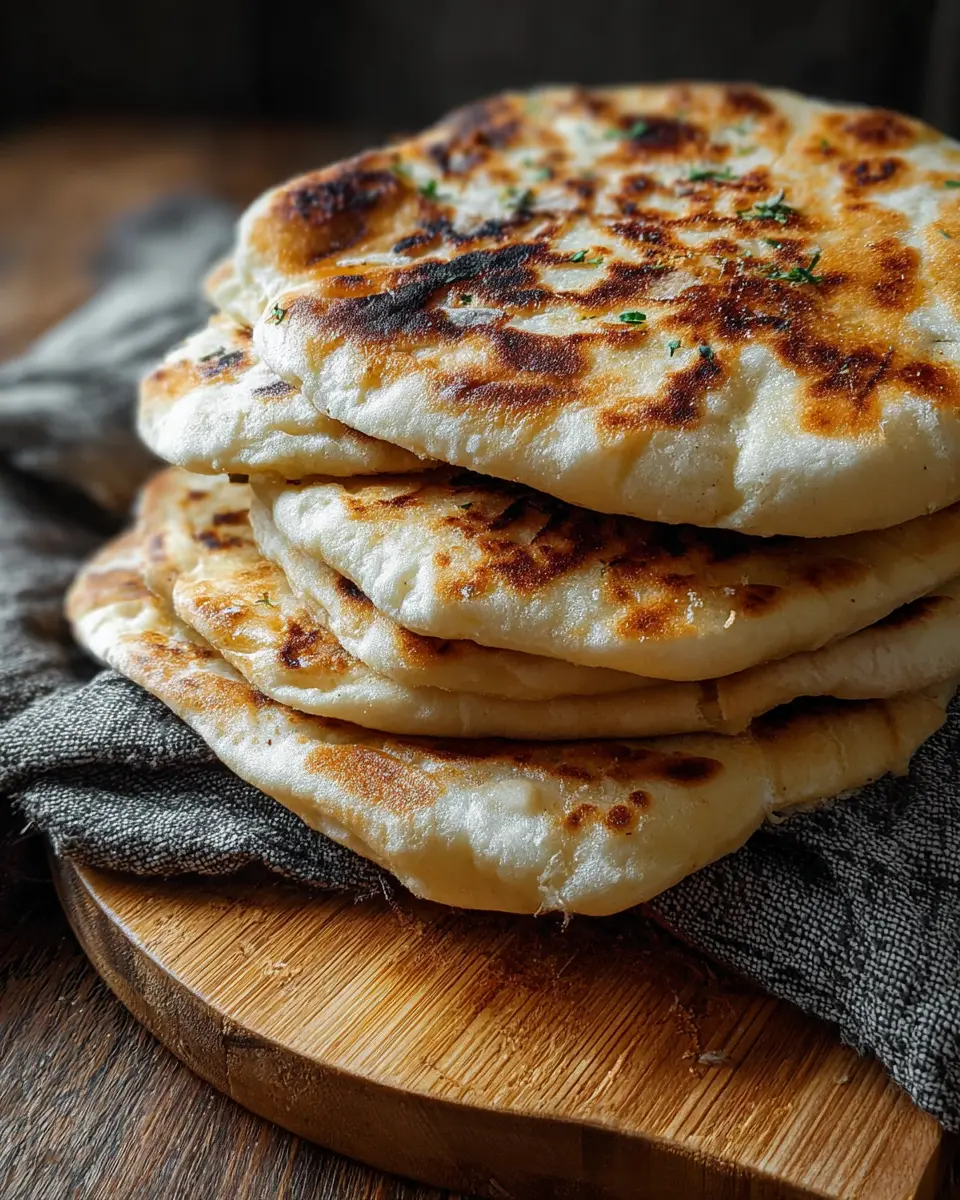
Introduction to Greek Pita Bread
If you're a young professional juggling a busy schedule while trying to eat healthily, Greek Pita Bread deserves a spotlight in your kitchen. This delightful, versatile bread is not only easy to make but also an excellent base for various meals, from quick lunches to satisfying dinners.
Why Greek Pita Bread is a Must-Try
Let’s be honest, life can get hectic, and whipping up an elaborate meal isn’t always feasible. That’s where Greek Pita Bread comes into play! It’s perfect for on-the-go meals, as you can stuff it with almost anything. Imagine warming a pita pocket and filling it with grilled chicken, fresh vegetables, and a drizzle of tzatziki sauce. Sounds mouthwatering, right? This quick preparation means you can enjoy a satisfying meal without sacrificing quality or health.
- Simple Ingredients: Traditional recipes call for flour, water, yeast, salt, and a pinch of sugar. These are pantry staples you likely already have.
- Versatile Options: Whether you’re a vegetarian, a fan of lean meats, or someone who loves Mediterranean flavors, Greek Pita Bread can adapt to your dietary preferences.
- Healthy Choices: Packed with fiber and can be whole grain, pita bread offers a healthier alternative to regular bread. According to the Whole Grains Council, whole grains can support heart health and maintain energy levels — ideal for your busy lifestyle.
Besides being delectable and nutritious, making Greek Pita Bread from scratch is quite rewarding! You might be surprised by how satisfying it feels to create something so delicious. Plus, it opens the door for a fun cooking experience with friends or family.
Feeling inspired? Let’s dive into the recipe! Trust me, once you've tasted homemade Greek Pita Bread, store-bought versions will never feel the same. The aroma that fills your kitchen is just the cherry on top of this culinary adventure!
Incorporate Greek Pita Bread into your meal prep strategy. Your lunches will transform, bringing brightness and flavor that take the monotonous out of meal planning. And remember, the next time you're in a grocery store, think about those pitas. They could become a staple in your refrigerator, ready to elevate your meals at any moment!

Ingredients for Greek Pita Bread
Essential ingredients for homemade pita perfection
Creating Greek Pita Bread is easier than you might think! With just a handful of simple ingredients, you'll be well on your way to homemade deliciousness. Here's what you need:
- All-purpose flour: This is your base. For the perfect texture, consider using a blend of white and whole wheat flour.
- Warm water: This activates the yeast, so aim for about 110°F (43°C).
- Active dry yeast: Fresh yeast ensures your pita puffs wonderfully.
- Olive oil: Enhances flavor and contributes to that soft, chewy texture.
- Salt: A must for bringing out the flavors of your ingredients.
- Sugar: This isn't just for sweetness! A bit helps activate the yeast nicely.
If you’re looking for more in-depth guidance, many cooking websites like Serious Eats offer excellent resources on bread-making tips.
Why not gather your ingredients and prep for a delightful cooking session? Your home will soon be filled with the warm, inviting aroma of freshly baked pita!
Preparing Greek Pita Bread
Making Greek Pita Bread from scratch is a delightful culinary adventure that not only fills your kitchen with enticing aromas but also brings a taste of the Mediterranean to your table. Whether you're planning a cozy dinner with friends or simply craving a delicious snack, this guide will walk you through the steps for achieving soft, fluffy pitas. Let’s get started!
Activate the yeast
First things first: activating the yeast is a crucial step in making perfect Greek Pita Bread. Start by gathering your ingredients. You’ll need:
- 2 teaspoons of active dry yeast
- 1 teaspoon of sugar
- 1 cup of warm water (around 110°F or 43°C)
In a small bowl, whisk together the yeast and sugar in the warm water. Let it sit for about 5-10 minutes until it becomes frothy. This step ensures that your yeast is alive and ready to create all that lovely fluffiness in your pitas. If it doesn’t foam up, you might want to start with a new packet of yeast—don’t risk being left with flat pitas!
Combine dry ingredients
While the yeast is doing its magic, let’s focus on combining the dry ingredients. In a large mixing bowl, whisk together:
- 3 cups of all-purpose flour
- 1 teaspoon of salt
Salt is essential not just for flavor but also for regulating yeast activity. Make sure to mix it well so that the salt is evenly distributed.
Form the dough
Once your yeast mixture is frothy, it’s time to form the dough. Pour the yeast mixture into the flour mixture, and stir until it starts to come together. You can use a wooden spoon or your hands for this. The dough will be somewhat sticky, but that’s okay!
A little tip here: if you're short on time, consider preparing your pitas while you prep some delicious fillings like turkey bacon or chicken ham to go alongside.
Knead until smooth and elastic
Now comes the fun part—kneading! Turn the dough out onto a floured surface and begin kneading for about 8-10 minutes. Your goal is to achieve a smooth and elastic texture. Don’t rush this magic moment, as kneading helps develop gluten, giving your pitas that beautiful puff we all love. If the dough sticks to your hands, don’t hesitate to sprinkle a bit more flour.
Let the dough rise
After kneading, place the dough in a lightly oiled bowl, cover it with a damp cloth, and let it rise in a warm spot for about 1 hour, or until it has doubled in size. This period of rising is often referred to as proofing, and it’s during this time that the dough absorbs the air pockets, crucial for fluffy pitas. If you're feeling bold, you might even try making some homemade Tzatziki sauce during this waiting period!
Shape the pitas
Once the dough has risen, punch it down to release any trapped air. Divide the dough into 8 equal pieces, shaping each piece into a smooth ball. Roll each ball out into a circle about ¼ inch thick. The more uniform the thickness, the better your pitas will puff up during cooking!
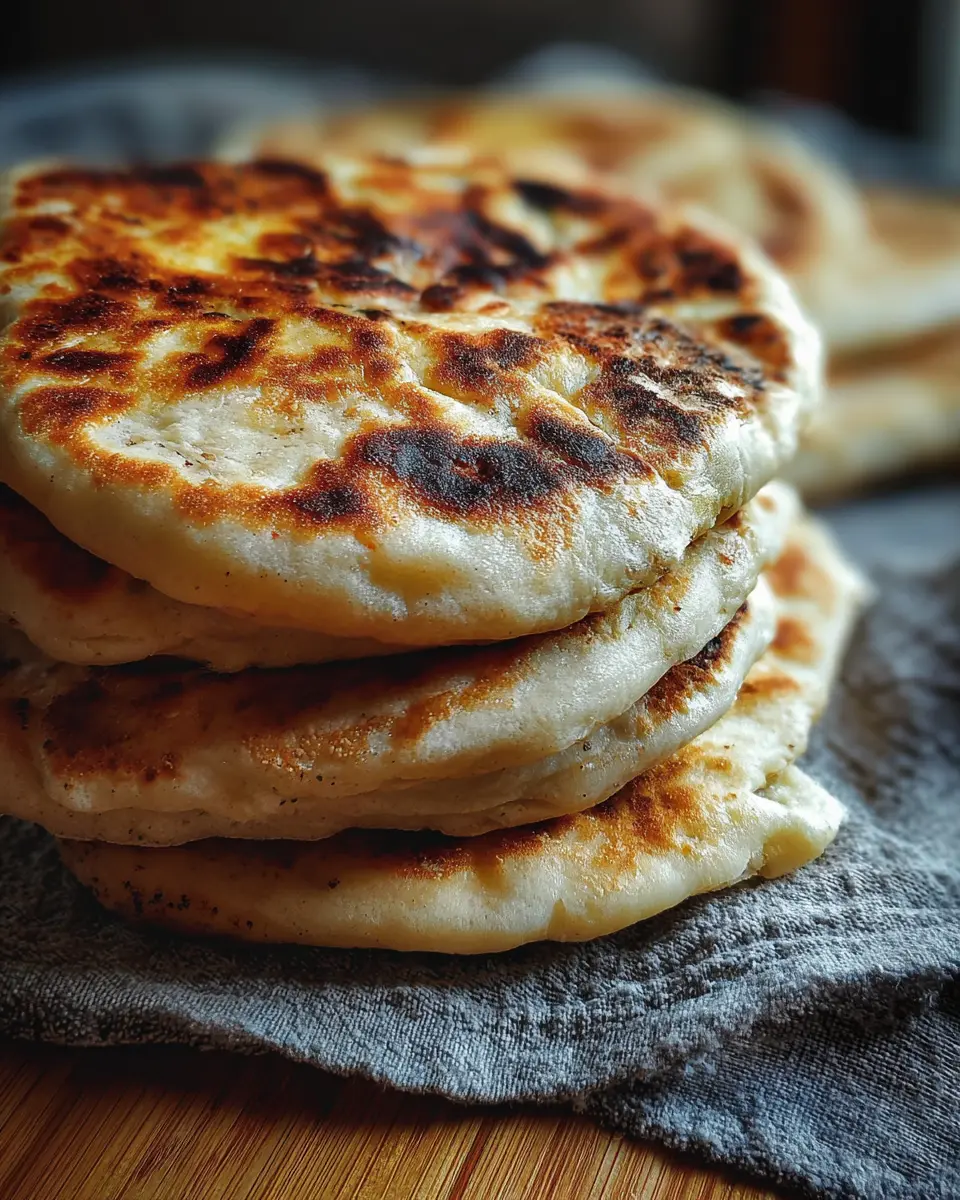
Cook the pitas
Finally, it’s time for cooking! Preheat a cast-iron skillet or a baking stone over medium-high heat. When it’s hot enough, place a dough circle on the skillet and cook for about 2-3 minutes on one side until bubbles appear. Flip it over and cook for another 1-2 minutes. You’ll know it’s done when it puffs up beautifully.
By following these steps, you'll have your very own batch of homemade Greek Pita Bread. Pair it with your favorite fillings, or serve it alongside a Mediterranean mezze platter. And don’t forget to share your pita-making experiences—after all, cooking is always better when enjoyed with friends!
For more recipes, consider checking out Taste of Home or Serious Eats for additional tips on bread-making and Mediterranean cuisine. Enjoy!
Variations on Greek Pita Bread
Exploring different ways to enjoy your Greek Pita Bread can elevate your meals and add delightful twists to your creations. Here are some variations to consider when you want to shake things up.
Whole-wheat Pita Options
If you’re looking for a healthier alternative to traditional pita, whole-wheat pita bread can be a game-changer. Whole grains not only provide a nutty flavor but also pack more fiber, making them a great choice for digestive health. You can easily incorporate whole-wheat flour into your Greek Pita Bread recipe. Just substitute half or all of the all-purpose flour with whole-wheat flour and adjust the water slightly to achieve the right dough consistency. For a more indulgent twist, consider adding a pinch of honey to your dough for a touch of natural sweetness.
Flavored Pita Versions
Why settle for plain when you can have flavored pita? Infusing your Greek Pita Bread with herbs and spices can transport your taste buds to Mediterranean shores.
- Herbs: Fresh or dried dill and oregano blend perfectly into the dough. They not only enhance flavor but also provide a lovely aroma.
- Spices: Try adding a sprinkle of sumac for a tangy punch, or opt for za'atar seasoning, which includes thyme, sesame seeds, and salt for a delightful Mediterranean flair.
These flavored variations are perfect for accompanying dips like tzatziki or hummus, allowing you to explore more creative pairings. For extra ideas, check out culinary websites like Serious Eats or Bon Appétit for some inspiration.
By trying these variations on your Greek Pita Bread, you can create a fun culinary experience that delights all the senses! Happy baking!
Cooking Tips and Notes for Greek Pita Bread
Common pitfalls to avoid
Making Greek Pita Bread at home is a rewarding experience, but there are a few common missteps to steer clear of:
- Dough Too Cold: Make sure your dough is at room temperature when you start working with it; cold dough doesn't rise well.
- Overworking the Dough: Knead just until smooth. Over-kneading can lead to dense pita rather than the soft, fluffy bread you want.
- Incorrect Oven Temperature: Preheat your oven sufficiently. If it's not hot enough, your pitas may not puff up properly. Aim for at least 475°F for the best results.
For more baking insights, you can check out this guide on dough management.
How to achieve the perfect puff
It’s all about technique! To get that heavenly puff in your Greek Pita Bread, follow these tips:
- Roll Evenly: When rolling out the dough, ensure you maintain an even thickness of about ¼ inch. Uneven areas can affect how they puff.
- Bake Immediately: Place the pitas in the oven right after rolling to retain the heat and moisture.
- Steam is Key: Adding steam in the oven can help; try placing a small pan of water in the oven during baking.
These small steps can significantly improve your pita-making experience. Happy baking!
Serving Suggestions for Greek Pita Bread
Ideal Dishes to Serve with Pita
Greek pita bread is wonderfully versatile and pairs perfectly with a variety of dishes. Consider serving it alongside:
- Hummus: This classic Middle Eastern dip is a crowd favorite.
- Tzatziki: The cool, creamy yogurt sauce enhances each bite.
- Grilled Meats: Marinated chicken or turkey bacon skewers make for a savory experience.
- Fresh Salads: A Greek salad complements pita beautifully with its vibrant flavors.
Each of these options brings out the charming qualities of pita, making your meal feel like a restaurant experience right at home. Try enhancing your dishes with fresh herbs like dill or mint for those extra layers of flavor.
Creative Toppings to Try
Want to rev up your Greek pita bread game? Get adventurous with these unique toppings:
- Feta Cheese and Olives: A Mediterranean staple that gives a briny richness.
- Roasted Vegetables: Seasonal veggies add color and nutrition.
- Avocado and Cherry Tomatoes: Perfect for a refreshing twist, packed with healthy fats.
- Spicy Chicken Ham: Add some heat for those who enjoy a kick.
These combinations not only savor well but also lend themselves beautifully to sharing. For more inspiration, check out resources like Serious Eats for delicious pita experiences. The versatility of Greek pita bread truly makes it a kitchen staple worth having!
Time Breakdown for Greek Pita Bread
When you're ready to make homemade Greek Pita Bread, knowing the time required can make all the difference. Here's a handy breakdown to keep you on track:
Preparation Time
Gathering your ingredients and mixing the dough takes about 10 minutes. That’s a breeze, right? You'll be amazed at how quickly you can set the stage for delicious bread.
Cooking Time
Once the dough has risen, it’s game time! Cooking your pitas on a hot skillet usually takes about 5–7 minutes per batch. You’ll want to keep an eye on them to achieve that perfect puff.
Total Time from Start to Finish
All in all, expect about 1 hour from start to finish, including rising time. It’s a small window for such a rewarding, fresh taste!
For more tips on making the best pita bread, consider checking out resources like King Arthur Baking or Bon Appétit. Happy baking!
Nutritional Facts for Greek Pita Bread
Calories per pita
In a typical serving, a single Greek Pita Bread contains around 160 calories. This makes it a fantastic base for a variety of dishes, whether you're crafting a cozy wrap or enjoying it as a side with your Mediterranean meal.
Macronutrient breakdown
When it comes to macronutrients, a standard Greek pita is quite balanced:
- Carbohydrates: Approximately 30 grams
- Protein: Roughly 5 grams
- Fat: About 1.5 grams
These nutritional properties make Greek Pita Bread a smart choice for those seeking a wholesome option. It pairs well with proteins like turkey bacon or chicken ham, giving you a satisfying, well-rounded meal. It's always interesting to note how such a simple staple can pack both nutrition and flavor. In a world where healthy eating sometimes feels daunting, Greek pita serves as a reminder that simple can be delicious. For more detailed nutritional insights, check out Healthline's guide on whole grains and their benefits.
With its low calorie count and balanced macros, Greek Pita Bread is not just a treat but also a versatile addition to your meals, making healthy eating easier and more enjoyable!
FAQs about Greek Pita Bread
When it comes to Greek Pita Bread, you might have a few questions after whipping up a batch in your kitchen. We've gathered some of the most common inquiries, so let's dive in!
How can I store leftover pita bread?
Storing leftover Greek pita bread is straightforward! Place the pitas in a resealable plastic bag or wrap them tightly in aluminum foil. Make sure to push out any excess air to keep them from getting stale. Storing them at room temperature is fine if you'll use them within a few days. For longer storage, refrigeration can dry them out. Keep them in a cool, dry place for optimal freshness!
Can I freeze Greek pita bread?
Absolutely! Freezing Greek pita bread is a fantastic way to extend its shelf life. Simply place the pitas in a freezer-safe bag, removing as much air as possible. Label the bag with the date, and they can last for up to three months. When you're ready to enjoy some fresh pita, just take out what you need and let them thaw at room temperature or reheat them directly from the freezer.
What’s the best way to reheat pita bread?
Reheating Greek pita bread can transform them back to their fluffy glory! You can:
- Oven: Preheat to 350°F and wrap the pitas in foil. Heat for about 10 minutes.
- Skillet: Place on a hot, dry skillet for about 30 seconds on each side.
- Microwave: Wrap in a damp paper towel and microwave for 15-20 seconds if you're in a hurry.
Whichever method you choose, watch closely to avoid overcooking!
If you ever find yourself searching for more tips on bread storage or cooking techniques, don't hesitate to check out resources from the Bread Bakers Guild for expert advice. Enjoy your Greek Pita Bread adventures!
Conclusion on Greek Pita Bread
Why Incorporating Pita Into Your Meals Is a Game-Changer
Incorporating Greek Pita Bread into your meals can truly elevate your dining experience. This versatile bread not only serves as a perfect vessel for a variety of fillings, like savory grilled chicken or zesty roasted vegetables, but its unique pocket allows for fun and creativity in your cooking.
Imagine wrapping a slice of Turkey Bacon or some Chicken Ham alongside fresh greens and a dollop of tzatziki—delicious and healthy! Plus, it's a great way to enjoy Mediterranean flavors while being conscious of your dietary choices.
To learn more about the health benefits of whole grains, consider checking out resources from Harvard Health. So go ahead, give Greek Pita Bread a try, and transform your meals into exciting culinary adventures!
Print
Greek Pita Bread Made Easy: Perfect for Flavorful Dishes
A simple and delicious recipe for making Greek Pita Bread at home.
- Total Time: 1 hour 30 minutes
- Yield: 8 pitas
Ingredients
- 2 cups all-purpose flour
- 1 teaspoon salt
- 1 teaspoon sugar
- 1 tablespoon olive oil
- 1 cup warm water
- 2 teaspoons active dry yeast
Instructions
- In a bowl, combine warm water, sugar, and yeast. Let it sit for 5 minutes until frothy.
- In a large mixing bowl, combine flour and salt.
- Add the yeast mixture and olive oil to the flour mixture.
- Knead the dough for about 10 minutes until smooth.
- Place the dough in a greased bowl, cover, and let it rise for 1 hour.
- Preheat the oven to 475°F (245°C).
- Divide the dough into small balls and roll them out into circles.
- Bake for 3-5 minutes until they puff up.
- Remove from the oven and cover with a clean towel to keep warm.
Notes
- Make sure the water is warm, not hot, to activate the yeast properly.
- You can add herbs or spices to the dough for extra flavor.
- Prep Time: 15 minutes
- Cook Time: 15 minutes
- Category: Bread
- Method: Baking
- Cuisine: Greek
- Diet: Vegetarian
Nutrition
- Serving Size: 1 pita
- Calories: 150
- Sugar: 0g
- Sodium: 200mg
- Fat: 3g
- Saturated Fat: 0.5g
- Unsaturated Fat: 2g
- Trans Fat: 0g
- Carbohydrates: 30g
- Fiber: 1g
- Protein: 5g
- Cholesterol: 0mg