Introduction to Homemade Crunch Bars
When it comes to satisfying your sweet tooth, homemade crunch bars can be a delightful alternative to store-bought options. Perhaps you've noticed that those commercial versions often come with a long list of ingredients — many of which are hard to pronounce. By making your own crunch bars at home, you can take control of what goes into them. You can choose high-quality ingredients, ensure they are free from preservatives, and even customize the flavors to suit your taste buds. This creative process not only allows for healthy substitutions, like using turkey bacon for added protein, but it also often proves to be more cost-effective in the long run.
Finding Comfort in Nostalgia
Have you ever found yourself reminiscing about simple childhood snacks? Homemade treats often evoke memories of time spent in the kitchen with family, whether it was baking cookies or experimenting with different flavors. Making homemade crunch bars gives you that same warm feeling, transporting you back to those carefree days.
There's something pure and joyful about crafting something from scratch. According to a study from the Journal of Positive Psychology, engaging in activities like cooking can improve your mood and decrease stress. So why not whip up a batch of these crunch bars? They’re not only great for bringing back memories but also provide a satisfying snack that feels personal and special.
Benefits Beyond Taste
Not only do homemade crunch bars allow you to reminisce about your childhood, but they also offer an opportunity to bond with others. Whether you’re hosting a gathering or sharing snacks at the office, everyone appreciates a thoughtfully made treat. Plus, it's fun to surprise friends and coworkers with flavors and ingredients that are unique to your creativity.
For tips on getting started with healthy versions of classic snacks, check out resources like the American Heart Association for diet-friendly ingredients that can fit into your busy lifestyle.
In essence, making your homemade crunch bars is about more than flavor—it's about experience, nostalgia, and the personal touch that comes when you create something with your own hands. So gather your ingredients, and let’s make some memories together!
Ingredients for Homemade Crunch Bars
All the essentials you’ll need
Creating your own homemade crunch bars is both rewarding and delicious! To whip up these delightful treats, gather the following essentials:
- Crispy rice cereal: This is the star ingredient that gives your bars that classic crunch.
- Chocolate chips: Choose either milk, dark, or white chocolate, depending on your taste preference.
- Peanut butter: Creamy or crunchy, it adds richness and a nutty flavor that complements the chocolate beautifully.
- Marshmallows: Mini marshmallows melt into the mix to create a chewy texture.
- Butter: A staple in any baking recipe, it helps bind everything together.
Feel free to explore ingredient sources like King Arthur Baking. They offer excellent tips on selecting high-quality ingredients for your homemade crunch bars.
Optional add-ins for extra flavor
Why stop at the basics? Elevate your crunch bars with these optional add-ins:
- Nuts: Chopped almonds or walnuts add protein and a delightful crunch.
- Dried fruit: Raisins or cranberries provide a sweet contrast.
- Spices: A pinch of cinnamon or sea salt can enhance the flavor beautifully.
Mixing and matching these ingredients allow you to customize your homemade crunch bars to your liking. Experimenting with flavors can turn an ordinary snack into an extraordinary treat! Have fun and get creative!
Step-by-step Preparation of Homemade Crunch Bars
Making your own homemade crunch bars can be both satisfying and delicious! They’re a perfect treat to satisfy your sweet tooth, plus they're incredibly easy to whip up. Ready to dig in? Let’s walk through the preparation process step by step.
Gather your ingredients
Before you start, it’s crucial to have all your ingredients laid out—this not only speeds up the process but ensures you don’t miss anything vital. You'll need:
- 1 cup of unsalted butter
- 1 cup of peanut butter (crunchy or creamy, your choice!)
- 1 cup of granulated sugar
- 1 teaspoon of vanilla extract
- ½ teaspoon of salt
- 6 cups of crispy rice cereal (like Rice Krispies)
- 2 cups of chocolate chips (for topping)
You can find most of these ingredients at your local grocery store or online. Websites like Bon Appétit can offer great insights on selecting the best-quality products.
Melt the butter and peanut butter
Now, let’s get cooking! Start by melting the butter and peanut butter together in a large saucepan over low heat. You want them to blend smoothly, creating a luscious, creamy mixture. Stir consistently to prevent burning. This process typically takes about 4-5 minutes. The aroma is divine—what's not to love about the combination of peanut butter and butter?
Add vanilla and salt for flavor
Once your butter and peanut butter are melted and blended, it’s time to add in the flavor boosters: vanilla and salt. Stir in 1 teaspoon of vanilla extract and ½ teaspoon of salt. The vanilla enhances the overall flavor profile, while a pinch of salt offsets the sweetness of the bars, making everything just right.
Fold in the crispy rice cereal
After mixing in the flavorings, turn off the heat and fold in the crispy rice cereal. Doing this gently ensures that each flake gets coated with the peanut butter mixture. If you go too vigorous, you might crush the cereal, and we want that crunch to shine through in our homemade crunch bars!
Press the mixture into a baking pan
Now comes the fun part: transferring your mixture into a baking dish! Use a greased 9x13 inch pan (or line it with parchment paper for easier removal). Spread the mixture evenly and press it down firmly with the back of a spatula. This step is crucial for ensuring your bars hold together once cooled.
Melt the chocolate for the topping
While the mixture cools a bit, it’s time to melt the chocolate chips. You can do this in a microwave-safe bowl, heating in 30-second increments and stirring in between until melted and smooth. Alternatively, you could use a double boiler for a more controlled melting process.
Pour and spread the chocolate
Once your chocolate is melted to perfection, pour it over the pressed rice cereal mixture. Use a spatula to spread the chocolate evenly across the top. Feel free to sprinkle a few extra crispy rice cereal bits on top for an appealing finish.
Chill and cut your bars
Finally, you’ll want to chill your homemade crunch bars in the refrigerator for at least 1 hour, or until the chocolate is set. Once it’s chilled, lift the entire block out of the pan (thanks to that parchment paper if you used it!) and place it on a cutting board. Cut into squares, and voilà—you’ve got yourself a batch of delicious homemade crunch bars!
Enjoy these bars as a mid-afternoon treat or make them for a gathering! They'll be a hit, and you can even personalize them by adding nuts or dried fruits. Happy snacking!

Variations on Homemade Crunch Bars
Creating your own homemade crunch bars allows for endless customization! Let's dive into some delightful variations that cater to different cravings and occasions.
Peanut Butter and Chocolate Chip Mix
If you're a fan of peanut butter, this combination provides the perfect balance of creaminess and crunch. Simply swap out a portion of your base with smooth or crunchy peanut butter. Add in a handful of chocolate chips for that indulgent touch. The silky melted chocolate married with the nutty flavor creates a treat you won’t forget. For a health boost, consider drizzling some melted dark chocolate on top before they set. Trust me, this mix is a crowd-pleaser!
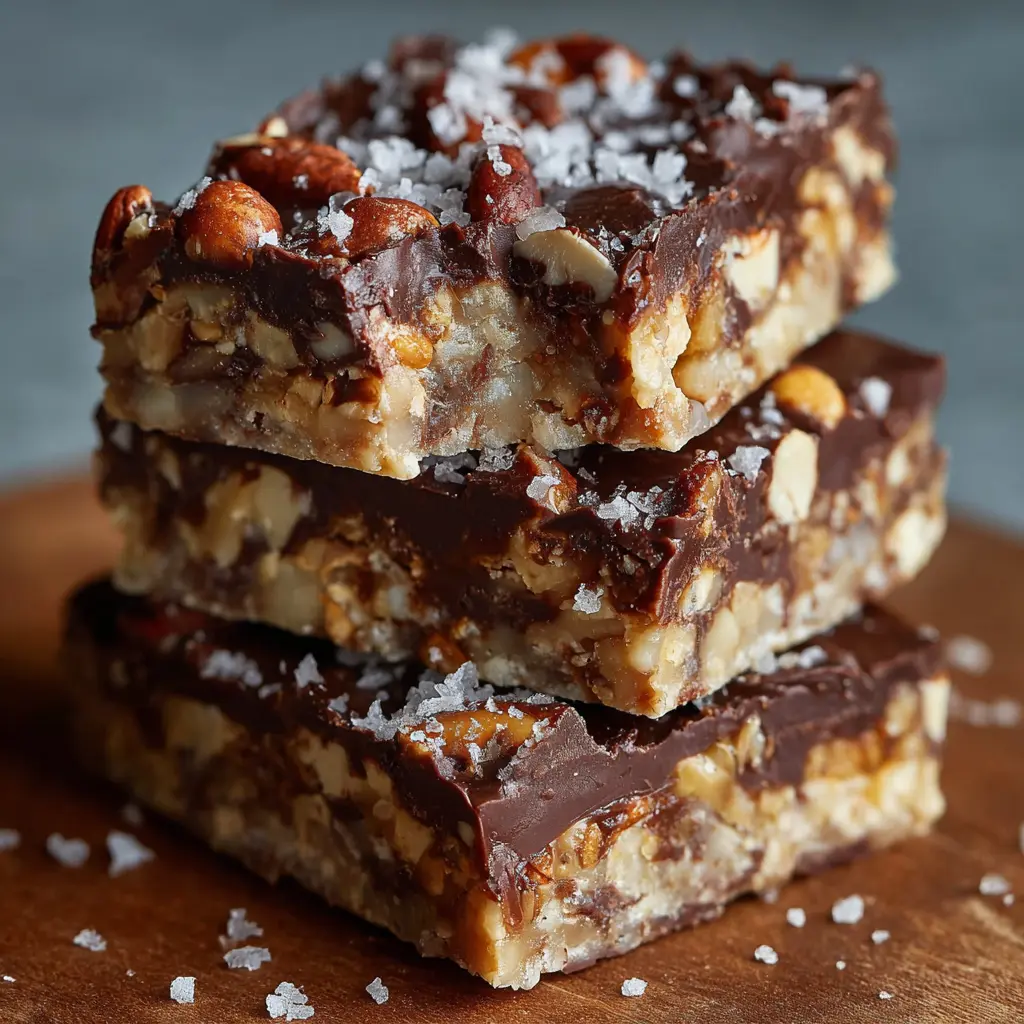
Nutty Crunch Variety
For those who enjoy a more robust flavor profile, introducing a mix of nuts can transform your homemade crunch bars. Think almonds, walnuts, or even our favorite, pecans! By adding about half a cup of chopped nuts to your bar mixture before pouring it into your mold, you’ll achieve a satisfying crunch. Have you tried toasting your nuts beforehand? It enhances their flavor and adds depth to your bars. You can find diverse nut choices and their nutritional benefits here.
Seasonal Flavors for Festive Touches
Don’t be afraid to get creative with seasonal flavors! During the fall, consider pumpkin spice for a cozy vibe. In the summer, a hint of coconut can provide a refreshing twist. By mixing in ingredients like dried cranberries or mini marshmallows during the holidays, these homemade crunch bars become not just a snack, but a festive delight! What seasonal flavors make your taste buds dance? Spreading a little creativity never hurt anyone!
Try out these variations; each bite is a new adventure waiting to unfold!
Cooking Tips and Notes for Homemade Crunch Bars
When making homemade crunch bars, a few tricks can elevate your treats from good to unforgettable!
Choose Quality Ingredients
The key to delicious crunch bars is using fresh, high-quality ingredients. Think about:
- Chocolate: Opt for a rich dark chocolate or your favorite milk chocolate for a creamy finish.
- Cereal: Use puffed rice or cornflakes for that perfect crunch. Check their freshness to ensure optimal texture.
Master the Melting Process
When melting your chocolate, do it slowly over low heat or in short bursts in the microwave. This helps prevent the chocolate from seizing up. A trusted source like Serious Eats offers great guidance on chocolate tempering.
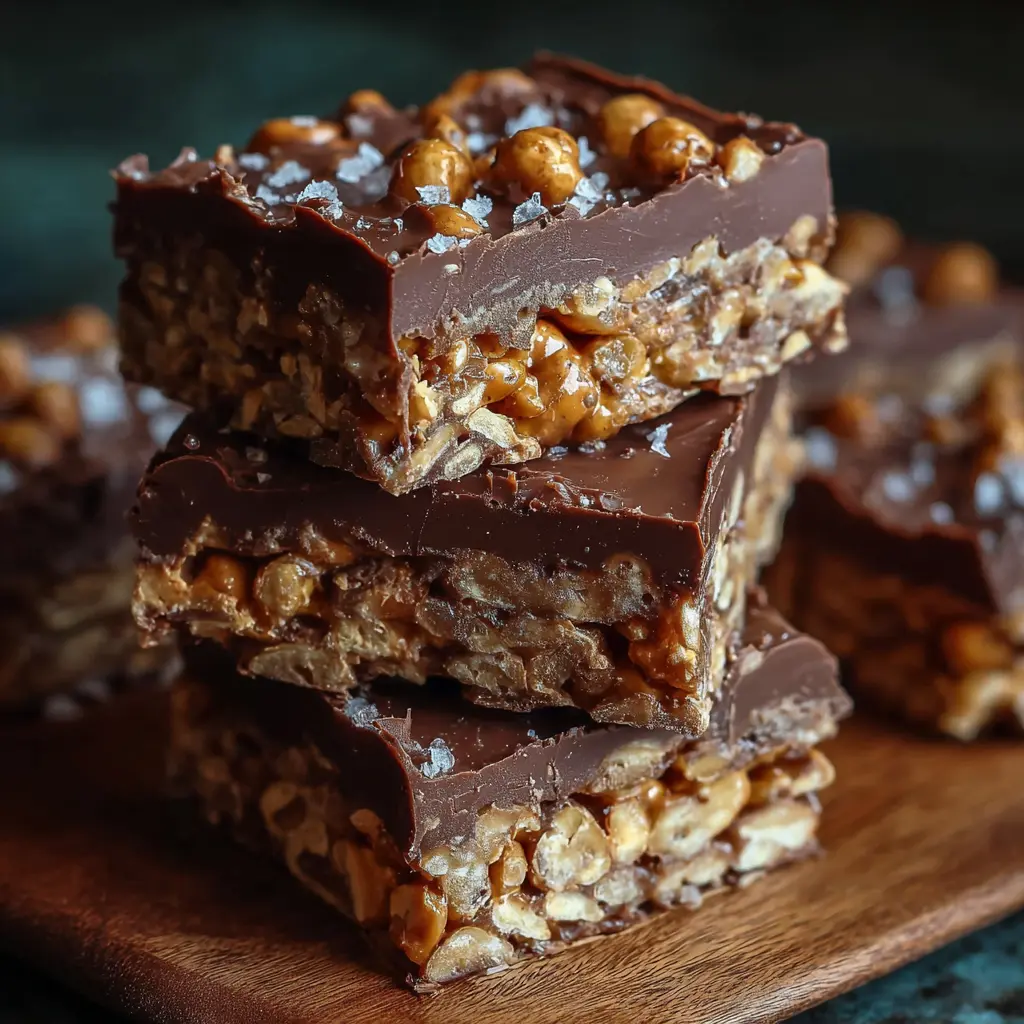
Get Creative with Add-ins
Feel free to experiment! Adding ingredients like:
- Dried fruit (raisins, cranberries)
- Nuts (almonds, cashews)
can provide amazing textures and flavors. Have you ever thought about adding a sprinkle of sea salt on top? It can enhance the sweetness beautifully.
Don't Rush the Setting
Patience is your friend; let your bars chill in the fridge for several hours before cutting. This helps them hold their shape and provides the perfect crunchy bite. Be sure to wrap any leftovers tightly, so they stay fresh longer.
By enjoying the process and applying these tips, you’re on your way to creating scrumptious homemade crunch bars that friends and family will adore!

Homemade Crunch Bars: Easy No-Bake Treats for Everyone
Delicious homemade crunch bars that are easy to make and require no baking. Perfect for everyone!
- Total Time: 2 hours 15 minutes
- Yield: 16 bars
Ingredients
- 2 cups crispy rice cereal
- 1 cup milk chocolate chips
- ½ cup unsweetened peanut butter
- ¼ cup honey
Instructions
- In a medium saucepan, combine honey and peanut butter. Heat over low until melted and smooth.
- Remove from heat and stir in the chocolate chips until melted.
- Add the crispy rice cereal and mix until well coated.
- Pour the mixture into a greased 8x8 pan and spread evenly.
- Refrigerate for at least 2 hours until firm, then cut into bars.
Notes
- Store in an airtight container for up to one week.
- For a crunchy texture, don’t overmix the cereal with the chocolate mixture.
- Prep Time: 10 minutes
- Cook Time: 5 minutes
- Category: Desserts
- Method: No-Bake
- Cuisine: American
- Diet: Vegetarian
Nutrition
- Serving Size: 1 bar
- Calories: 150
- Sugar: 8g
- Sodium: 50mg
- Fat: 7g
- Saturated Fat: 3g
- Unsaturated Fat: 4g
- Trans Fat: 0g
- Carbohydrates: 19g
- Fiber: 1g
- Protein: 3g
- Cholesterol: 0mg