Introduction to No Bake Oreo Cheesecake
What is No Bake Oreo Cheesecake?
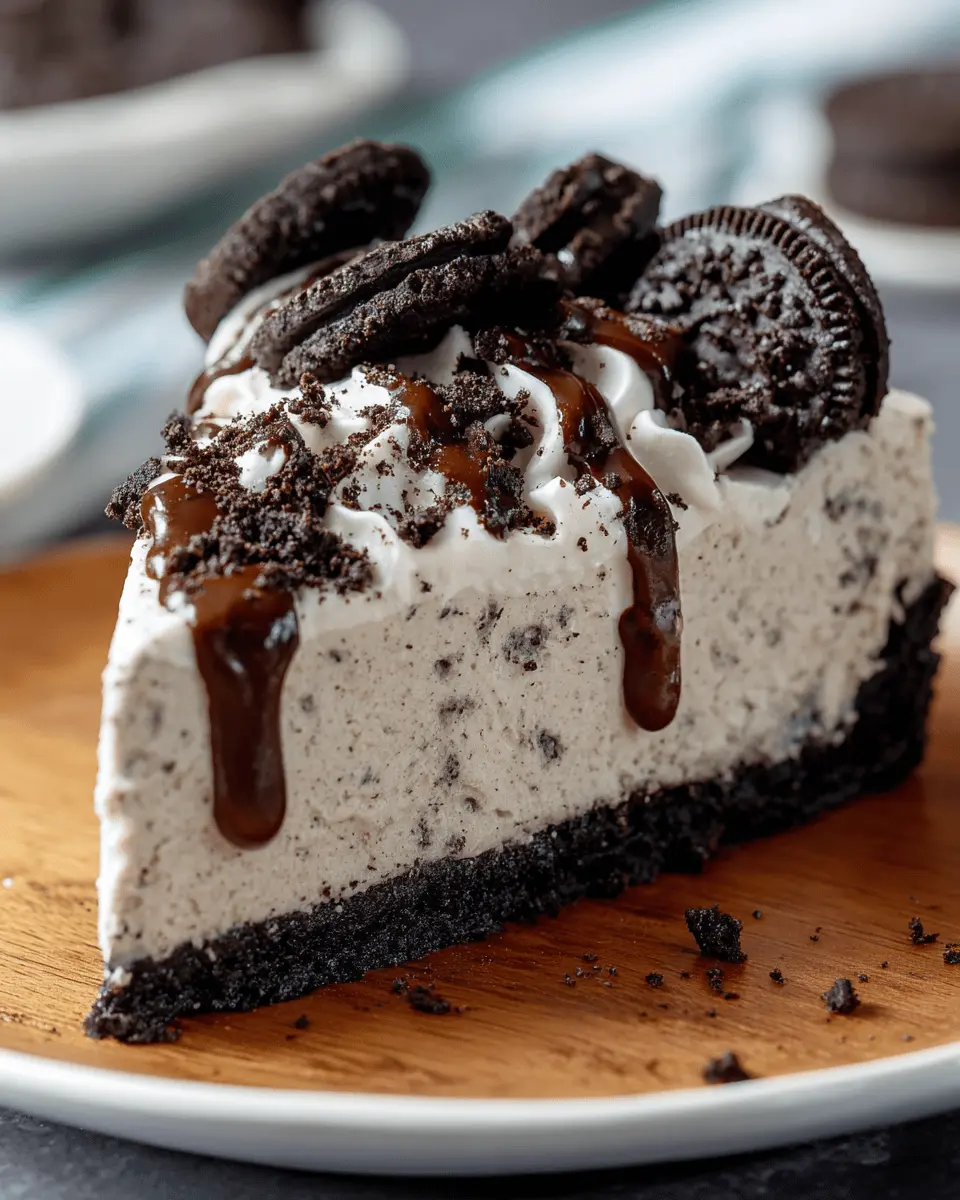
No Bake Oreo Cheesecake is a delightful dessert that combines the rich, creamy texture of cheesecake with the beloved flavor of Oreo cookies. Unlike traditional cheesecakes, which require baking, this version simplifies the process, making it perfect for those bustling weekday evenings or impromptu gatherings. It usually features a crushed Oreo crust, a luscious cream cheese filling enhanced with Oreo bits, and a topping of whipped cream or additional Oreos for that extra crunch.
Why No Bake? The Convenience Factor
The beauty of a no bake Oreo cheesecake lies in its convenience. Imagine coming home after a long day and knowing that a delicious dessert is just a few steps away without ever turning on the oven. This recipe is not only quick to prepare but also doesn’t require extensive kitchen equipment. Just a mixing bowl, a spatula, and a springform pan will do the trick! For those interested in the science of no-bake desserts, you might find this article on cheesecake chemistry quite enlightening.
Plus, no bake desserts have a unique appeal. They tend to have a lighter texture compared to baked versions, allowing the flavors to shine through more vividly. This no bake Oreo cheesecake is a fantastic treat for any occasion, whether it’s a casual dinner party or a significant celebration.
A Personal Anecdote: My First Attempt
I’ll never forget my first attempt at making a no bake Oreo cheesecake. It was a summer evening, and my friends arrived unexpectedly. In a mild panic, I rummaged through my pantry and found a pack of Oreo cookies tucked away. With a few additional ingredients, I whipped up the cheesecake mixture and pressed the crust into the pan. As it chilled in the fridge, I was anxious but hopeful.
When I finally served it, my friends were instantly hooked. The smile on their faces, as they took their first bite, was priceless. That moment solidified my love for no bake recipes, and I’ve been making this dessert ever since!
If you're looking for an easy yet impressive dessert that guarantees smiles around the table, look no further than this ultimate no bake Oreo cheesecake. Get ready to dive into the deliciousness!
Ingredients for No Bake Oreo Cheesecake
Essential Ingredients for Perfect Cheesecake
Creating a rich and creamy no bake Oreo cheesecake starts with the right ingredients. Here’s what you’ll need to whip up this decadent dessert:
- Oreo Cookies: About 25-30, crushed for the crust and filling.
- Cream Cheese: Two packages (16 oz total) for that luscious, creamy texture.
- Heavy Whipping Cream: One cup to ensure a fluffy and stable filling.
- Granulated Sugar: Just half a cup to balance the flavors without overpowering the Oreo taste.
- Vanilla Extract: One teaspoon enhances the overall sweetness and adds depth.
These essential ingredients form the backbone of your cheesecake, creating a harmony of flavors that’s hard to resist.
Optional Ingredients for Customization
Want to take your no bake Oreo cheesecake to the next level? Consider adding:
- Chocolate Chips: Sprinkle some across the top or mix into the filling for extra chocolatey goodness.
- Turkey Bacon Crumbles: For a surprising twist, a savory crunch can be a unique addition (though unconventional).
- Fruit Toppings: Fresh berries or caramel drizzle can elevate the presentation and provide a fresh contrast.
Feel free to play around! For more tips on customizing your cheesecake, check out expert advice from sources like Food Network. Happy baking!
Preparing No Bake Oreo Cheesecake
Who doesn’t love the rich, creamy flavor of cheesecake, especially when it’s a no bake Oreo cheesecake? This dessert is a hit at any gathering, and the best part is that it requires no oven time. Let’s dive into the steps to make this delightful treat!
Gather Your Ingredients
Before you start mixing and whipping, you'll want to assemble all your ingredients. Having everything ready not only speeds up the process but also makes for a more organized kitchen! Here’s what you need:
- Oreo cookies: About 24 for the crust and more for toppings
- Unsalted butter: ½ cup, melted
- Cream cheese: 16 ounces, softened
- Powdered sugar: 1 cup
- Vanilla extract: 1 teaspoon
- Whipped topping: 8 ounces, thawed
- Optional: Chocolate sauce or extra Oreo crumbs for garnish
If you’re curious about the health benefits of the ingredients, the crispiness of Oreos combined with the creaminess of cheese creates a unique texture that many enjoy. You might also want to check out this link on dairy benefits for more info on how cream cheese plays into a balanced diet.
Cream Cheese Mixture
Start by placing your softened cream cheese in a mixing bowl. Using an electric mixer, beat the cream cheese until it’s nice and smooth. This step is crucial because lumps will ruin that creamy texture we’re aiming for! Add the powdered sugar and vanilla extract, mixing again until well combined. For an extra level of creaminess, consider using a high-quality brand of cream cheese. They can make a noticeable difference in flavor.
Incorporating Oreo Pieces
Now comes the fun part—crushing those delectable Oreo cookies! You can use a food processor or simply place your cookies in a zip-top bag and crush them with a rolling pin. You’ll want to reserve about 3 tablespoons for garnishing later. Fold the crushed Oreo crumbs into the cream cheese mixture until everything is evenly incorporated. This is where the flavor really begins to shine!
Folding in the Whipped Topping
To achieve that airy texture, it’s important to gently fold in the whipped topping. Add about half of the whipped topping to the cream cheese mixture and use a spatula to combine. Be cautious not to over-mix; we want to maintain that light and fluffy texture. Once it’s blended, fold in the remaining whipped topping until just combined. At this stage, you might be tempted to taste the batter (and you should!), it’s the perfect balance of sweet and creamy.
Filling the Oreo Crust
Now it’s time to fill your crust! If you haven’t prepared the crust yet, crush your remaining Oreos and mix them with melted butter, then press this mixture firmly into the bottom of a pie dish or springform pan. Once that’s done, pour the cheesecake filling over the crust evenly. Spread it with a spatula to ensure it’s level.
Chilling Process
This is where the no bake Oreo cheesecake magic happens! Place your cheesecake in the refrigerator and allow it to chill for a minimum of 4 hours, or ideally, overnight. The longer it chills, the firmer and more set it will be—perfect for slicing and serving later.
When you’re ready to enjoy your creation, decorate it with whipped cream, additional Oreo pieces, or a drizzle of chocolate sauce. Trust me, the anticipation will only make the first bite sweeter!
Enjoy this creamy, delectable no bake Oreo cheesecake at your next gathering, and watch it disappear in no time! Whether it's a birthday party or simply a weekend treat, you're sure to impress. Let us know how it turns out!

Variations on No Bake Oreo Cheesecake
If you're smitten with the classic no bake Oreo cheesecake, get ready to take your dessert game up a notch. Here are two delightful variations that pack in additional flavors while keeping that creamy goodness we all crave.
Chocolate Oreo Cheesecake Twist
Chocoholics, rejoice! This version of the no bake Oreo cheesecake is a dream come true. To create the rich chocolatey base, simply substitute half of the cream cheese with chocolate cream cheese or blend in melted dark chocolate.
- Ingredients to consider:
- 8 oz chocolate cream cheese
- 1 cup melted dark chocolate
- Classic Oreo cookie crust
Top with chocolate shavings or extra chopped Oreos for added texture. This variation is not just visually striking; it also deepens the flavor profile, delivering a dessert that’s decadent yet oh-so-easy to make. Check out this chocolate-themed recipe to inspire your chocolate cravings!
Peanut Butter Oreo Cheesecake
If peanut butter is your jam, why not blend it into your no bake Oreo cheesecake? The nutty flavor pairs beautifully with the Oreo crust and creates an indulgent twist.
- Key ingredients:
- 1 cup creamy peanut butter
- 8 oz cream cheese
- Chopped peanuts for garnish
Fold the peanut butter into the cream cheese mixture until smooth, and pour it onto your cookie crust. The sweet and salty notes will leave your guests begging for the recipe. For a few more ideas, check out this peanut butter lovers' guide to expand your kitchen repertoire.
No matter which variation you choose, you'll have an impressive dessert that's sure to please. So whip up one of these today and let the compliments roll in!
Cooking Tips and Notes for No Bake Oreo Cheesecake
Choosing the Right Cream Cheese
When making no bake Oreo cheesecake, quality matters! Opt for full-fat cream cheese for a richer, smoother texture. Low-fat versions often lack the same creaminess and can result in a less satisfying cheesecake. To help you choose, always check for a brand that’s creamy and spreadable, like Philadelphia or any local artisan cream cheese. Speaking of cream cheese, always let it sit at room temperature for about 30 minutes before using. This helps it blend seamlessly with your other ingredients.
Tips for Crushing Oreos
Crushing Oreos sounds simple, but there’s a technique to it! For the best results, place the cookies in a resealable plastic bag and use a rolling pin to crush them. This method not only keeps the mess contained but also allows you to control how fine or chunky the crumbs are. Alternatively, you can use a food processor for a quick and uniform crush—just be careful not to pulverize them into dust. Aim for a crumb texture that retains a bit of structure; it'll create a fantastic crust for your cheesecake.
Need more tips? Check out The Spruce Eats for expert baking advice.
Serving Suggestions for No Bake Oreo Cheesecake
Creative Presentation Ideas
When serving your no bake Oreo cheesecake, presentation can elevate the experience. Consider these enticing options:
- Layered Jars: Serve individual portions in mason jars. Layer crumbled Oreos and cheesecake filling to create a visually stunning dessert that guests can enjoy on the go.
- Chocolate Drizzle: Add a simple chocolate ganache or melted chocolate drizzle on top for a touch of elegance. It not only enhances flavor but also adds a beautiful glossy finish.
- Garnish with Fresh Ingredients: Top each slice with fresh berries or a sprig of mint. Not only does this brighten the dish, but it also brings a refreshing contrast to the rich cheesecake.
Pairing Suggestions for a Sweet Treat
To complement your no bake Oreo cheesecake, consider these delightful pairings:
- Coffee or Cold Brew: The rich flavors of coffee pair beautifully with the chocolatey cheesecake, enhancing its taste while providing a lovely caffeine kick.
- Fruit Compote: A homemade berry or cherry compote can add a tartness that balances the sweetness of the cheesecake. It's a great way to sneak in some fruit!
- Nutty Crust Options: Instead of traditional crust, try using crushed nuts like pecans or almonds for a different texture and flavor twist.
No matter how you choose to present and pair your no bake Oreo cheesecake, your guests are sure to be impressed! For more tips and tricks, check out this presentation guide and elevate your dessert game today!
Time Breakdown for No Bake Oreo Cheesecake
Preparation Time
Creating your no bake Oreo cheesecake is as easy as pie! You'll spend about 20-30 minutes whipping together the ingredients. This includes crushing the Oreos and blending the creamy filling to perfection. Gather all your ingredients, set up your workspace, and you’re ready to go.
Chilling Time
After assembling your tantalizing cheesecake, it’s time for it to chill. Pop it in the refrigerator for at least 4-6 hours, allowing it to set properly. If you can wait overnight, even better! That extra time really enhances the flavors.
Total Time
So, when you add the preparation and chilling times together, you’re looking at a total of around 4.5 to 6.5 hours from start to finish. It might seem like a while, but most of that time is hands-off while you wait for the cheesecake to chill and firm up. Trust me, the wait will be worth it! For tips on making this even quicker, check out this guide on no-bake desserts.
Nutritional Facts for No Bake Oreo Cheesecake
Calories Per Serving
If you’re wondering how indulging in a slice of no bake Oreo cheesecake fits into your diet, you’ll be glad to know it’s quite manageable! Each serving contains approximately 350 calories, a delightful balance when savored as an occasional treat.
Other Nutritional Information
Beyond the calorie count, this heavenly dessert also packs in:
- Fat: About 25g, primarily from the cream cheese and whipped topping, offering a rich mouthfeel.
- Carbohydrates: Roughly 30g, mostly from the Oreos, providing that satisfying sweetness.
- Protein: Around 4g, depending on your choice of cream cheese.
- Sugar: Approximately 20g, because let's face it, we love a little sweetness!
In moderation, this no bake Oreo cheesecake can be a part of a balanced diet. For tips on creating healthier versions or swapping ingredients, check out this resource. What’s your favorite cheesecake flavor?
FAQs about No Bake Oreo Cheesecake
Can I make this cheesecake in advance?
Absolutely! One of the great perks of this no bake Oreo cheesecake is that it tastes even better when made a day in advance. Not only does it allow the flavors to meld beautifully, but it also saves you precious time on the day you plan to serve it. Just be sure to cover it well with plastic wrap or store it in an airtight container in the fridge to keep it fresh. For best results, aim to enjoy it within 3-4 days.
How do I know when the cheesecake is set?
Determining the perfect set for your no bake Oreo cheesecake is crucial for that ideal creamy texture. After chilling for at least 4 hours, gently give the cheesecake a tap. If it slightly jiggles but is mostly firm, it’s ready! An invaluable tip is to use a toothpick; inserting it into the center should come out clean, indicating your cheesecake has set properly. If it’s too wobbly, fear not! Just pop it back in the fridge for another hour or so.
What are some alternatives to Oreos?
While Oreos are delicious, there are plenty of options if you're looking to mix it up. Consider using:
- Graham crackers for a classic taste.
- Chocolate wafer cookies for a similar rich flavor.
- Gluten-free cookies if you have dietary restrictions.
Feel free to get creative! What’s your favorite cookie to snack on? You might discover a new twist on this classic dessert. For more ideas, check out this cookie substitute guide.
With these FAQs, I'm hopeful you're feeling equipped and excited to whip up your very own no bake Oreo cheesecake!
Conclusion on No Bake Oreo Cheesecake
Recap of Deliciousness
To sum it up, no bake Oreo cheesecake offers a delightful combination of creamy richness and chocolatey crunch that's hard to resist. With the smoothness of cream cheese melding perfectly with the iconic Oreo flavor, every bite is a celebration of desserts. Plus, the minimal effort required to whip it up means more time enjoying this indulgent treat with friends or family.
Encouragement to Try the Recipe
So, why not give this easy dessert a go? You will impress your guests, and possibly yourself, with little effort. Whether it's for a casual get-together or a special celebration, this no bake Oreo cheesecake is bound to be a hit! Check out the recipe and elevate your dessert game today! For additional tips on dessert-making, consider visiting the Food Network for inspiring ideas.
Print
No Bake Oreo Cheesecake: Easy Indulgence for Any Occasion
This No Bake Oreo Cheesecake is an easy and indulgent dessert perfect for any occasion.
- Total Time: 4 hours 20 minutes
- Yield: 8 servings
Ingredients
- 24 Oreo cookies
- ½ cup unsalted butter, melted
- 2 cups cream cheese, softened
- 1 cup powdered sugar
- 1 cup heavy cream
- 1 teaspoon vanilla extract
- additional Oreo cookies for topping
Instructions
- Crush the Oreo cookies and mix with melted butter to form the crust.
- Press the mixture into the bottom of a springform pan and refrigerate.
- In a bowl, beat the cream cheese and powdered sugar until smooth.
- In another bowl, whip the heavy cream and vanilla until stiff peaks form.
- Fold the whipped cream into the cream cheese mixture.
- Pour the mixture over the crust and smooth the top.
- Refrigerate for at least 4 hours or until set.
- Top with additional crushed Oreos before serving.
Notes
- For a richer flavor, let the cheesecake sit in the refrigerator overnight.
- Prep Time: 20 minutes
- Category: Dessert
- Method: No Bake
- Cuisine: American
- Diet: Vegetarian
Nutrition
- Serving Size: 1 slice
- Calories: 350
- Sugar: 30g
- Sodium: 200mg
- Fat: 25g
- Saturated Fat: 15g
- Unsaturated Fat: 10g
- Trans Fat: 0g
- Carbohydrates: 30g
- Fiber: 1g
- Protein: 4g
- Cholesterol: 80mg