Introduction to Pickled Garlic
When it comes to culinary delights, pickled garlic deserves a special mention. Not only does it add a zesty flavor punch to your meals, but it also brings along an impressive list of health benefits. If you're looking to elevate your dishes, incorporating pickled garlic can do wonders, from salads to sandwiches and beyond.
Why Pickled Garlic is a Culinary Gem
Imagine biting into a crunchy piece of garlic that’s both tangy and sweet, enhancing the flavors of your favorite dishes. Pickled garlic is a culinary gem that has a lot to offer, and you might be surprised to learn that its roots stretch across many cultures. Whether you’re enjoying Middle Eastern cuisine or exploring Asian dishes, you’ll find that this versatile ingredient is a staple everywhere.
The health benefits of garlic are well-documented. According to research from the National Center for Biotechnology Information, garlic can improve cardiovascular health and boost your immune system. When you pickle garlic, you enhance its shelf life while retaining these valuable properties. Plus, there’s something fun and satisfying about making your own pickled goods at home. It's a great way to experiment in the kitchen and impress your friends with your culinary skills.
Have you ever wondered how pickled garlic could spice up your meals? Consider adding it to:
- Salads: Toss in some diced pickled garlic for an unexpected taste.
- Sandwiches: Layer it with your turkey bacon and chicken ham for a flavorful sandwich that’s anything but boring.
- Pasta and rice dishes: A few pieces can beautifully complement the umami flavors.
You don’t have to be a professional chef to master the art of pickling. With a few basic ingredients—vinegar, salt, and sugar—you can create your own garlic treat at home. Personally, I love making a batch during summer to enjoy throughout the year. It feels like having a little taste of summer preserved, no matter the season.
If you're ready to turn your kitchen into a pickling paradise, check out this guide to pickling that covers everything from basic techniques to advanced methods. Let’s dive in and discover how you can make your very own pickled garlic!
Ingredients for Pickled Garlic
Ready to dive into making your own pickled garlic? It’s easier than you might think! Let’s gather some simple, yet flavorful ingredients that transform plain garlic into a crunchy, tangy delight. Here’s what you’ll need:
- Garlic cloves: Use fresh, firm cloves for the best flavor and texture. About two cups should do the trick.
- Vinegar: Opt for white vinegar or apple cider vinegar for a pleasant acidity that complements the garlic.
- Water: Combine equal parts of water and vinegar for a balanced brine.
- Sugar: A touch of sugar (around 1-2 tablespoons) will enhance the flavor and offset the garlic’s natural pungency.
- Salt: Use non-iodized salt (like kosher or sea salt) to ensure the brine stays clear and tasty.
- Spices: Think peppercorns, mustard seeds, or even a pinch of red pepper flakes for an extra kick.
- Optional: Fresh herbs, such as dill or thyme, can elevate the flavor profile even further!
With these ingredients in hand, you’re well on your way to enjoying homemade pickled garlic. For more details on the pickling process, check out resources like The Kitchn for useful tips and tricks!
Step-by-step Preparation for Pickled Garlic
Pickled garlic is a delightful addition to salads, sandwiches, and even charcuterie boards. Preparing your own batch is not only a rewarding experience but can also elevate your culinary creations. Ready to dive in? Here’s a friendly guide to creating your very own pickled garlic at home.
Gather your ingredients
Before you start, it’s essential to gather all the necessary ingredients. Here’s what you’ll need:
- Fresh garlic cloves (about 2 cups)
- Apple cider vinegar or white vinegar (1 cup)
- Water (1 cup)
- Sugar (1 tablespoon)
- Salt (1 tablespoon)
- Optional spices: chili flakes, black peppercorns, mustard seeds, or dill
Having everything prepared ahead of time not only speeds up the process but also ensures you won’t have to scramble around looking for something mid-recipe. Plus, getting all your ingredients out can make you feel like a professional chef ready to impress!
Sterilize your jar
Once you’ve got your ingredients, it’s time to focus on cleanliness, as proper sterilization is key to preserving your pickled garlic. You’ll need:
- A clean glass jar with a tight-fitting lid (16 oz is a good size)
- Boiling water
Follow these steps to sterilize:
- Wash the jar and lid in hot, soapy water.
- Rinse thoroughly and place in a pot of boiling water for about 10 minutes.
- Remove with tongs and let it cool upside down on a clean kitchen towel.
Cleanliness ensures your pickled garlic remains safe to eat for longer, so don’t skip this step!
Boil the pickling liquid
Next, let’s make the pickling liquid, which is where the magic happens! Here’s a simple way to do it:
- In a medium saucepan, combine the vinegar, water, sugar, and salt.
- Bring the mixture to a gentle boil over medium-high heat, stirring until the sugar and salt dissolve completely.
Feel free to experiment with spices as you heat the liquid. Adding chili flakes can give your pickled garlic an enjoyable kick! For more detailed spice combinations, check out this culinary resource.
Pack the garlic into the jar
Now comes the fun part—packing the garlic! Peel the garlic cloves, and if you like, give them a gentle smash with the flat side of your knife to help release flavor.
- Place the garlic cloves into your sterilized jar, packing them in as tightly as you can without crushing them.
- If you’re adding additional spices, sprinkle them between the layers of garlic, creating flavor pockets.
The aroma is already intoxicating. You’re just a step away from delicious pickled garlic!
Pour the liquid and cool
With the garlic packed, it's time to pour the pickling liquid:
- Carefully pour the hot pickling liquid over the garlic until the jar is full and the garlic is completely submerged.
- Leave a small space (about half an inch) at the top of the jar to allow for gas expansion during the cooling process.
- Use a clean utensil to gently tap the jar, releasing any air bubbles that may have formed.
Allow the jar to cool slightly at room temperature; this will set the stage for incredible flavors to meld together.
Seal and refrigerate
Once your pickled garlic has cooled to room temperature, it’s time to seal it up:
- Secure the lid tightly on the jar.
- Place your jar in the refrigerator.
Your pickled garlic will be ready to enjoy after about a week, but letting it sit for two to three weeks will maximize flavor. Just think about how tasty it will be in your next dish—like a zesty addition to a turkey bacon sandwich or a flavorful bite in salads!
Making pickled garlic is not just a cooking technique; it’s a culinary adventure. So, roll up your sleeves and happy pickling!
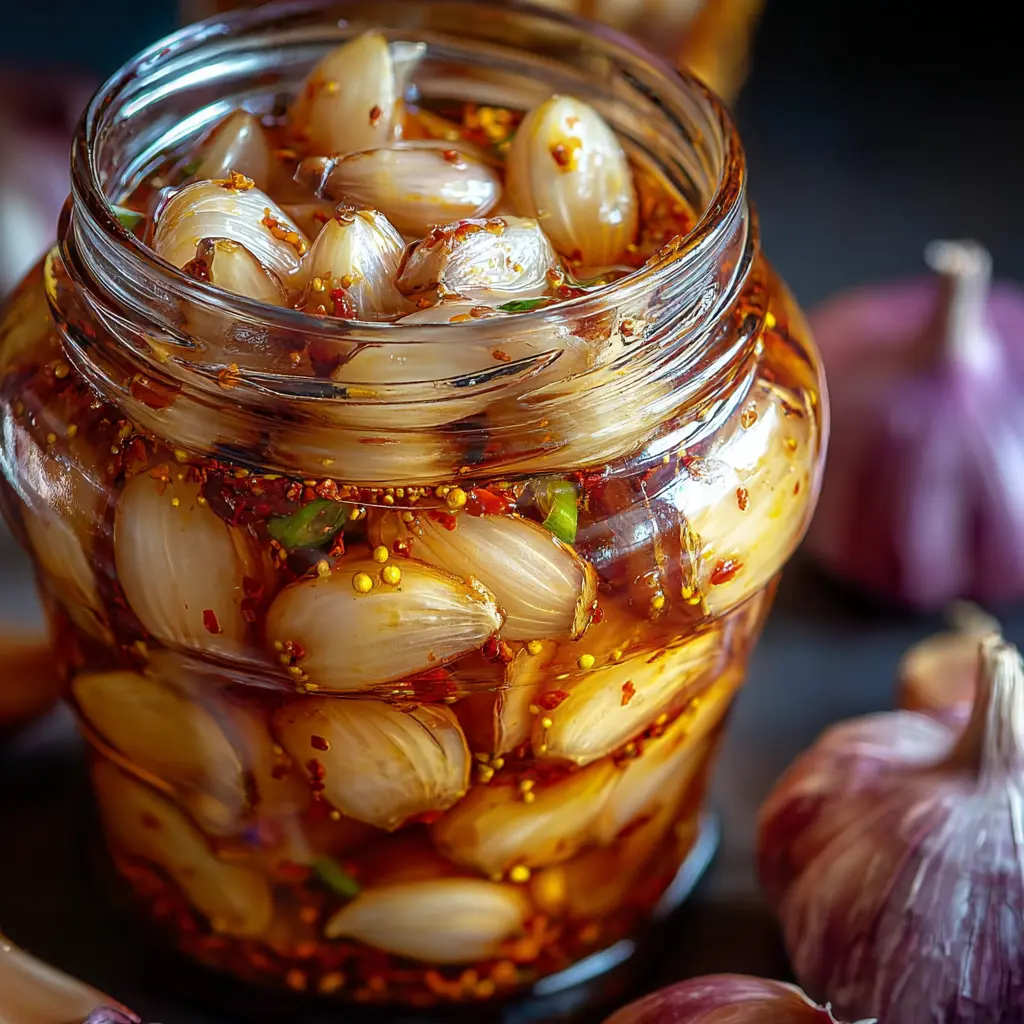
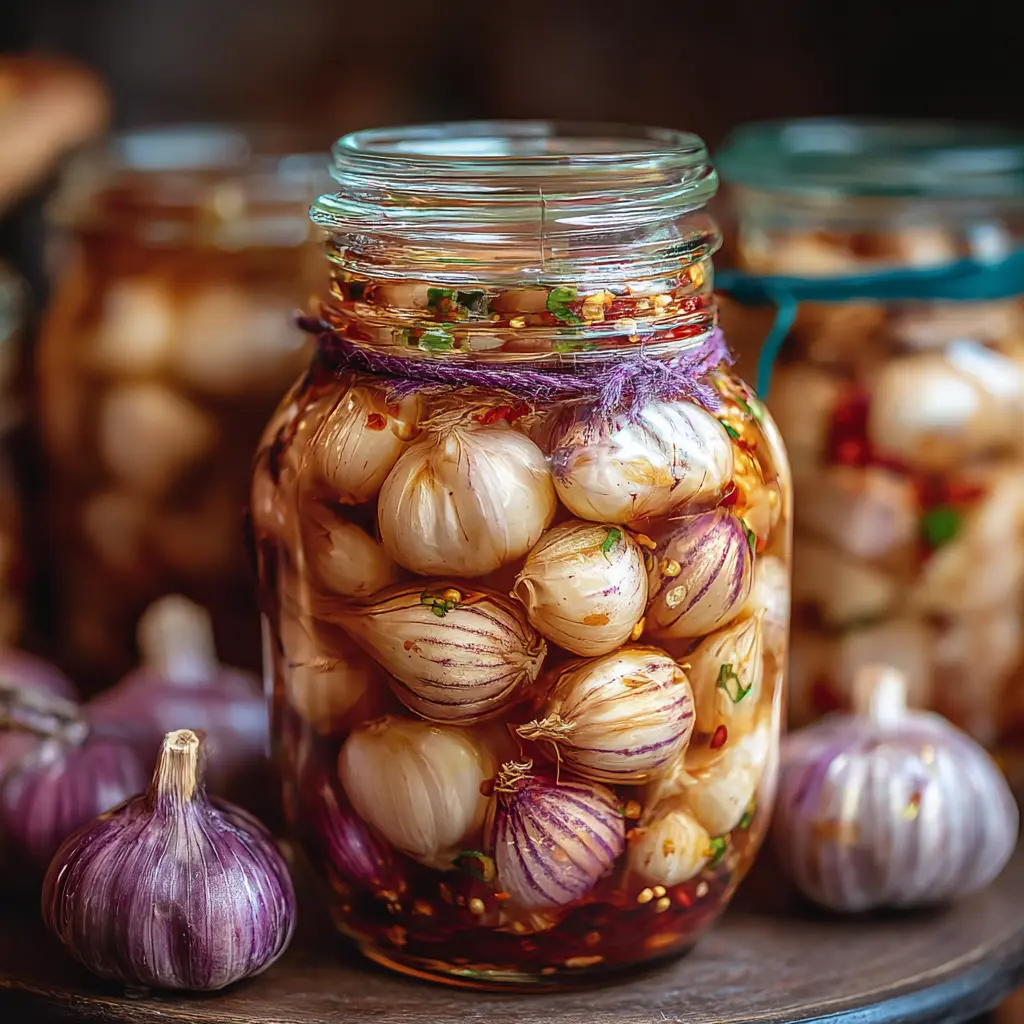
Variations of Pickled Garlic
When it comes to elevating your culinary experience, pickled garlic can be a game changer. Here, we’ll explore delicious variations that cater to different taste buds and culinary preferences.
Spicy Pickled Garlic with Chili Peppers
For those who crave heat, adding chili peppers to your pickled garlic is an excellent choice. The fiery kick from fresh or dried chili peppers complements the garlic perfectly. Here’s how to spice it up:
- Choose your peppers: Jalapeños offer moderate heat while ghost peppers bring an intense kick. Find the right balance for your palate.
- Infuse flavors: Consider adding ingredients like peppercorns or mustard seeds for an extra dimension of flavor.
- Adjust sugar levels: A touch of sugar can help to moderate the spice, resulting in a well-rounded pickle.
Spicy pickled garlic is fantastic on sandwiches, tacos, or even mixed into pasta dishes for an exciting twist. For more inspiration, check out this guide on the benefits of spicy food.
Sweet and Tangy Garlic Pickles
If you prefer something a bit more mellow, sweet and tangy pickled garlic is right up your alley. This variation combines the savory notes of garlic with the delightful sweetness of sugar and tanginess of vinegar.
- Select your vinegar: Apple cider vinegar or rice vinegar can add unique flavors, so don’t be afraid to experiment.
- Balance the sweet: Using brown sugar can impart a richer, caramel-like sweetness that elevates the overall taste.
- Add herbs: Thyme or dill can add a fragrant touch to your sweet and tangy concoction.
Sweet and tangy pickled garlic pairs wonderfully with salads, cheese platters, or as a side to grilled turkey bacon or chicken ham. If you’re curious about the science behind pickling, the University of Georgia’s food preservation guide is a great resource.
Whether you gravitate toward spicy or sweet, these variations of pickled garlic can enhance your meals and impress your guests with your culinary creativity. Happy pickling!
Cooking Tips and Notes for Pickled Garlic
When it comes to making pickled garlic, a few simple tips can elevate your batch from good to extraordinary. Whether you're new to pickling or just looking to polish your skills, these insights will help you achieve crispy, flavorful results.
Select the Right Garlic
Choosing fresh garlic is key. Look for firm, unblemished bulbs with no signs of sprouting. Younger garlic varieties are often milder and ideal for those who prefer a subtler flavor in their pickled garlic.
Spice It Up
Feel free to experiment with spices! Popular choices include black peppercorns, mustard seeds, and crushed red pepper flakes. Each addition can personalize your recipe and enhance the overall flavor profile.
Be Patient
Allow the garlic to pickle for at least a week before digging in. The flavors develop beautifully over time. If you're keen on understanding the science behind pickling, you may want to read up on food preservation techniques on reputable sites like FoodSafety.gov.
Storage Tips
Store your pickled garlic in a sterilized jar. Keep it in the refrigerator, where it should last for several months. Always use a clean utensil when retrieving garlic to maintain its fresh taste.
Remember, the joy of pickling comes not only from consuming delicious garlic but also from the process itself. What's your favorite unique spice combination to try? Happy pickling!
Serving Suggestions for Pickled Garlic
When it comes to pickled garlic, versatility is its middle name! You might find yourself wondering how to incorporate this zesty condiment into your meals. Here are some delightful ways to enjoy the bold flavors of pickled garlic:
Elevate Your Sandwich Game
Spread a layer of cream cheese or hummus on your favorite bread and add a few slices of pickled garlic. Whether it’s on a turkey bacon or chicken ham sandwich, these cloves will provide a savory kick that complements the meat perfectly.
Brighten Up Salads
Chop up some pickled garlic and toss it into your salads for an added zing. It pairs wonderfully with mixed greens and adds a unique pop to your homemade salad dressings. Try combining it with olive oil and lemon juice for a refreshing vinaigrette!
Snack Time Upgrade
Feeling snacky? Serve pickled garlic with crackers and cheese. A tangy bite of garlic alongside creamy cheeses makes for an irresistible combination that’s perfect for gatherings.
Looking for more creative ideas? Check out this article on flavor pairings to expand your culinary repertoire!
Time Breakdown for Pickled Garlic
Preparation Time
Getting started on your pickled garlic adventure will take about 15-20 minutes. This is the time you’ll spend peeling garlic cloves, measuring out your vinegar, and gathering your spices. It’s the perfect opportunity to channel your inner chef!
Cooking Time
The actual cooking process is pretty minimal—around 10 minutes. You’ll bring your vinegar solution to a boil and then pour it over the garlic cloves. It’s quick, and the scent will be utterly delightful!
Total Time
From beginning to end, you’re looking at approximately 30 minutes. Keep in mind that while the garlic is pickling, the flavors will continue to develop over several days. If you're eager to enjoy homemade pickled garlic, check out further details on culinary benefits of pickling to enhance your cooking skills! Enjoy your culinary exploration!
Nutritional Facts for Pickled Garlic
When enjoying pickled garlic, it's essential to know its nutritional benefits and how it fits into your daily diet. Let’s break it down!
Calories
A single clove of pickled garlic typically contains about 5 calories. This makes it a fantastic low-calorie condiment that can add a zesty punch to your meals without worrying much about calorie counts.
Sugar content
You might be surprised, but pickled garlic contains very little sugar—around 0.2 grams per clove. This makes it a friendly option for anyone watching their sugar intake.
Sodium
One consideration with pickled garlic is its sodium content. A serving can pack in around 130 mg of sodium, largely due to the brine. For those monitoring their salt, be sure to enjoy it in moderation!
Incorporating pickled garlic into your meals can be as simple as tossing it into salads or sandwiches, enhancing flavor without heavy calorie loads. For more insights on achieving a balanced diet, check out resources from the USDA MyPlate or the American Heart Association.
FAQs about Pickled Garlic
How long can I store pickled garlic?
When you pickle garlic, you're not just enhancing its flavor — you're also extending its shelf life. Properly stored, pickled garlic can last up to a year in the refrigerator. Just make sure to keep it in an airtight container, submerged in the pickling solution. For optimal taste, try to consume it within six months. Always check for any signs of spoilage, such as off smells or discoloration, before using it.
Can I use different types of vinegar for pickling?
Absolutely! While many recipes call for white vinegar or apple cider vinegar, experimenting with different types can open up new flavor profiles. For instance, rice vinegar adds a mild sweetness, while balsamic vinegar can give your pickled garlic a richer depth. Just be mindful of the acidity level; most vinegars should have at least 5% acidity for proper pickling. If you're curious about the science behind pickling, you might find this USDA guide on vinegar helpful.
Is pickled garlic healthy?
Yes, pickled garlic is not only delicious but also offers some health benefits. Garlic itself is known for its antibacterial and anti-inflammatory properties, which can contribute to heart health and boosting the immune system. Pickling can enhance these benefits while preserving the garlic's flavor. Keep in mind, however, that moderation is key. Sometimes, the pickling process involves added sugars or sodium, so it’s a good idea to enjoy it as part of a balanced diet. Curious about garlic’s health perks? Check out this Healthline article on garlic benefits.
Whether you're enhancing your meals or exploring new culinary adventures, pickled garlic certainly deserves a spot in your kitchen!
Conclusion on Pickled Garlic
In wrapping up our delicious journey into the world of pickled garlic, it’s clear that this bold condiment isn’t just a flavor booster; it’s a versatile kitchen staple. Whether you're enhancing your favorite turkey bacon sandwich or adding a zing to your salads, pickled garlic brings a unique twist that elevates even the simplest dishes. Plus, the health benefits are undeniable, from supporting heart health to bolstering your immune system. As you embark on your pickling adventure, remember that experimentation is key. For tips on ideal storage and serving suggestions, check out resources from the National Center for Home Food Preservation to inspire your culinary creativity. Enjoy your pickled garlic delights!
Print
Pickled Garlic: The Easy Way to Elevate Your Home Cooking
Pickled garlic is a simple yet effective way to enhance your culinary creations, adding depth and flavor to dishes while providing health benefits.
- Total Time: 2 weeks
- Yield: 4 jars
Ingredients
- 2 cups peeled garlic cloves
- 2 cups distilled white vinegar
- 1 cup water
- 1 tablespoon sugar
- 1 tablespoon salt
- 1 teaspoon crushed red pepper flakes
- 1 teaspoon black peppercorns
- 1 teaspoon dill seeds
Instructions
- In a saucepan, combine vinegar, water, sugar, and salt. Heat over medium until dissolved.
- In sterilized jars, pack the garlic cloves tightly.
- Add the red pepper flakes, black peppercorns, and dill seeds to the jars.
- Pour the hot vinegar mixture over the garlic, ensuring cloves are fully submerged.
- Seal the jars and let them cool to room temperature.
- Refrigerate for at least 2 weeks before using for the best flavor.
Notes
- Adjust the level of spices to personalize the heat of the pickles.
- Use high-quality vinegar for better flavor.
- These pickles can last for several months when stored properly.
- Prep Time: 15 minutes
- Cook Time: 10 minutes
- Category: Condiments
- Method: Pickling
- Cuisine: Preserved
- Diet: Vegan
Nutrition
- Serving Size: 1 clove
- Calories: 4
- Sugar: 1g
- Sodium: 240mg
- Fat: 0g
- Saturated Fat: 0g
- Unsaturated Fat: 0g
- Trans Fat: 0g
- Carbohydrates: 1g
- Fiber: 0g
- Protein: 0g
- Cholesterol: 0mg