Introduction to Yellow Velvet Oreo Cheesecake
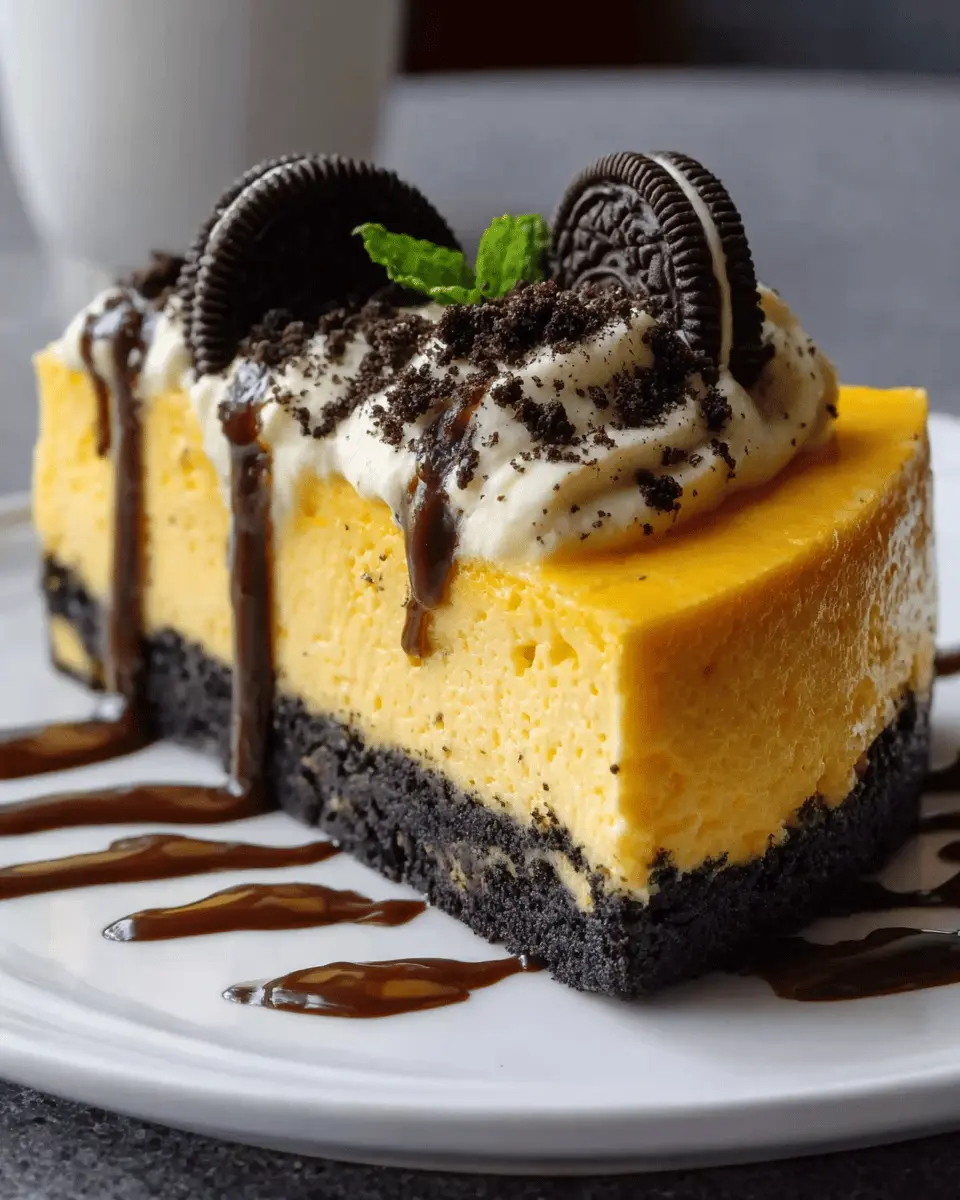
If you’ve ever dreamed of indulging in a dessert that perfectly balances richness and playfulness, then you’re in for a treat with this yellow velvet Oreo cheesecake recipe. Imagine a creamy cheesecake blend that's as vibrant and inviting as a sunlit day, resting atop a crumbly, sweet Oreo crust. This dessert is not just a feast for your taste buds; it's also a visual delight that will impress your friends and family.
Why Yellow Velvet Oreo Cheesecake?
So, why opt for yellow velvet in your cheesecake? The answer lies in its decadent flavor and fluffy texture, reminiscent of a velvety sponge cake that melts in your mouth. When combined with the classic richness of cheesecake and the delightful crunch of Oreo cookies, it creates a dessert experience that transcends the ordinary.
This cheesecake incorporates the beloved yellow cake flavor—think of a gentle vanilla with a hint of buttery richness. It's a perfect base that complements the creaminess of the cheese filling without overpowering it. Additionally, the iconic Oreo crust adds a chocolatey twist that contrasts beautifully with the lighter texture of the filling.
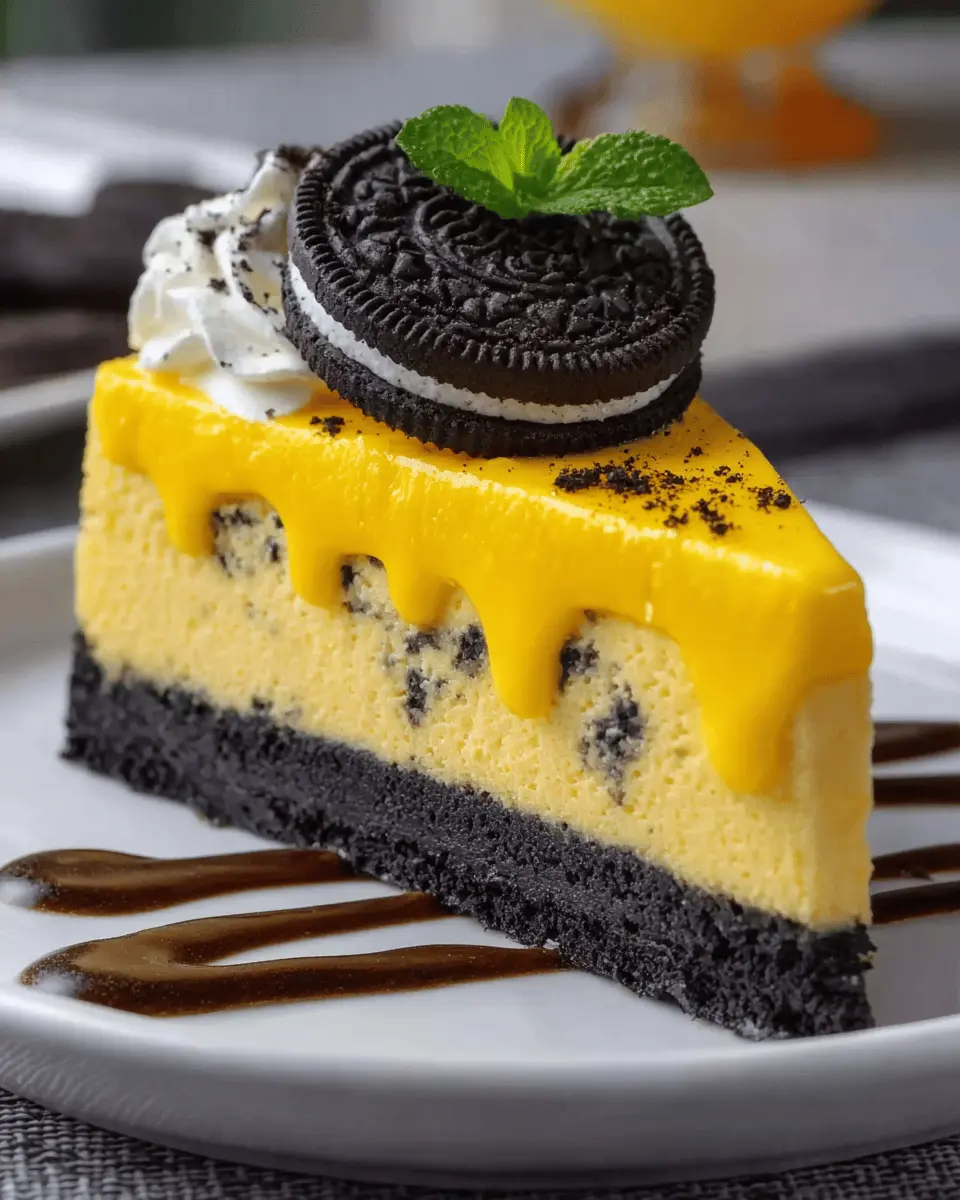
For those looking for a crowd-pleaser, this dessert is a surefire hit at gatherings, from birthday parties to casual get-togethers. Plus, the vibrant yellow hue makes it an Instagram-ready option that is bound to turn heads.
Let’s not forget about the ease of preparation! The unique combination of ingredients simplifies the baking process while still offering an impressive outcome.
You can find tips on how to elevate your baking skills in articles from sources like King Arthur Baking and Epicurious. They emphasize the importance of quality ingredients and methods. With a little enthusiasm and a couple of tips from the pros, you'll be whipping up this delightful cheesecake in no time!
As we delve into the steps to create your own yellow velvet Oreo cheesecake, you’ll discover the secrets that make it a remarkable addition to your recipe repertoire—embracing the joy of baking and sharing sweet moments with those you love!
Ingredients for Yellow Velvet Oreo Cheesecake
When it comes to crafting the perfect yellow velvet Oreo cheesecake, the ingredients are everything. Below, I've outlined the key components you'll need to create a dessert that's sure to impress.
Essential ingredients for the base
For a rich, flavorful base, you’ll need:
- Oreo cookies: About 24, crushed finely for that classic flavor.
- Unsalted butter: Roughly ½ cup, melted to bind the crust together.
- Sugar: Optional, a tablespoon or two can enhance the overall sweetness.
Crushing those Oreo cookies to the right consistency is crucial! You want them to resemble a fine crumb, which will help create a solid foundation for your cheesecake.
Key components for the cream
The creamy layer is where the magic happens. Gather these ingredients:
- Cream cheese: Two 8-ounce packages, softened for a smooth texture.
- Sour cream: 1 cup adds richness and tanginess.
- Granulated sugar: About ¾ cup to sweeten.
- Vanilla extract: 1 teaspoon for a hint of warmth.
- Eggs: 3 large, these help bind everything beautifully.
Mixing these together creates a luscious filling that balances the sweetness of the Oreo base perfectly.
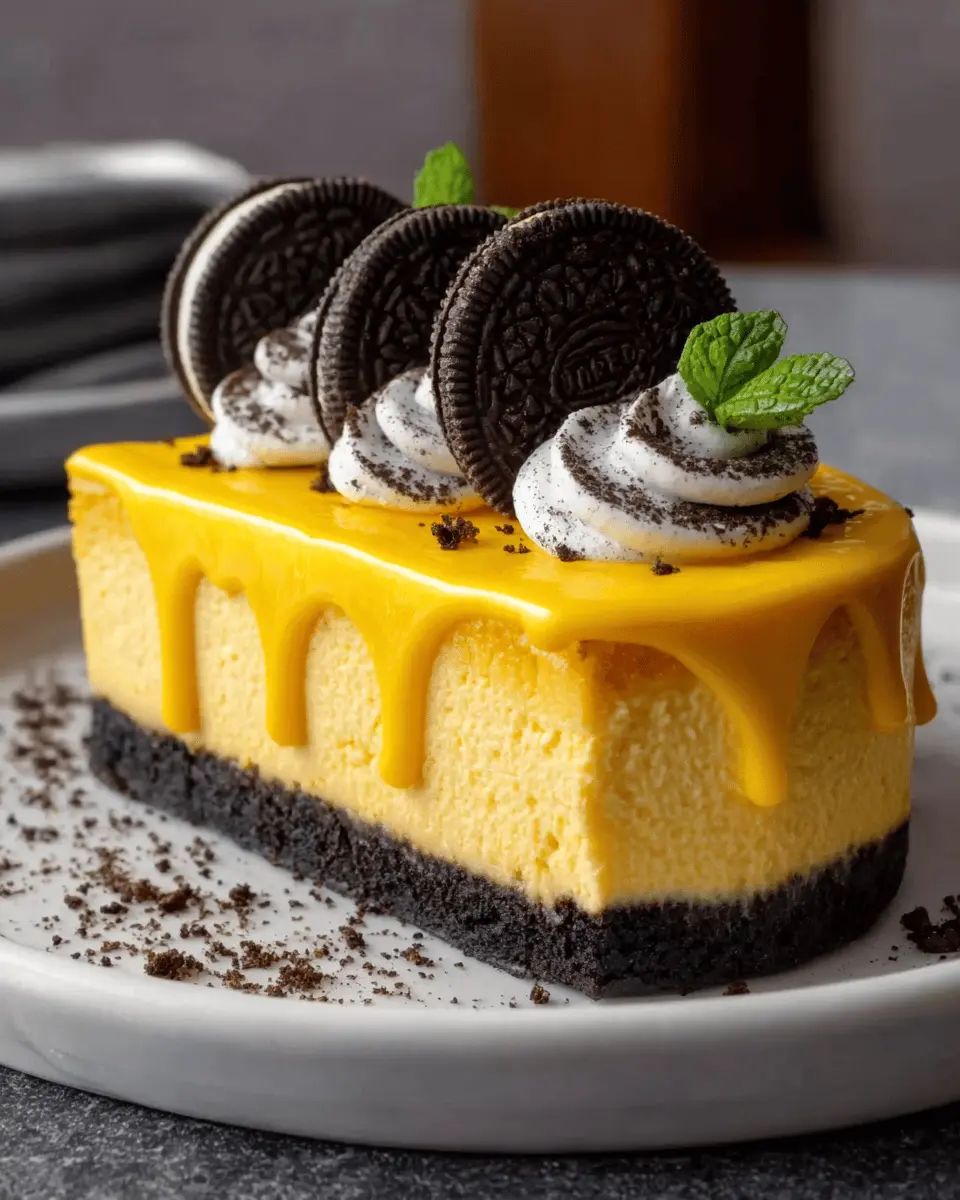
Topping ingredients for that perfect finish
To elevate your cheesecake, you can add:
- Whipped cream: About 1 cup, for a fluffy top.
- Crushed Oreos: Extra for sprinkling on top.
- Fresh berries: Strawberries or raspberries, for a pop of color and flavor.
These toppings not only look fantastic but also add delightful textures and flavors, rounding out your yellow velvet Oreo cheesecake recipe.
With these ingredients ready to go, you’re well on your way to creating a dessert that will have everyone asking for seconds! For tips on proper baking techniques, consider checking out The Joy of Cooking or Serious Eats, which offer great resources for beginners and seasoned bakers alike.
Step-by-step Preparation of Yellow Velvet Oreo Cheesecake
Creating a luscious yellow velvet Oreo cheesecake is a delightful journey that combines the rich flavors of cheesecake with the fun twist of Oreo cookies. Perfect for parties or a cozy night in, this recipe is as easy to make as it is delightful to eat. Let’s roll up our sleeves and dive into the preparation process step-by-step!
Prepare the Oreo base
The foundation of your cheesecake will be the Oreo base, and trust me, it sets the stage for an irresistible treat. Here’s how to whip it up:
- Ingredients Needed:
- 24 Oreo cookies
- ½ cup unsalted butter, melted
Start by preheating your oven to 350°F (175°C). In a food processor, crush the Oreo cookies into fine crumbs. You want them as granular as possible for a smooth crust. If you don’t have a food processor, place the cookies in a ziplock bag and crush them with a rolling pin—this can be quite therapeutic!
Next, mix the crushed Oreo with the melted butter in a bowl until it resembles wet sand. Transfer the mixture into a springform pan, pressing it firmly down to create an even base. Bake for about 10 minutes until set, then let it cool while you prepare the cream mixture.
Make the cream mixture
Now for the fun part! The cream mixture is where the creamy goodness of your cheesecake shines. Here’s what you’ll need:
- Ingredients Needed:
- 16 oz cream cheese, softened
- 1 cup granulated sugar
- 1 teaspoon vanilla extract
- 3 large eggs
- 1 cup sour cream
- A few drops of yellow food coloring (optional)
In a large mixing bowl, beat the softened cream cheese until it’s smooth and free of lumps. You can use a hand mixer or a stand mixer on medium speed. Gradually add the sugar, continuing to beat the mixture until well combined. Then, stir in the vanilla extract, which adds a lovely depth of flavor.
Now, add the eggs one by one, mixing well between each addition. Finally, incorporate the sour cream—this ingredient elevates the creaminess of the cheesecake to new heights. If you want that beautiful yellow hue, now’s the time to add a few drops of yellow food coloring!
Combine the ingredients
At this stage, it's time to bring everything together for our yellow velvet Oreo cheesecake recipe.
- Gently fold the rest of the crushed Oreo cookies into your cream mixture. This will add that signature cookie surprise into every bite, making your cheesecake even more delightful.
Make sure to mix just enough to distribute the pieces, ensuring the chunky texture is present in every slice. This combination will be the heart of your cheesecake, so give it a moment of admiration before proceeding!
Pour the mixture over the base
You’re almost there! Take that glorious cream mixture and pour it over the cooled Oreo base. Spread it evenly with a spatula for a smooth finish. This is where the magic truly happens as your cheesecake starts to take shape!
To prevent any cracks while baking, you might want to tap the pan gently on the countertop to release any trapped air bubbles.
Choose your baking option
Finally, it’s time to decide how you want to bake your cheesecake. You can opt for:
- Water Bath: For a creamy, smooth result, place the springform pan inside a larger pan filled halfway with water. This method gently cooks the cheesecake, preventing cracks.
- Direct Baking: If you’re short on time, you can bake it directly. Just remember to lower the temperature to 325°F to keep the texture smooth.
Bake the cheesecake for about 50-60 minutes until the edges are set but the center is slightly jiggly—don’t worry; it will firm up as it cools.
And voilà! Your yellow velvet Oreo cheesecake is ready for the final touch. Let it cool completely, then chill it in the refrigerator for at least four hours (or overnight, if you can wait!).
Happy baking, and enjoy every blissful bite of this cheesecake creation! If you're looking for more dessert inspirations, check out SugarHero for sweet ideas.
Variations on Yellow Velvet Oreo Cheesecake
No-bake Version of Yellow Velvet Oreo Cheesecake
If you're dreaming of indulging in a yellow velvet Oreo cheesecake without the hassle of baking, you’re in luck! A no-bake version is not only simpler but also super creamy and delicious. Start with a classic Oreo crust—just crush some Oreos mixed with melted butter. For the filling, blend cream cheese, whipped cream, and yellow cake mix to achieve that signature velvety texture. Don’t forget to fold crushed Oreos into the mix for that delightful crunch. Chill for at least four hours, or overnight if you can wait! This version is perfect for warm days when you want dessert without heating up the kitchen.
Flavor Variations to Try
While the traditional yellow velvet Oreo cheesecake recipe is divine on its own, why not get a little adventurous? Here are some tempting flavor combinations to consider:
- Chocolate Swirl: Add melted chocolate into the cream cheese mixture, swirled elegantly for a marbled effect.
- Caramel Delight: Drizzle some caramel sauce on top for a sweet, salty contrast that will wow your taste buds.
- Nutty Crunch: Incorporate chopped nuts like pecans or almonds for an added texture and flavor boost.
Feel free to get creative! This cheesecake serves as a fantastic base for all sorts of flavor profiles. Whether you’re preparing for a brunch or hosting a dinner party, a whimsical twist on this classic will impress your guests.
For further inspiration, check out Food Network or Joy of Baking for more cheesecake variations and tips!
Cooking Tips and Notes for Yellow Velvet Oreo Cheesecake
Tips for creaminess
For the yellow velvet Oreo cheesecake recipe, achieving that ultra-creamy texture requires a few key steps:
- Room Temperature Ingredients: Make sure your cream cheese, eggs, and sour cream are at room temperature before mixing. This ensures a smoother batter and prevents lumps.
- Mixing Technique: Gently mix your ingredients until just combined. Overmixing can incorporate excess air, leading to cracks.
- Add Sour Cream: Incorporating sour cream enhances the creaminess and adds a delightful tang.
For more creamy cheesecake tips, check out this cheesecake guide.
Notes for avoiding cracks
Cracks in your cheesecake can be frustrating, but with these precautions, your yellow velvet Oreo cheesecake will be picture-perfect:
- Water Bath Method: Baking your cheesecake in a water bath provides gentle heat and helps maintain moisture, reducing the likelihood of cracks.
- Cool Gradually: After baking, let your cheesecake cool in the oven with the door ajar. This gradual temperature change minimizes the risk of cracking.
- Don’t Overbake: Pull your cheesecake out while it still has a slight jiggle in the center. It will continue to set as it cools.
Remember, patience is key! Enjoy the baking process, and you'll have a stunning cheesecake to show off.
Serving Suggestions for Yellow Velvet Oreo Cheesecake
Perfect Occasions to Serve
Your yellow velvet Oreo cheesecake is not just a dessert; it's a showstopper! Consider serving it at:
- Birthdays: Elevate the experience with a slice of this creamy delight for both kids and adults.
- Celebrations: Perfect for graduations or promotions, adding a touch of festivity.
- Cozy Gatherings: Make your next game night or movie marathon more special with this sweet treat.
Imagine your friends' expressions as they take their first bite! There’s something about that velvety texture that sparks joy and invites conversation.
Pairing Ideas to Enhance Flavors
To truly take your yellow velvet Oreo cheesecake recipe to the next level, consider these pairing ideas:
- Fresh Berries: Strawberries, raspberries, or blueberries not only add a pop of color but also provide a refreshing contrast to the creamy richness.
- Whipped Cream: A dollop of homemade or store-bought whipped cream can enhance the cheesecake’s texture.
- Coffee or Herbal Teas: A steaming cup of coffee or a soothing herbal tea complements the flavors beautifully. Try pairing it with chai for a warm, spicy contrast.
These combinations will not only delight the taste buds but also create an unforgettable dessert experience. Explore more about food pairings here to further inspire your culinary creativity!
Time Breakdown for Yellow Velvet Oreo Cheesecake
Preparation Time
Getting started with the yellow velvet Oreo cheesecake recipe takes about 20-30 minutes. This is your chance to embrace creativity! Measure out your ingredients, crush those Oreos, and mix your velvety batter. Don't rush; savor the moment as you prepare the layers for an indulgent treat.
Chilling or Baking Time
Once your cheesecake is assembled, it’s time for it to chill in the refrigerator or bake, depending on your preference. For the chilled version, allow at least 4 hours, but overnight is best for optimal flavor. If you’re baking, expect about 55-60 minutes, plus additional cooling time.
Total Time to Indulge
In total, you’re looking at roughly 5 hours—including prep, chilling, or baking—before you can dive into this deliciously decadent cheesecake. It’s worth the wait, so plan to enjoy your creation with close friends or at a cozy gathering. This recipe not only satisfies a sweet tooth but also creates beautiful memories and connections. For more tips on decorations and serving ideas, consider checking out expert sites like Serious Eats and Food Network.
Nutritional Facts for Yellow Velvet Oreo Cheesecake
When indulging in the creamy delight of a Yellow Velvet Oreo Cheesecake, it’s useful to know what you’re savoring. Here’s a quick breakdown:
Calories per Serving
Each slice of this decadent dessert contains approximately 350 calories. While it’s not an everyday treat, it’s perfect for those special occasions or when you need a sweet pick-me-up.
Sugar Content
A serving boasts around 25 grams of sugar. While it satisfies your sweet tooth, be mindful if you're watching your sugar intake. For some tips on lowering sugar in desserts, check out this article.
Protein and Fat Breakdown
In terms of protein and fat, you’ll find about 5 grams of protein and 22 grams of fat per slice. Most of the fat comes from the cream cheese and Oreo crust, giving it that rich mouthfeel we all love.
This yellow velvet Oreo cheesecake recipe is definitely worth every bite!
FAQs about Yellow Velvet Oreo Cheesecake
Can I use low-fat cream cheese?
Absolutely! If you’re looking to lighten up your yellow velvet Oreo cheesecake recipe, low-fat cream cheese can be a great substitute. While it may slightly alter the texture or richness, many folks enjoy using it without sacrificing flavor. Just be sure to blend it well to minimize any lumps. Remember, balancing taste and health is key!
How should I store leftovers?
If you’re lucky enough to have leftovers (which is often not the case with this crowd-pleaser), proper storage is essential. To keep your yellow velvet Oreo cheesecake fresh, cover it tightly with plastic wrap or foil and store it in the refrigerator. It should last for about 3-5 days. For longer storage, you might consider freezing individual slices. Wrap each slice in plastic wrap, place them in a freezer-safe bag, and freeze for up to a month. When you're ready to enjoy, just let it thaw in the fridge overnight.
What can I substitute for Oreo cookies?
If you’re not a fan of Oreos or need a gluten-free option, don’t fret! There are plenty of alternatives:
- Chocolate sandwich cookies – Brands like Kirkland or Newman’s Own can offer similar flavor.
- Graham crackers – A classic choice that can give a unique twist to your crust.
- Homemade cocoa cookies – Making your own can be fun and adds a personal touch.
For more baking tips and alternatives, you might find this guide on cookie swaps helpful!
Embracing creativity will only enhance your cheesecake experience and make it uniquely yours. Happy baking!
Conclusion on Yellow Velvet Oreo Cheesecake
In conclusion, the yellow velvet Oreo cheesecake recipe is more than just a dessert; it’s a delightful experience that combines rich flavors and textures. Imagine hosting friends and serving this decadent cheesecake, their faces lighting up as they indulge in each creamy, chocolatey bite.
To elevate your cheesecake game, consider using high-quality ingredients, and don’t shy away from experimenting with toppings like fresh fruits or flavored whipped cream. Have you tried a caramel drizzle? It’s a game changer! For more dessert ideas, check out resources from Serious Eats and Food Network.
Whether you whip this up for a special occasion or a cozy night in, the yellow velvet Oreo cheesecake is sure to impress. With every slice, you’ll create sweet memories that keep your taste buds coming back for more!
Print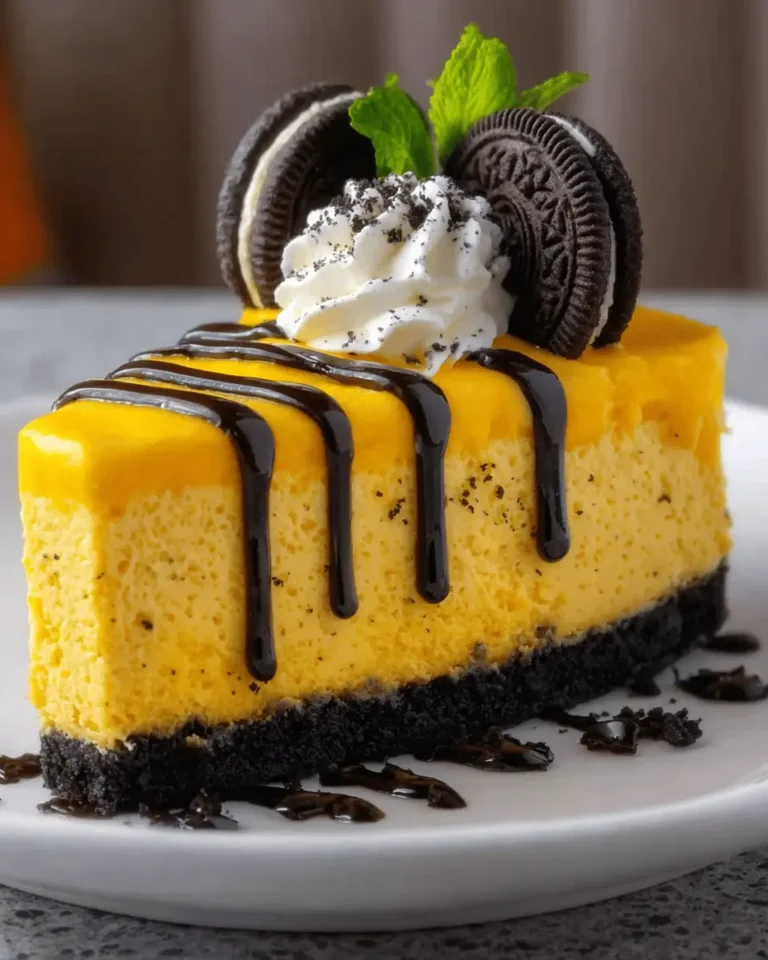
Yellow Velvet Oreo Cheesecake Recipe: The Ultimate Indulgence for Home Chefs
Indulge in the rich and creamy flavors of this Yellow Velvet Oreo Cheesecake, perfect for any occasion.
- Total Time: 4 hours 80 minutes
- Yield: 12 servings
Ingredients
- 2 cups crushed Oreo cookies
- ½ cup unsalted butter, melted
- 4 packages (8 oz each) cream cheese, softened
- 1 cup granulated sugar
- 1 cup sour cream
- 1 tablespoon vanilla extract
- 5 large eggs
- 1 cup yellow food coloring
Instructions
- Preheat your oven to 325°F (160°C).
- Combine crushed Oreo cookies and melted butter in a bowl; press firmly into the bottom of a springform pan.
- In a large mixing bowl, beat cream cheese and sugar until smooth.
- Add sour cream and vanilla, mix until combined.
- Add eggs one at a time, mixing well after each addition.
- Stir in yellow food coloring until desired color is achieved.
- Pour the cheesecake mixture over the crust and smooth the top.
- Bake for 60 minutes or until the center is set.
- Turn off the oven and let the cheesecake cool in the oven for 1 hour.
- Remove from oven, let cool completely, then refrigerate for at least 4 hours before serving.
Notes
- For a richer flavor, use double stuffed Oreos.
- Can be topped with whipped cream or more crushed Oreos before serving.
- Prep Time: 20 minutes
- Cook Time: 60 minutes
- Category: Dessert
- Method: Baking
- Cuisine: American
- Diet: Vegetarian
Nutrition
- Serving Size: 1 slice
- Calories: 450
- Sugar: 30g
- Sodium: 250mg
- Fat: 30g
- Saturated Fat: 15g
- Unsaturated Fat: 10g
- Trans Fat: 1g
- Carbohydrates: 40g
- Fiber: 2g
- Protein: 6g
- Cholesterol: 100mg