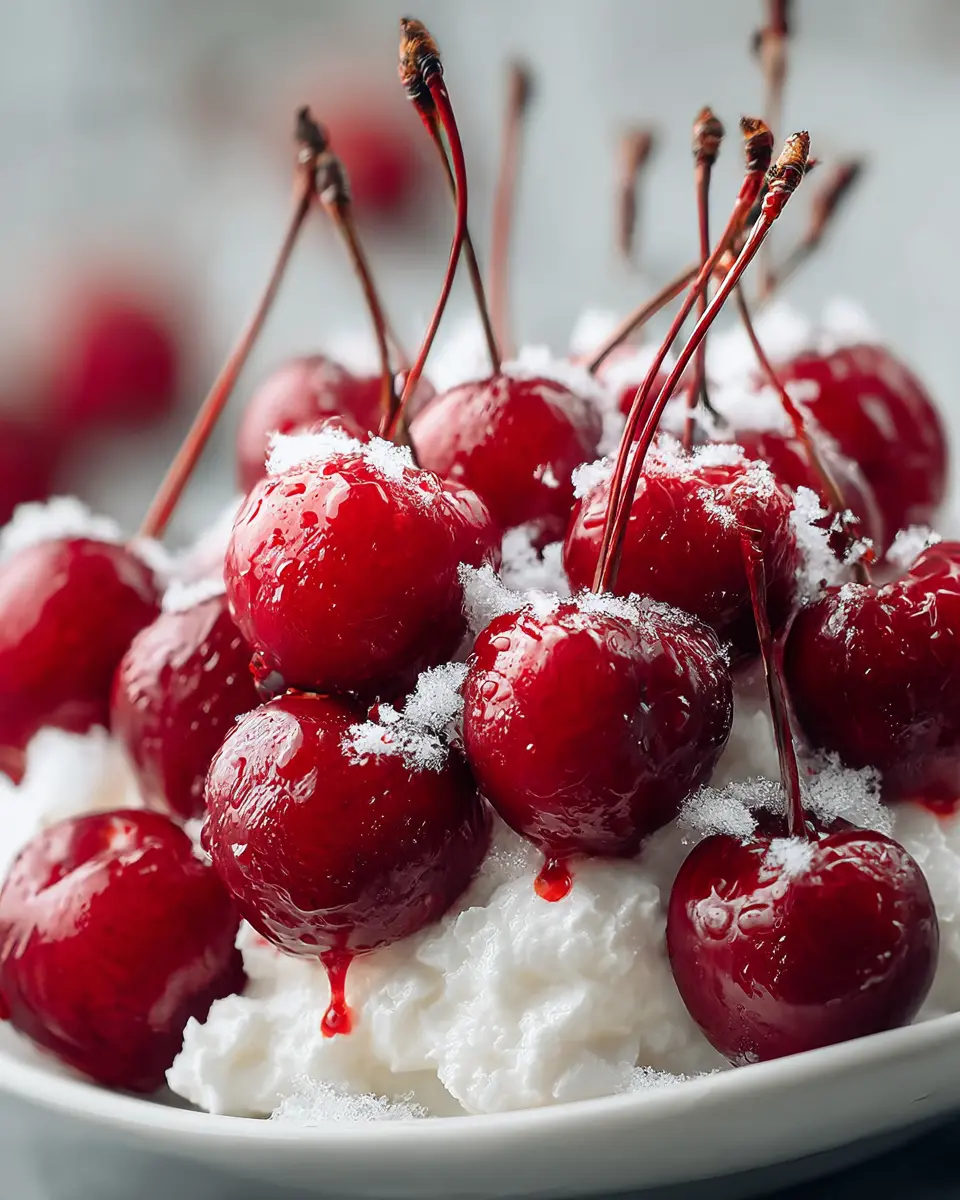
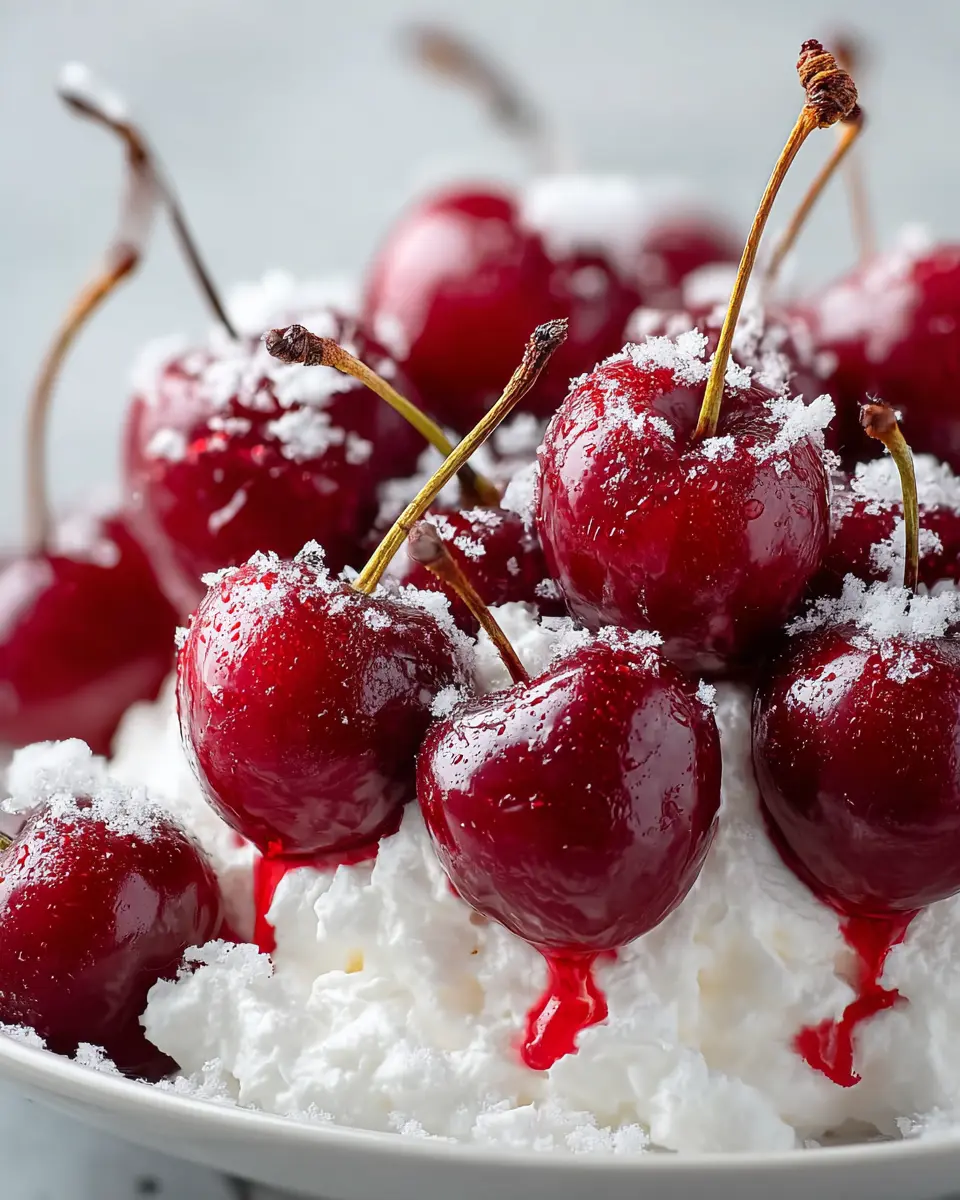
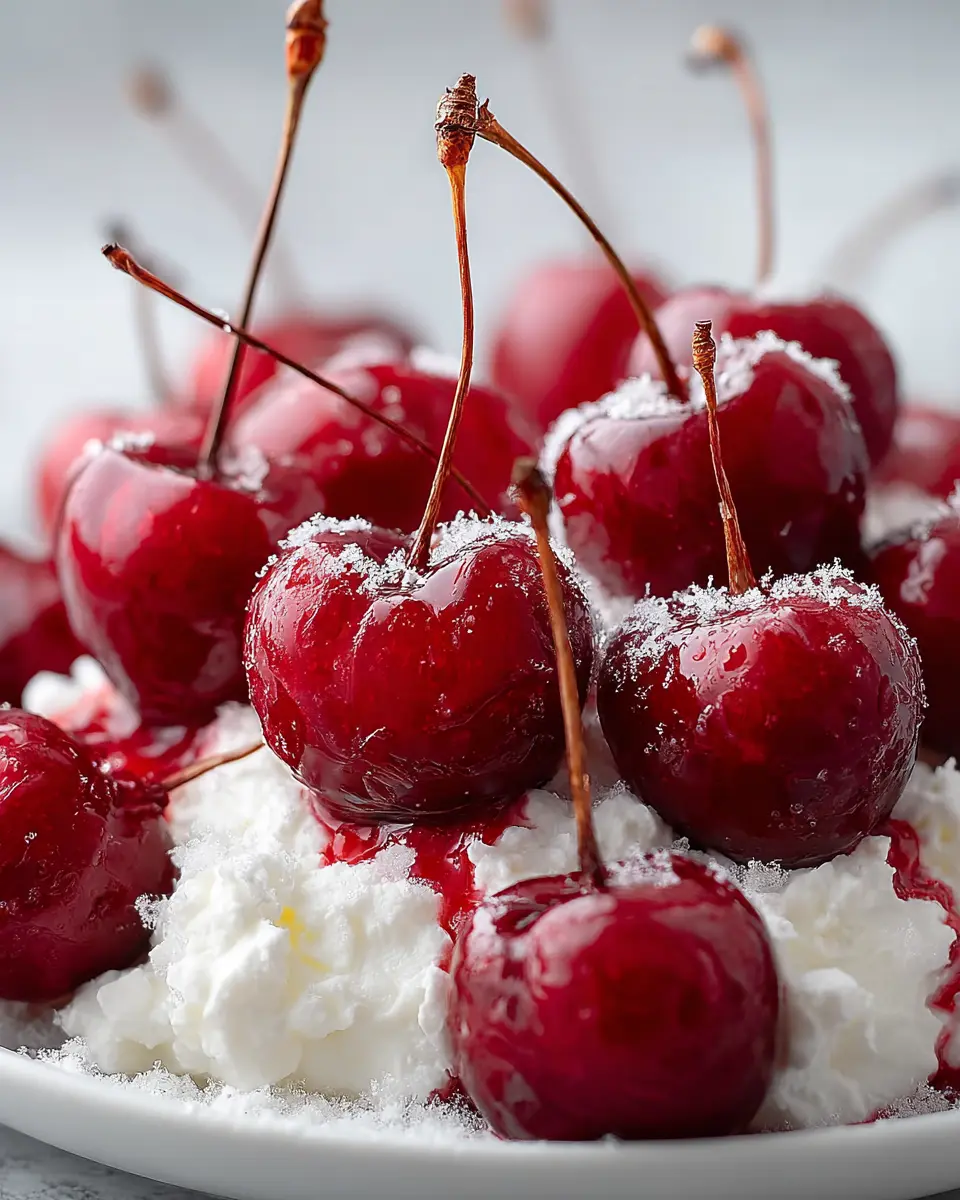
Introduction to Cherries in the Snow
The Story Behind the Dessert
Have you ever enjoyed a dessert that not only tasted divine but also brought a sense of nostalgia? That’s precisely what Cherries in the Snow inspires in many of us. Originating in the mid-20th century, this delightful dish combines the tartness of fresh cherries with the sweetness of creamy, fluffy meringue—a perfect dessert balance that makes your taste buds sing.
The name itself evokes beautiful imagery. Picture a snowy landscape, the pure white meringue playing canvas to vibrant red cherries, creating a breathtaking contrast. This dish often makes an appearance during holiday festivities and celebrations, reminding us of cozy gatherings and sweet moments shared with loved ones.
Back in the 1950s, Cherries in the Snow quickly became a staple at potlucks and family reunions. Its vintage vibe captures the hearts of those who appreciate classic recipes with a twist. The dish was popularized by various community cookbooks, with each household adding a personal touch, whether through the type of cherries used or the way the meringue is whipped to perfection.
If you’re curious about the basics of cherries, consider this: Did you know that cherries are packed with antioxidants? According to a study by the University of Michigan, they can help reduce inflammation, making them not just a delightful treat but also a health-conscious choice. Healthline highlights cherries’ impressive nutritional profile, making them a fantastic addition to any dessert.
Experimenting with Cherries in the Snow can mean using fresh, canned, or frozen cherries, allowing for year-round enjoyment. And for those who love to add their spin, think about incorporating almond or vanilla extracts into the meringue. Don't be afraid to explore different toppings or presentation styles!
In the next sections, we’ll share a straightforward recipe for Cherries in the Snow that will impress your friends and family. Whether you’re an experienced baker or a kitchen novice, this delightful treat is sure to brighten any occasion. So, let’s dive into making this classic dessert and create those sweet memories together!
Ingredients for Cherries in the Snow
To create the delightful cherries in the snow, you'll need a few essential ingredients. This dish is not only colorful but also a true crowd-pleaser, making it perfect for gatherings or just a cozy night at home. Here's what you'll want to gather:
Essential Ingredients List
- Fresh Cherries: Look for plump, juicy cherries, as they are the star of the dish. Organic is always a good choice for taste and sustainability.
- Cream Cheese: Softened to room temperature, this will give your cherries in the snow a creamy texture.
- Powdered Sugar: This adds the right sweetness. You can adjust the amount based on your preference.
- Turkey Bacon: Crumbled and crispy, it adds a delightful crunch that contrasts beautifully with the creamy cherries.
- Chopped Nuts: Options like almonds or walnuts add an extra layer of flavor and texture.
- Coconut Flakes: Unsweetened, for the snow-like appearance that makes this dish visually appealing.
For a deeper dive into ingredient benefits, you can check out resources like Nutrition.gov or Healthline. These sites offer insight into how these ingredients work together nutritionally.
Preparing Cherries in the Snow
When you think of a delightful dessert that captures the essence of comfort and nostalgia, Cherries in the Snow is a beautiful contender that exudes warmth and sweetness. Perfect for gatherings or a relaxing evening at home, this dessert is not only straightforward to prepare but also visually stunning. Let’s walk through the delightful steps of creating this heavenly treat!
Crafting the Cream Cheese Mixture
The heart of your Cherries in the Snow lies in a creamy base that combines delightful flavors. Start by gathering the following ingredients:
- 8 oz cream cheese, softened
- 1 cup powdered sugar
- In a medium mixing bowl, beat the softened cream cheese until it’s nice and smooth. A hand mixer works wonders here but don’t hesitate to use a whisk for a bit of a workout!
- Gradually add the powdered sugar, mixing until you achieve a thick and creamy consistency. This step is crucial for building that rich foundation that complements the cherries.
Pro tip: Using room temperature cream cheese makes blending so much easier and avoids those pesky lumps. If you're in a pinch, you can slightly microwave the cream cheese for about 10-15 seconds, but be careful not to melt it!
Incorporating Milk and Vanilla
To elevate the cream cheese mixture, we’ll add some liquid goodness:
- 1 cup milk
- 1 teaspoon vanilla extract
- Slowly pour in the milk and add the vanilla extract to your cream cheese mix.
- Continue mixing until everything is well incorporated and creamy. This will add a hint of sweetness and flavor complexity that pairs perfectly with the tart cherries.
Have you ever considered the role of milk in desserts? According to Healthline, milk not only brings creaminess, but also calcium and other essential nutrients to your sweet treats.
Folding in the Whipped Topping
The fluffy texture of the whipped topping is what gives Cherries in the Snow its signature look:
- 8 oz whipped topping (thawed)
- Once your cream cheese mixture is smooth and well-blended, it’s time to fold in the whipped topping. Gently introduce it using a spatula—this will keep the mixture light and airy, preserving that lovely, cloud-like texture.
- Try to avoid vigorous stirring; instead, use a gentle folding motion to combine. This step is where your dessert starts to truly embody the snow-like appearance!
Incorporating Angel Food Cake
The next layer is what will give your dessert structure and lightness—a soft and airy angel food cake. Here’s what you’ll need:
- 1 store-bought or homemade angel food cake
- Cut the angel food cake into bite-sized cubes. This will allow for an inviting mixture of textures in your dessert.
- Gently fold the cubes into the cream cheese and whipped topping mixture, ensuring every piece gets that heavenly coat.
Why angel food cake? This cake famously has a low-fat content compared to other cake options, making it a lighter alternative in desserts.
Layering with Cherry Pie Filling
Finally, here comes the star of the show—delicious cherries. You’ll need:
- 1 can of cherry pie filling
- In a trifle dish or individual cups, start layering your Cherries in the Snow. Begin with a layer of your creamy mixture, then add a generous scoop of cherry pie filling.
- Repeat the layers until you reach the top of your container, finishing with the cherry filling so everyone gets to see that vibrant red.
When serving, consider garnishing with additional whipped topping or fresh cherries for visual appeal. Did you know that cherries pack powerful antioxidants? It's a sweet way to include some health benefits while enjoying dessert!
In conclusion, Cherries in the Snow is a delightful blend of flavors and textures that’s fairly easy to put together. With just a few simple steps, you’ll create a stunning dessert that will impress your guests and satisfy your sweet cravings. Ready to indulge? Enjoy the process, and don't forget to savor each bite!
Variations on Cherries in the Snow
Cherries in the Snow with Fresh Fruits
When you think about Cherries in the Snow, what comes to mind? The classic version, rich and creamy? That's a great go-to, but why not mix it up? Incorporating fresh fruits can elevate this dessert to new heights. Imagine succulent strawberries, vibrant blueberries, or refreshing pineapple pieces mingling with the cherries, adding color and an exciting twist. You could even drizzle some homemade fruit syrup over the top for extra flair. This not only enhances the flavor but also makes the dish visually stunning—a perfect centerpiece for any gathering.
Don't hesitate to explore local farmers’ markets for seasonal fruits. Fresh produce tends to be not just tastier but also more nutritious, supporting your healthy eating goals.
Chocolate Cherry Snow Dessert
If you’re a chocolate lover (who isn’t?), consider crafting a Chocolate Cherry Snow dessert. It’s a heavenly combination where the richness of chocolate melds beautifully with the tartness of cherries. Start by making a chocolate mousse or pudding base and layer it with your Cherries in the Snow mixture. The creamy, dreamy texture pairs impeccably with the acidic notes of the cherries. For some added crunch, sprinkle crushed nuts or a dash of cocoa powder on top for that gourmet finish.
This treat can also be a hit at parties, offering guests a dessert option that's both indulgent and refreshing. The rich flavors encourage sharing, so be sure to have ample portions ready!
For more delightful recipes that showcase the beauty of cherries, check out sources like Food Network or All Recipes to inspire your next culinary adventure!
Cooking tips and notes for Cherries in the Snow
Best practices for a fluffy texture
Achieving a delightful and fluffy texture for your Cherries in the Snow is all about technique. Here are a few tried-and-true tips to elevate your dessert game:
-
Room Temperature Ingredients: Start with eggs and cream cheese at room temperature. This helps create a creamy blend that’s essential for fluffiness. You’d be surprised how much of a difference this makes!
-
Whip the Cream Wisely: When whipping your heavy cream, make sure it’s chilled. Aim for soft peaks first, then gradually incorporate sugar. Overwhipping can lead to a grainy texture, so keep a close eye on it.
-
Gentle Folding: When combining your whipped cream with the cherry mixture, use a gentle folding technique. This preserves air bubbles, creating that light, airy texture we love.
-
Chill Before Serving: After assembling, let your Cherries in the Snow chill in the refrigerator. This not only enhances the flavors but allows the texture to set beautifully!
For more tips on achieving perfect whipped cream, check out sources like The Kitchn or Serious Eats for expert advice. Happy cooking!
Serving suggestions for Cherries in the Snow
Creating a delightful experience with Cherries in the Snow begins with how you plate and present this gorgeous dessert. Here are some friendly and approachable tips to elevate your serving style:
How to Plate and Present the Dessert
-
Choose the Right Dish: Opt for a shallow, wide bowl to showcase the contrasting colors. The fluffy white topping against the deep red cherries creates a stunning visual.
-
Layering is Key: Start by spooning a generous layer of your Cherries in the Snow into the dish, ensuring some cherries are visible for that pop of color.
-
Garnish Thoughtfully: A sprinkle of toasted coconut or a dusting of powdered sugar adds a nice touch. Fresh mint leaves can also provide a lovely green contrast, enhancing the overall look.
-
Add a Creamy Element: Serve with a dollop of whipped cream or a side of vanilla ice cream for those who appreciate a creamy texture.
For inspiration, check out sites like Food52 for plating techniques that can take your dessert from simple to sensational!
Taking these thoughtful steps ensures your Cherries in the Snow is not only delicious but also a feast for the eyes. Your guests will be enchanted!
Time breakdown for Cherries in the Snow
Preparation time
Getting started with your Cherries in the Snow takes around 20 minutes. This is when you’ll gather your ingredients, prepare the cherries, and mix them with the fluffy snow-like layers of cream and sugar. It's a fun process—really, it’s like crafting a little dessert masterpiece!
Setting time
Once you’ve whipped up your creation, it needs some gentle time in the fridge. The Cherries in the Snow should set for at least 2 hours to achieve that perfect blend of flavors and textures. If you're a planner, making it the night before is a great idea.
Total time
In total, you’re looking at about 2 hours and 20 minutes from start to finish. This quick yet rewarding dessert is perfect for impressing friends or family during a cozy gathering. Who wouldn't love to indulge in such a delicious treat? For more tips on ingredient selection, check out this expert advice from Food Network.
Nutritional facts for Cherries in the Snow
If you’re a dessert lover looking for a healthy yet delightful treat, Cherries in the Snow could be your perfect match! Let’s break down some nutritional facts so you can enjoy this indulgence guilt-free.
Calories
A serving of Cherries in the Snow typically contains around 120-150 calories. It’s a light option that allows you to enjoy a sweet treat without completely derailing your daily caloric intake. Most of the calories come from the natural sugars found in cherries, which can be a healthier alternative to processed sugars.
Protein
You might be surprised to know that Cherries in the Snow can contribute approximately 2 grams of protein per serving. While cherries aren’t a protein powerhouse, pairing them with a protein-rich topping like Greek yogurt can elevate the dish nutritionally and keep you satisfied longer.
Sodium
When it comes to sodium content, Cherries in the Snow is a friend to your health. Each serving generally contains less than 10 mg of sodium. This makes it a fantastic dessert choice, especially if you’re mindful of your sodium intake for heart health.
Enjoying Cherries in the Snow means you can have your dessert and eat it too—without compromising on nutrition! If you’re curious about the health benefits of cherries, resources like the USDA Nutrition Database or Healthline provide excellent insights into this wonderful fruit.
For more delightful recipes featuring this beloved fruit, stay tuned!
FAQs about Cherries in the Snow
Can I use fresh cherries instead of pie filling?
Absolutely! While the classic Cherries in the Snow dessert often uses cherry pie filling for convenience, fresh cherries can elevate your dish beautifully. Just make sure to pit and slice them before mixing into your whipped cream and cream cheese base. This will give you a delightful tartness that pairs wonderfully with the sweetness of the cream. If you go this route, you might want to add a bit of sugar to balance the flavor.
How long can I keep Cherries in the Snow in the fridge?
If stored properly, you can keep your Cherries in the Snow in the fridge for about 3 to 5 days. Be sure to cover it tightly to maintain freshness and avoid absorbing other odors. This delightful dessert holds up well, but keeping it well-covered will ensure that your whipped cream stays fluffy and the cherries retain their delightful taste.
Can I make this dessert ahead of time?
Yes, making Cherries in the Snow ahead of time is a great idea! You can prepare the cherry mixture and the cream cheese layer a day or two in advance. Just assemble it just before serving for the best texture. If you want to get even more creative, consider adding a dash of vanilla or almond extract to your cherry mixture for an extra flavor pop.
For more tips on preserving freshness in desserts, check out this insightful article on food safety and storage recommendations!
Conclusion on Cherries in the Snow
Recap of the dessert's appeal
In summary, Cherries in the Snow is a delightful dessert that captivates both the eye and the palate. With its luscious cherry topping mingling atop a creamy, fluffy layer, this treat is sure to become a favorite in your dessert repertoire.
The combination of tart cherries and sweet cream creates a beautiful balance of flavors that can elevate any occasion—be it a casual gathering or a festive celebration.
Why not impress your friends with this unique dish? Pair it with a homemade lemonade or some refreshing iced tea for an unforgettable meal. Check out this guide on pairing desserts to elevate your dining experience!
So, whether you're hosting a dinner party or simply treating yourself, Cherries in the Snow is a wonderful way to indulge in something special. You'll find it both fun to make and delicious to eat—what's not to love?
Print
Cherries in the Snow: Indulgent Turkey Bacon Dessert Delight
A delicious dessert featuring cherries and a savory twist with turkey bacon.
- Total Time: 45 minutes
- Yield: 4 servings
Ingredients
- 1 cup cherries, pitted
- 4 slices turkey bacon
- 1 cup whipped cream
- 2 tablespoons sugar
- 1 teaspoon vanilla extract
Instructions
- Preheat the oven to 350°F (175°C).
- Cook the turkey bacon in a skillet until crispy, then crumble it.
- In a bowl, mix the pitted cherries with sugar and vanilla.
- Layer the cherry mixture in a dessert dish and top with whipped cream and crumbled bacon.
- Chill for 30 minutes before serving.
Notes
- For a richer flavor, use thick-cut turkey bacon.
- Consider adding a sprinkle of chocolate shavings on top.
- Prep Time: 15 minutes
- Cook Time: 10 minutes
- Category: Dessert
- Method: Baking
- Cuisine: American
- Diet: Gluten-Free
Nutrition
- Serving Size: 1 serving
- Calories: 250
- Sugar: 20g
- Sodium: 300mg
- Fat: 15g
- Saturated Fat: 4g
- Unsaturated Fat: 10g
- Trans Fat: 0g
- Carbohydrates: 30g
- Fiber: 2g
- Protein: 5g
- Cholesterol: 10mg