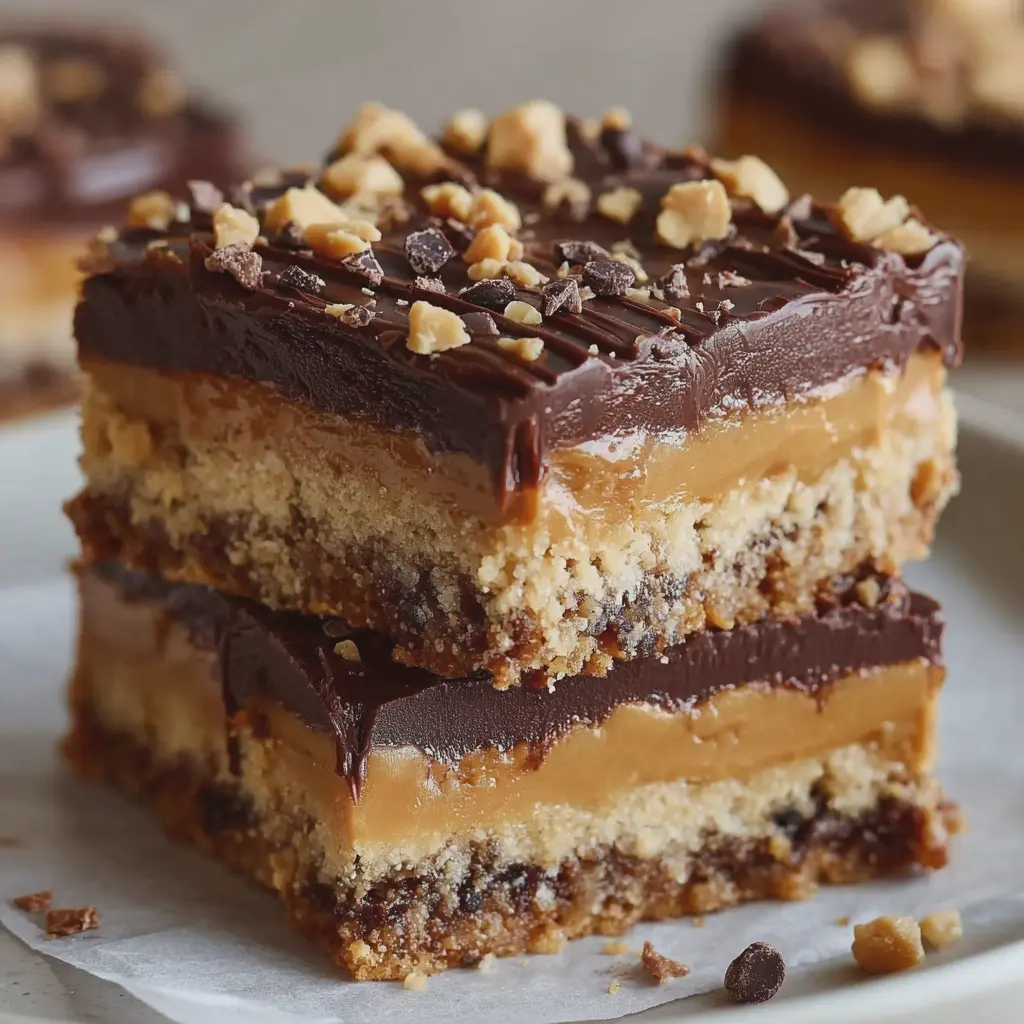
Introduction to Peanut Butter Dream Bars
When you think of irresistible sweets, nothing quite compares to Peanut Butter Dream Bars. These delectable treats are a symphony of rich, creamy peanut butter layered over a crumbly base, making every bite a perfect indulgence. Whether you're at a picnic, a potluck, or simply indulging at home, these bars are reliable crowd-pleasers.
Why Peanut Butter Dream Bars are the Ultimate Treat
So, why do Peanut Butter Dream Bars stand out among the myriad of desserts out there? For starters, their flavor profile strikes the perfect balance between sweet and savory. The layers meld together beautifully, creating a texture that’s both crunchy and creamy. Have you ever craved something that resonates with nostalgia yet feels innovative? That’s exactly how these bars appeal to your taste buds.
-
Quick and Easy: Life is busy, and finding time to bake can often feel daunting. Luckily, making Peanut Butter Dream Bars doesn’t require extensive culinary skills or hours of preparation. With simple ingredients and minimal fuss, you can whip these up in no time.
-
Versatile Ingredients: The beauty of these bars lies in their adaptability. Whether you prefer a gluten-free base or want to add extra chocolate chips, the options are endless. Customize them to fit your dietary needs and personal preferences!
-
Perfect for Any Occasion: Whether you’re celebrating a birthday, hosting a game night, or simply enjoying a quiet evening, these bars lend themselves to any setting. They’re quick to prepare and can be made ahead of time, ensuring you always have a delightful treat on hand.
For those intrigued by the health aspect, peanut butter is a fantastic source of protein and healthy fats. While it’s essential to enjoy these bars in moderation, it’s great to know you're indulging in a treat that also offers some nutritional benefits. Curious to learn more about the health perks of peanut butter? Check out this article from Healthline.
Ready to dive into the world of Peanut Butter Dream Bars? Let's get baking!
Ingredients for Peanut Butter Dream Bars
Essential Ingredients for Dreamy Flavor
Creating the perfect Peanut Butter Dream Bars starts with quality ingredients that bring rich flavor and delightful texture. Here’s what you’ll need:
- Peanut Butter: Choose smooth or crunchy, depending on your preference. Organic options can add a lovely natural sweetness.
- Oats: Rolled oats provide a hearty base. They also bring fiber, which is great for digestion.
- Honey or Maple Syrup: These natural sweeteners offer a touch of sweetness while keeping things healthy.
- Butter or Coconut Oil: For that buttery richness, you can use regular butter or substitute with coconut oil for a dairy-free option.
- Chocolate Chips: Semi-sweet chocolate adds a luxurious touch and pairs perfectly with peanut butter.
- Salt: Don’t skip the salt! A pinch enhances the flavors beautifully.
This combination of ingredients ensures your Peanut Butter Dream Bars are not just tasty but also satisfying. You can explore variations, like adding nuts or dried fruits for added texture and nutrients. So, are you ready to create your own delicious bars?
Step-by-step Preparation of Peanut Butter Dream Bars
When it comes to dessert, few things can compare to the rich and creamy delight of Peanut Butter Dream Bars. They're the perfect blend of peanut butter and chocolate, making them irresistible to anyone with a sweet tooth. Let's dive into the step-by-step preparation to ensure your baking experience is as smooth as the fillings of these delectable bars.
Preheat the oven and prepare your pan
Start by preheating your oven to 350°F (175°C). A preheated oven is crucial for evenly baking your Peanut Butter Dream Bars so they come out perfectly cooked. While the oven warms up, grab an 8x8 inch baking pan and line it with parchment paper. This not only makes for easy removal later but helps prevent them from sticking.
Mix together the base layer ingredients
In a mixing bowl, combine the following ingredients for the base layer:
- 1 cup of graham cracker crumbs
- ½ cup of granulated sugar
- ½ cup of melted butter
- ½ cup of creamy peanut butter
Use a spatula or wooden spoon to mix these until well-combined. This should create a crumbly yet cohesive mixture — the foundation of your Peanut Butter Dream Bars. Graham crackers, with their hint of sweetness, are essential for giving that delightful texture.
Press the base mixture into the pan
Once your mixture is ready, it’s time to channel your inner baker! Take the mixture and evenly press it into the bottom of the prepared baking pan. For an easier job, you can use the back of a measuring cup to compact it tightly. Getting this layer right is crucial as it forms the sturdy base that will hold all that creamy goodness above.
Bake the base (optional for firmer texture)
Place the pan in the oven and let it bake for about 10 minutes. This step is optional, but baking the base for a few minutes enhances its firmness and depth of flavor. You achieve a slightly toasty, golden layer that provides a delightful contrast to the buttery topping.
Melt the chocolate and peanut butter topping
While the base is baking, it’s time to whip up the delicious topping. In a microwave-safe bowl, add:
- 1 cup of semi-sweet chocolate chips
- ¼ cup of creamy peanut butter
Heat these in the microwave in 30-second increments, stirring in between, until melted and smooth. The combination of chocolate and peanut butter is nothing short of heavenly. If you’re looking for a twist, consider incorporating dark chocolate for a richer flavor.
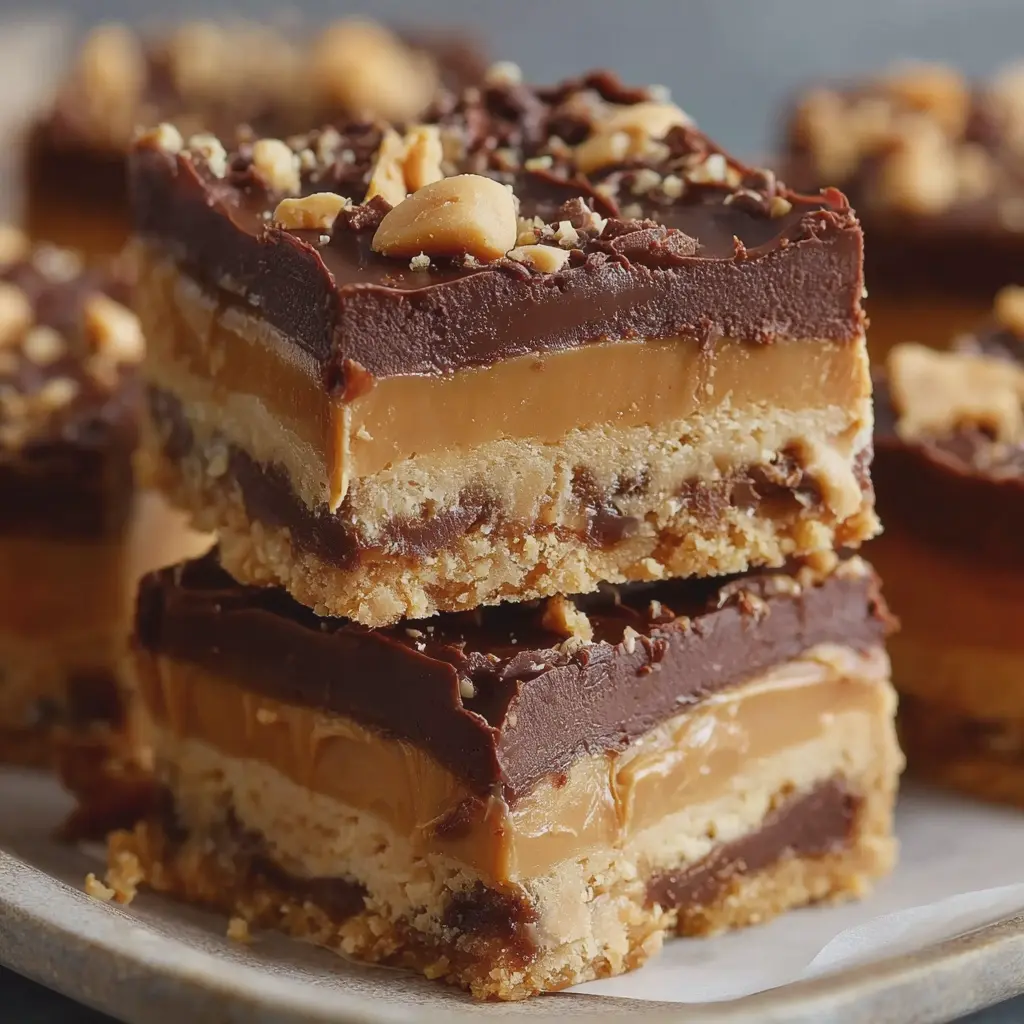
Pour and spread the chocolate layer
Once melted, carefully pour the chocolate-peanut butter mixture over the baked base. Use a spatula to spread it evenly across the surface. Make sure to reach the edges so every bite of your Peanut Butter Dream Bars is satisfying and beautifully layered.
Chill and set the bars
Now comes the hardest part: patience. Place the pan in the refrigerator and allow it to chill for at least 2 hours, so the bars set properly. This is when the chocolate layer firms up, making it easier to cut into perfect squares later. Need a quick tip? If you’re in a hurry, aim for at least 30 minutes in the freezer.
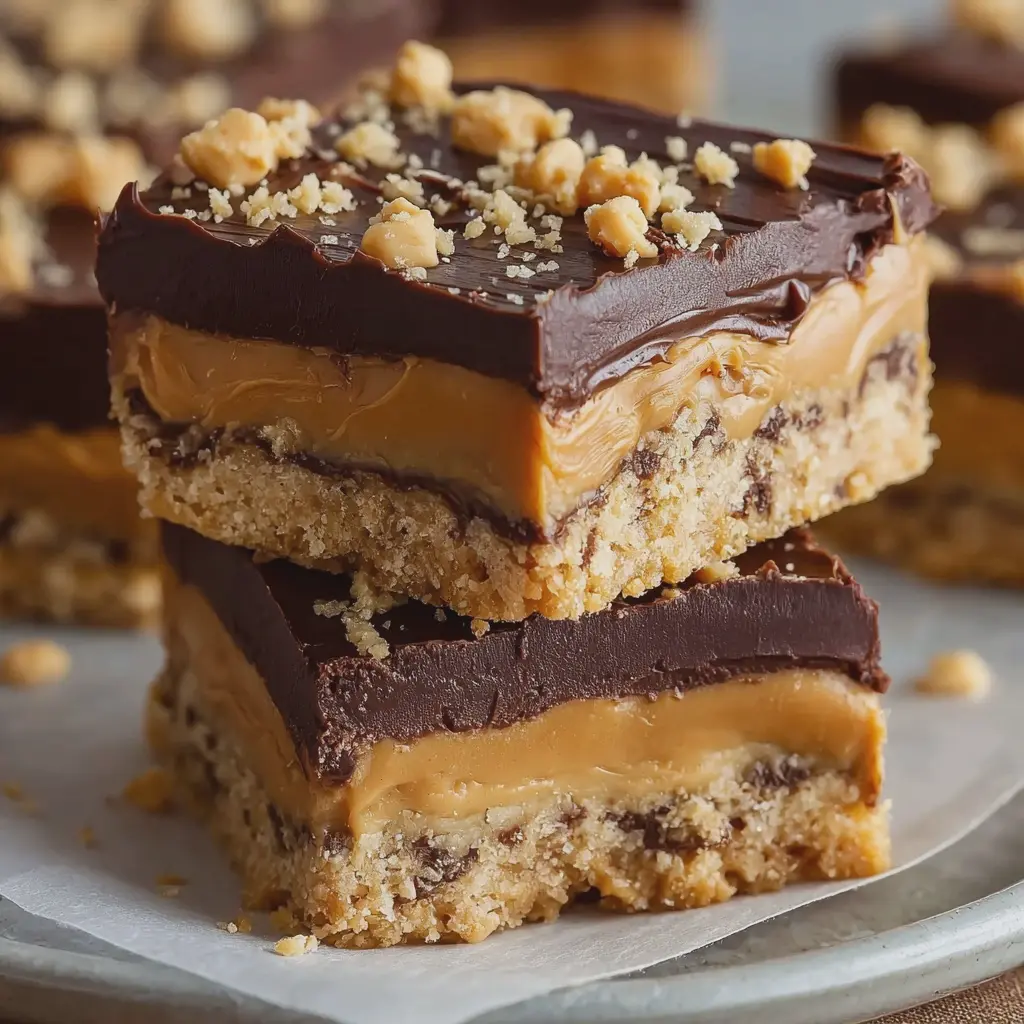
Cut into squares and serve
Once set, you can lift your Peanut Butter Dream Bars out of the pan using the parchment paper. Use a sharp knife to cut them into squares. If you want to impress your friends, consider drizzling some extra melted chocolate on top or sprinkling crushed nuts for added texture!
Whether you choose to serve them at a gathering or indulge by yourself, these Peanut Butter Dream Bars are bound to be a hit. Share a piece with a friend, or just enjoy the rich flavors all to yourself — we won't judge!
For a more in-depth look at variations on this classic recipe, you can explore sites like Food Network or BBC Good Food for endless inspiration. Happy baking!
Variations on Peanut Butter Dream Bars
Swapping Out Ingredients for Different Flavors
Unlocking the potential of Peanut Butter Dream Bars means experimenting with swaps. Not a fan of peanut butter? Try almond or cashew butter for a nutty twist. These options not only alter the flavor profile but also cater to different dietary needs. If you’re looking to reduce sugar, consider using honey or maple syrup instead of granulated sugar. You might find a delightful flavor fusion that excites your taste buds!
You can even take a daring leap by introducing oatmeal instead of part of the flour. This can add a wholesome chewiness while increasing fiber content. Feeling adventurous? Toss in some shredded coconut for a tropical vibe—who knew your kitchen could become an island getaway?
Adding Unexpected Mix-Ins for Extra Flair
The beauty of Peanut Butter Dream Bars lies in their versatility. Think outside the box with mix-ins that surprise and delight! Chocolate chips are a classic addition, but why not incorporate white chocolate or even yogurt chips for a tangy twist?
Consider adding:
- Chopped nuts for extra crunch (almonds, pecans, or walnuts)
- Dried fruits such as cranberries or apricots for a burst of sweetness
- Mini marshmallows to make bars more indulgent
These unexpected elements not only enhance flavor but elevate the texture too. Each bite can bring something new, keeping your palate engaged. Want to dive into more ways to enhance your baking? Check out the helpful tips at The Kitchn and expand your culinary repertoire!
With these simple tweaks, your Peanut Butter Dream Bars can become an exciting adventure every time you bake. Why not host a bake-off with friends to try out different variations and find your ultimate favorite?
Cooking Tips and Notes for Peanut Butter Dream Bars
Secrets to a Perfect Texture
Getting the right texture for your Peanut Butter Dream Bars is key to that dreamy taste sensation. Use creamy peanut butter for a smoother consistency, and be sure to soften your butter to room temperature before mixing. This helps everything blend beautifully. When baking, don’t overmix the ingredients; it can create a denser bar. Remember, a light touch will yield a richer texture!
How to Avoid Common Mistakes
It’s easy to make small errors that can affect your bars. Common pitfalls include:
- Incorrect measurements: Always use a kitchen scale or measuring cups accurately for your dry and wet ingredients.
- Underbaking: Keep an eye on your bars. They should be set around the edges but still slightly soft in the middle when you take them out. They will continue to firm up as they cool.
- Cooling time: Patience is a virtue! Let your Peanut Butter Dream Bars cool completely before cutting them; this ensures cleaner edges.
For more baking tips, you might find the resources on King Arthur Baking helpful!
Serving Suggestions for Peanut Butter Dream Bars
Pairing with Milk Alternatives
When it comes to enjoying your Peanut Butter Dream Bars, the right beverage can make all the difference! Consider pairing these delicious bars with a glass of almond milk or oat milk for a creamy, nutty contrast. Both options are not only delicious but also plant-based, making them perfect for anyone watching their dairy intake. For a fun twist, try a chocolate-flavored plant milk; the rich flavor complements the peanut butter beautifully.
Creative Serving Ideas for Gatherings
Hosting a gathering? Elevate your dessert table by presenting your Peanut Butter Dream Bars with a twist! Cut the bars into fun shapes using cookie cutters, and dust them with powdered sugar for an elegant touch. You could also serve them alongside fresh fruit, like sliced strawberries or bananas, for a pop of color and freshness. For added flair, drizzle homemade chocolate sauce over the bars right before serving.
By making these delightful bars the star of your dessert spread, you'll ensure that your guests are raving about them long after the last bite! Want more inspiration? Check out these creative dessert ideas for your next gathering.
Time Breakdown for Peanut Butter Dream Bars
Preparation time
For these delightful Peanut Butter Dream Bars, you’ll need about 15 minutes of prep time. This is perfect for whipping up a quick and delicious treat after a long workday. Gather your ingredients, make some measurements, and let your creativity flow as you mix everything together!
Chilling time
Once you’ve combined your ingredients and spread them into a baking dish, you'll want to chill the bars for at least an hour. This step is crucial—allowing the flavors to meld and the bars to firm up ensures a perfect texture. Plus, who doesn’t enjoy a little time to unwind while your snacks chill?
Total time
In total, you’re looking at roughly 1 hour and 15 minutes from start to finish. This means you can enjoy these Peanut Butter Dream Bars in no time! When life gets busy, having quick treats like this can really brighten your day. For more recipes and tips on quick desserts, check out Serious Eats.
So why wait? Get started on these dreamy bars today!
Nutritional Facts for Peanut Butter Dream Bars
Calories per serving
When you're diving into a Peanut Butter Dream Bar, it's essential to know what you're indulging in. Each bar typically contains around 200 calories. This makes it a delightful treat without derailing your day! Just that perfect sweet spot for an energy boost during your afternoon slump.
Key nutrients in each bar
These bars don’t just satisfy your sweet tooth; they’re loaded with beneficial nutrients:
- Protein: Each serving packs a solid punch of protein, thanks to the peanut butter, which keeps you feeling full and focused.
- Healthy Fats: The peanut butter provides heart-healthy fats that are good for your well-being.
- Fiber: A significant source of fiber will aid digestion and keep you satisfied longer.
For personalized insights on nutritional values, check out resources like the USDA FoodData Central to help track your intake. Snack smart and enjoy those Peanut Butter Dream Bars!
FAQs about Peanut Butter Dream Bars
Can I make these bars gluten-free?
Absolutely! To create delicious Peanut Butter Dream Bars that everyone can enjoy, simply swap the regular flour for a gluten-free alternative like almond flour or a store-bought gluten-free flour blend. Many of these blends are designed to mimic all-purpose flour closely, ensuring that your bars come out just as tasty.
How should I store leftover bars?
To maintain the freshness of your Peanut Butter Dream Bars, store them in an airtight container. Keep the container in the refrigerator to extend their shelf life, ideally up to a week. If you want to enjoy them later, you can freeze the bars—just wrap them individually in plastic wrap and then place them in a freezer bag. When you're ready to indulge, allow them to thaw in the fridge overnight.
What are some common substitutions?
Have some ingredients you're missing? Here are a few easy swaps to consider:
- Nut butters: If peanut butter isn't your thing, try almond butter or even sunflower seed butter for a nut-free option.
- Sweeteners: Instead of granulated sugar, you can use honey or maple syrup for a touch of natural sweetness.
- Chocolate: Dark chocolate chips can be replaced with milk or white chocolate for different flavor profiles.
The beauty of these Peanut Butter Dream Bars is their versatility. Feel free to get creative and adjust the ingredients to fit your lifestyle or pantry staples. If you're looking for more ideas, check out resources like Minimalist Baker, which offer excellent substitution guides!
Remember, cooking should be fun and adapt to your tastes—experiment to make these bars truly yours.
Conclusion on Peanut Butter Dream Bars
Why You Need to Try Making These at Home
If you haven’t yet made Peanut Butter Dream Bars at home, you’re truly missing out! The harmonious blend of creamy peanut butter and sweet, crumbly crust creates a delightful treat that’s sure to be a hit with friends and family. Homemade bars are not only fresher than store-bought versions, but they also allow you to customize ingredients to fit your taste preferences and dietary needs—perfect for busy professionals looking for healthier snacks.
Imagine indulging guilt-free in a bite-sized sweet treat you made yourself! Plus, your kitchen will smell amazing. Embrace the joy of creating these Peanut Butter Dream Bars, and share the love—who wouldn’t appreciate a thoughtful homemade gift?
For a more in-depth look at additional sweet treats, check out this guide on healthy dessert recipes and elevate your baking game further!
Print
Peanut Butter Dream Bars: Easy Indulgence for Sweet Lovers
Indulge in the rich and creamy flavor of Peanut Butter Dream Bars, a quick and easy dessert that satisfies your sweet cravings.
- Total Time: 40 minutes
- Yield: 16 bars
Ingredients
- 1 cup creamy peanut butter
- 1 cup granulated sugar
- 1 cup graham cracker crumbs
- ½ cup unsalted butter, melted
- 1 cup powdered sugar
- ¼ cup milk
- 1 cup chocolate chips
Instructions
- Preheat your oven to 350°F (175°C).
- In a mixing bowl, combine peanut butter, granulated sugar, graham cracker crumbs, and melted butter until well blended.
- Spread the mixture evenly in a greased baking pan.
- In another bowl, mix powdered sugar and milk until smooth, then spread over the peanut butter layer.
- Sprinkle chocolate chips on top and gently press down.
- Bake for 20-25 minutes or until set.
- Let it cool before cutting into bars.
Notes
- For an extra indulgence, swirl some melted chocolate on top before cooling.
- These bars are best served chilled.
- Prep Time: 15 minutes
- Cook Time: 25 minutes
- Category: Dessert
- Method: baking
- Cuisine: American
- Diet: vegetarian
Nutrition
- Serving Size: 1 bar
- Calories: 250
- Sugar: 18g
- Sodium: 150mg
- Fat: 15g
- Saturated Fat: 6g
- Unsaturated Fat: 8g
- Trans Fat: 0g
- Carbohydrates: 30g
- Fiber: 1g
- Protein: 5g
- Cholesterol: 15mg