Introduction to Chocolate Mochi
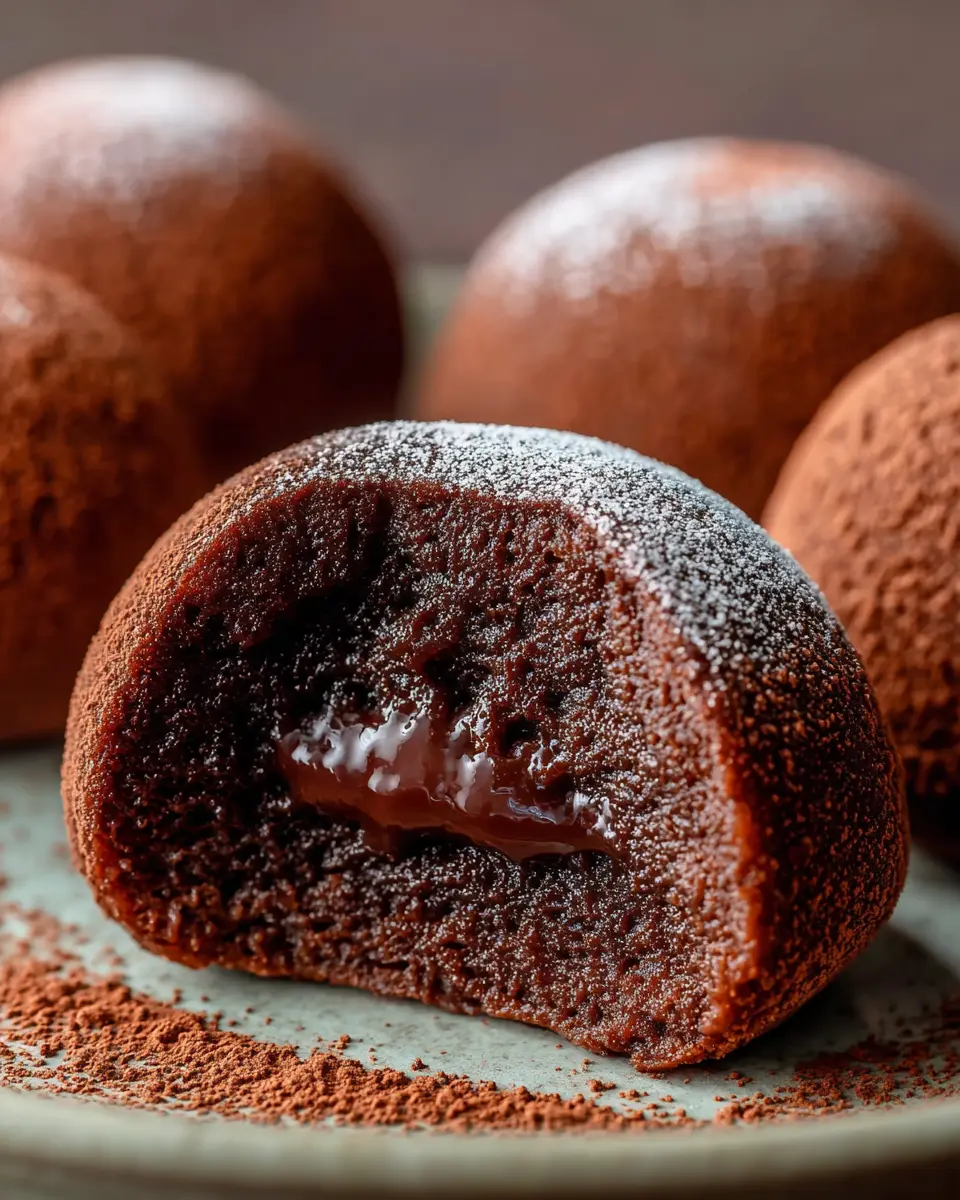
When it comes to desserts that blend texture and flavor in marvelous ways, chocolate mochi takes the cake—quite literally! Originating from Japan, mochi is made from glutinous rice, creating a wonderfully chewy and soft treat. Now, imagine infusing that delightful chewiness with rich, decadent chocolate. Voilà! You have chocolate mochi, a delicious fusion that has captured the hearts and taste buds of dessert lovers around the globe.
What is Chocolate Mochi and Why Is It So Delightful?
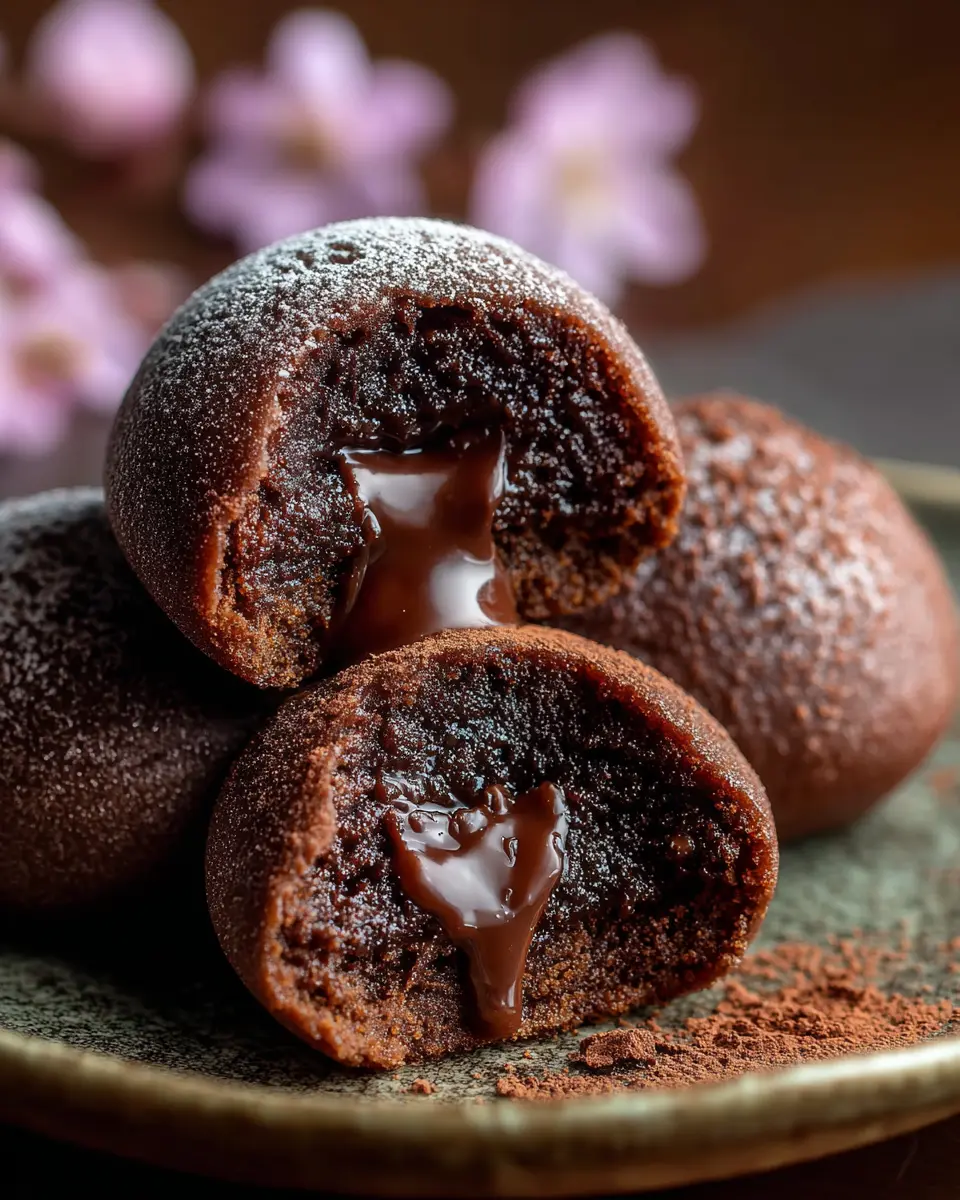
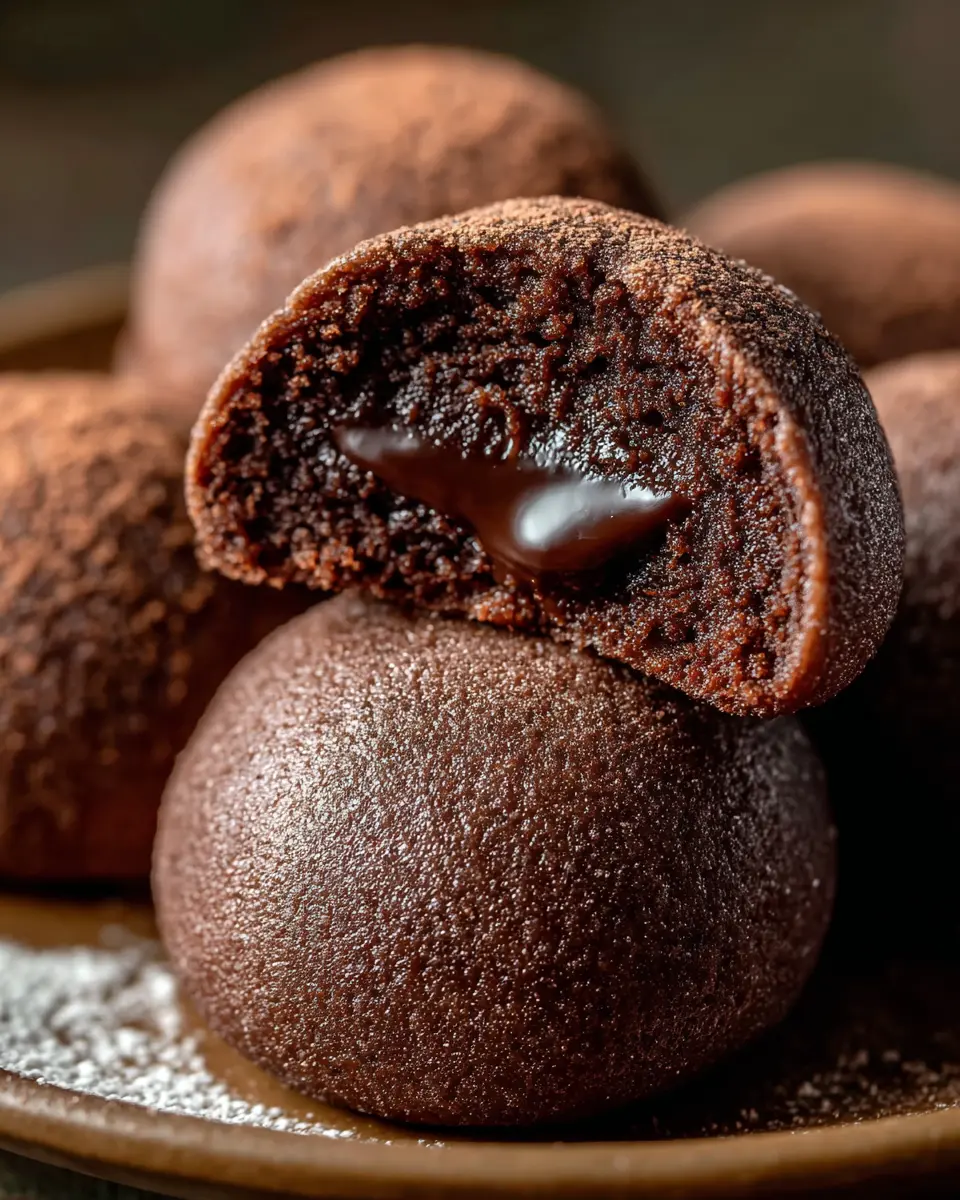
Chocolate mochi isn’t just a dessert; it's an experience. This delightful treat is made through a process called mochitsuki, where glutinous rice is steamed, pounded, and turned into a sticky dough. The addition of cocoa powder or melted chocolate gives it that irresistible cocoa flavor. The exterior is soft and sometimes dusted with cornstarch or cocoa powder, while the center can be filled with chocolate ganache, ice cream, or even sweet red bean paste for a twist.
So, why is it so beloved?
- A Unique Texture: The contrast between the soft outer layer and the rich filling provides an exciting mouthfeel that’s undeniably satisfying.
- Versatility: Chocolate mochi can be enjoyed in various forms, whether as ice cream mochi, bite-sized candies, or desserts for parties. You can even customize the fillings to match your cravings!
- Cultural Fusion: Many people appreciate chocolate mochi because it bridges cultures. It’s not just a Japanese dish; it finds its way into many international dessert menus, adding a flavorful touch to global cuisine.
Moreover, there are health perks! Mochi is often gluten-free (if made with appropriate ingredients), and portion control is easier compared to sliceable cakes, making it a guilt-free indulgence. You can explore more about the health benefits of mochi on sources like Healthline.
In a world filled with traditional cakes and pastries, chocolate mochi stands out with its unique flavor profile and whimsical presentation. Whether you’re preparing a sweet surprise for friends or treating yourself, chocolate mochi is a delightful adventure for your palate!
Ingredients for Chocolate Mochi
Creating the perfect chocolate mochi is simpler than you might think! Gather these essential ingredients to whip up a delightful treat that's sure to impress.
The Key Ingredients
- Glutinous Rice Flour: 1 cup is the foundation of this recipe. It helps achieve that uniquely chewy texture.
- Cocoa Powder: ¼ cup, unsweetened. This is where the chocolatey goodness comes in, giving your mochi its rich flavor.
- Sugar: ½ cup balances the cocoa's bitterness, adding just the right sweetness.
- Water: 1 cup. Use it to mix everything together and create that gooey, pliable dough.
- Cornstarch: ½ cup. A dusting of cornstarch on your work surface prevents sticking.
- Chocolate Filling: You can use chocolate ganache or even soft chocolate truffles for a luscious surprise inside.
With these ingredients, you're ready to dive into the world of chocolate mochi. If you’re curious about mochi’s history or other variations, check out resources like Savoring the Past for some delectable insights.
Step-by-Step Preparation of Chocolate Mochi
Making chocolate mochi at home can seem intimidating, but with a little patience and a few simple steps, you'll have a delightful treat to impress yourself and your friends. Whether you're planning for a cozy movie night or a celebratory get-together, the chewy sweetness of mochi filled with rich chocolate is always a hit. Let’s jump into the details!
Gather your ingredients
First things first! You’ll need to collect all the necessary ingredients to make this delicious chocolate mochi. Here's what you'll need:
- 1 cup sweet rice flour (also known as glutinous rice flour)
- ¼ cup granulated sugar
- ½ cup water
- ¼ cup cocoa powder (for that rich chocolate flavor)
- ½ cup chocolate chips (dark or milk, depending on your preference)
- Cornstarch or potato starch for dusting (to keep the mochi from sticking)
Grab everything and let’s get cooking! It makes a world of difference when you have everything in one place. Think of it like prep work in the kitchen—it's how the magic begins!
Mix the dry ingredients
In a medium bowl, combine your sweet rice flour, cocoa powder, and granulated sugar. Whisk these ingredients together until they are thoroughly mixed. This step is crucial as it ensures that the flavors blend evenly throughout the mochi.
Why mix dry ingredients first? The answer lies in even distribution. By doing this, you avoid clumps of cocoa or sugar in the final product, which could lead to uneven flavor. Plus, it’s a great arm workout!
Combine with wet ingredients
Once you’ve got the dry ingredients all mixed, it’s time to introduce the wet side. Gradually add the water to the dry mixture while stirring continuously. You want to achieve a smooth, lump-free batter. If it seems too thick, add a tiny bit more water (one tablespoon at a time). It’s better to be cautious here, as you want the perfect “mochi” consistency—sticky but not overly runny.
Cook the mochi mixture
Pour the combined mixture into a microwave-safe bowl or dish. Cover it with a damp paper towel and microwave on high for about 1-2 minutes. Stir halfway through to ensure even cooking. The mochi should begin to thicken and become somewhat translucent. This is the moment when the magic happens! If you have a steamer, you can also steam the mixture for about 10-15 minutes, which some argue offers a better texture.
Transfer and cool the dough
Be careful while transferring the hot concoction—it’s going to be sticky! Once your mochi is cooked, allow it to cool for a few minutes before working with it. This is an excellent opportunity to prepare your workspace. Dust your surface generously with cornstarch, ensuring that the mochi won't stick when you shape it.
Shape your chocolate mochi
Once the mochi dough is cool enough to handle, dust your hands with cornstarch and grab a small portion of dough. Flatten it out into a disc about 2 inches wide. Place a few chocolate chips in the center and fold the edges over to encase them completely. Roll it gently between your palms to form a ball. You can experiment with the size and shape—some might prefer small bites while others may want larger pieces.
Dust and serve
After shaping all your chocolate mochi, give them another light dusting of cornstarch to prevent sticking. Now, they’re ready for serving! Arrange them on a platter, and they make a beautiful centerpiece for any dessert table.
For an added touch, consider pairing your chocolate mochi with fresh strawberries or whipped cream for a delightful contrast in flavors.
If you’re interested in exploring more about the science behind mochi or different flavor variations, check out this article on Mochi History and Variations, where you’ll find a plethora of delicious ideas!
With each bite of your homemade chocolate mochi, you’ll savor the soft, chewy texture paired with that indulgent chocolate center—a perfect treat for any occasion. Enjoy!
Variations on Chocolate Mochi
If you love mochi, you’ll delight in these creative spins on classic chocolate mochi. These variations not only enhance the flavor but also add a unique twist to your dessert game!
Chocolate-filled Mochi
Let’s start with the classic chocolate-filled mochi. Imagine biting into the chewy exterior, only to discover a luscious, molten chocolate center waiting for you! Here’s how to elevate this variation:
- Choose your chocolate: Dark, milk, or even white chocolate — the choice is yours.
- Experiment with textures: Add a sprinkle of sea salt on top for a sweet-salty experience, or fold in crushed nuts for an unexpected crunch.
This simple yet decadent twist is perfect for cozy nights in. You can find more inspiration on this delightful treat from sources like Serious Eats.
Matcha Chocolate Mochi
For a flavor fusion that's sure to impress, try matcha chocolate mochi. The earthy notes of matcha beautifully complement the richness of chocolate, creating a harmonious blend:
- Balance the flavors: Use high-quality matcha for the best results, as it brings out the umami depth in your mochi.
- Visual appeal: Dust the finished mochi with matcha powder to create a lovely presentation.
This variation is not just about taste; it’s a feast for the eyes as well!
Peanut Butter Chocolate Mochi
If you’re a fan of peanut butter, this mochi is about to become your new favorite! Imagine the creamy, nutty goodness enveloped in a chewy chocolate mochi shell:
- Pillow of delight: Stuff each piece with a spoonful of creamy peanut butter, or try using a mix of crunchy and smooth for added texture.
- Health boost: Add a touch of honey or maple syrup for sweetness without relying solely on sugar.
Peanut butter chocolate mochi is not only indulgent but also provides that added protein kick to keep you satisfied.
With these delightful twists, you can enjoy chocolate mochi in countless ways. Experiment with these variations and share your own favorite combinations! What’s your go-to flavor addition?
Cooking Tips and Notes for Chocolate Mochi
When diving into the world of chocolate mochi, prepare for a delightful journey! Here are some friendly tips to ensure your mochi turns out perfectly.
Choosing the Right Flour
For authentic texture, use glutinous rice flour (sometimes labeled as mochi flour). Regular flour won’t give you that chewy bite that chocolate mochi is famous for. Brands like Mochiko or Bob's Red Mill are top picks for their quality and availability.
Mixing Your Ingredients
You’ll want your batter to be smooth, so take your time when mixing. If you notice lumps, don’t hesitate to use a whisk or a silicone spatula to break them up. Following this method guarantees an even cook.
Flavor Enhancements
Consider adding a pinch of salt to balance the sweetness. If you’re feeling adventurous, experiment with flavors like espresso or matcha—with the rich chocolate, these create an unforgettable twist!
Avoiding Sticky Situations
To prevent your mochi from sticking to surfaces, dust everything—your hands, the cutting board, and the plate—with cornstarch. This simple trick makes a world of difference and keeps your chocolate mochi intact.
Resources for More Tips
For more expertise, you can check out Serious Eats for in-depth tutorials or Bon Appétit for creative twists.
With these tips, you’ll be well on your way to mastering delicious chocolate mochi! Enjoy the process and happy cooking!
Serving Suggestions for Chocolate Mochi
Pairing with Fruits
The delightful taste of chocolate mochi pairs beautifully with a variety of fresh fruits. Consider serving them alongside:
- Strawberries: Their natural sweetness complements the rich chocolate flavor.
- Bananas: Sliced bananas add creaminess and enhance the texture of the mochi.
- Raspberries: These tart berries provide a refreshing contrast, balancing the sweetness.
You can even create a colorful fruit platter to elevate your dessert experience and impress your guests. This not only adds a pop of color but also brings a healthful side to your chocolate mochi indulgence.
Serving with Homemade Sauces
To elevate your chocolate mochi, consider accompanying it with homemade sauces. Here are a couple of suggestions:
- Chocolate Sauce: Drizzle warm chocolate sauce over your mochi for a decadent touch.
- Berry Sauce: A simple berry compote made from fresh berries can add a juicy burst of flavor.
Creating these sauces at home is easier than you might think, and they add a gourmet flair. Plus, they provide an opportunity for creative presentation that will delight your friends and family.
Feel like adding a twist? Try experimenting with vanilla yogurt or whipped cream as toppings, creating a delightful experience for your palate!
Time Breakdown for Chocolate Mochi
When it comes to crafting the perfect chocolate mochi, timing is everything. Here's a quick overview to help you plan your baking adventure.
Preparation Time
Expect to spend about 20 minutes whipping up the ingredients and mixing everything together. This is the exciting part where you’ll get your hands a bit sticky with that delicious mochi dough!
Cooking Time
Once your dough is ready, steaming it will take around 30 minutes. This gentle cooking method preserves the soft, chewy texture that makes chocolate mochi so delightful.
Total Time
All in all, you’re looking at roughly 50 minutes from start to finish. Not too daunting, right? With just under an hour, you can enjoy this delightful treat. For more insights on mochi-making, check out Serious Eats for expert tips and tricks!
Nutritional Facts for Chocolate Mochi
Chocolate mochi not only captivates our taste buds but also offers some interesting nutritional benefits. Here’s a quick look at what you can expect:
Calories
A single piece of chocolate mochi generally contains about 100 calories. This makes it a delightful treat that won’t break your calorie bank if you’re mindful of portions. Depending on the brand or recipe, these numbers might vary slightly, so it's always a good idea to check the packaging.
Sugar Content
When it comes to sweetness, chocolate mochi typically contains around 8-10 grams of sugar per piece. This is enough to satisfy your sweet tooth without leaving you feeling guilty. For a healthier alternative, consider using natural sweeteners or reducing the sugar amount in homemade versions.
Gluten-Free Benefits
One of the best things about chocolate mochi is that it's usually made with glutinous rice flour, making it a fantastic gluten-free snack option. This characteristic allows those with gluten sensitivities or celiac disease to indulge in a delicious dessert. According to the Gluten Intolerance Group, gluten-free diets can lead to improved overall wellness for many individuals.
Now that you know the nutritional facts, you might just be tempted to give chocolate mochi a try or even whip up your own batch! For more insights on gluten-free eating, check out resources from Celiac Support Association.
FAQs about Chocolate Mochi
Can I use regular rice flour instead of glutinous rice flour?
While it might seem tempting to substitute regular rice flour for glutinous rice flour in your chocolate mochi, it’s important to note that the textures will completely differ. Glutinous rice flour is key for achieving that signature chewy texture we all love in mochi. Regular rice flour lacks the sticky qualities needed to create that delightful bite. So, stick with glutinous rice flour for the best results—your taste buds will thank you!
How do I store leftover mochi?
If you find yourself with leftover chocolate mochi, you’ll want to store it properly to maintain its deliciousness. Wrap each piece in plastic wrap to prevent them from drying out, and place them in an airtight container. They can be kept at room temperature for a day or two, but for longer storage, consider refrigerating them. Just remember, refrigeration can change their texture slightly, so enjoy them fresh whenever possible!
Is it possible to freeze chocolate mochi?
Absolutely! In fact, freezing chocolate mochi is a great way to extend its shelf life. After wrapping each piece in plastic wrap, place them in a freezer bag or an airtight container. They can last in the freezer for about a month. When you’re ready to enjoy them, simply thaw them at room temperature for a few hours, and they'll be almost as delightful as when they were freshly made!
For more tips on mochi or alternative sweet treats, check out sites like Serious Eats and Bon Appétit, where you can dive deeper into the world of delightful desserts!
Conclusion on Chocolate Mochi
Why you should try making chocolate mochi today!
Chocolate mochi is not just a treat; it’s an experience. Imagine biting into the chewy, sticky exterior only to discover a rich, creamy chocolate center bursting with flavor. Whether you’re a seasoned chef or a kitchen novice, this delightful dessert can elevate your cooking game.
Making chocolate mochi is a fun process, perfect for sharing with friends or family. Plus, it’s a versatile treat; you can customize the fillings or even experiment with flavors! Want some inspiration? Check out recipes on sites like Serious Eats or Food52 for more creative ideas.
So why wait? Gather your ingredients and dive into the world of homemade chocolate mochi today! Your taste buds will thank you.
Print
Chocolate Mochi: The Best Indulgent Treat for Home Cooks
Indulge in the delightful taste of Chocolate Mochi, a soft and chewy treat that combines the rich flavor of chocolate with the unique texture of mochi. Perfect for any occasion!
- Total Time: 45 minutes
- Yield: 12 pieces
Ingredients
- 1 cup glutinous rice flour
- ¼ cup cocoa powder
- ¾ cup sugar
- 1 cup water
- ½ cup chocolate chips
- ¼ cup cornstarch
Instructions
- In a mixing bowl, combine glutinous rice flour, cocoa powder, and sugar.
- Gradually add water, stirring until smooth.
- Transfer the mixture to a greased steaming dish.
- Steam for about 30 minutes until cooked through.
- Let it cool slightly before kneading.
- Divide into portions and fill with chocolate chips.
- Shape into balls and coat with cornstarch.
Notes
- For extra flavor, add a pinch of salt to the mixture.
- Store mochi in an airtight container to maintain softness.
- Prep Time: 15 minutes
- Cook Time: 30 minutes
- Category: Dessert
- Method: Steaming
- Cuisine: Japanese
- Diet: Vegetarian
Nutrition
- Serving Size: 1 piece
- Calories: 120
- Sugar: 12g
- Sodium: 5mg
- Fat: 3g
- Saturated Fat: 1g
- Unsaturated Fat: 2g
- Trans Fat: 0g
- Carbohydrates: 24g
- Fiber: 1g
- Protein: 2g
- Cholesterol: 0mg