Introduction to Homemade Mounds Bars
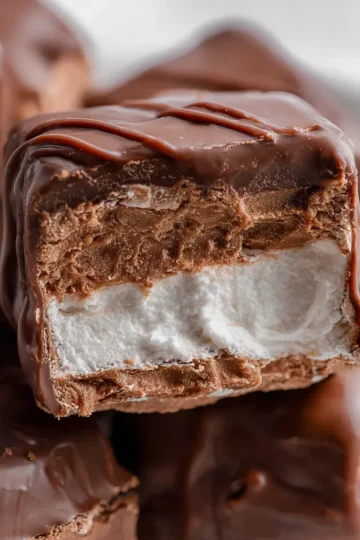
When it comes to satisfying your sweet tooth, store-bought candy bars might be convenient, but they often lack the wholesome goodness of homemade treats. That’s where homemade Mounds bars come into play—a delicious, chocolate-covered coconut delight that's easily made in your own kitchen.
Why Homemade Mounds Bars Are a Game Changer
Making homemade Mounds bars is not just about indulging—it's also about knowing exactly what goes into your treats. Imagine the satisfaction of crafting a dessert with high-quality ingredients, tailored to your taste preferences. You can experiment with the sweetness level, the type of chocolate, or even add a sprinkle of sea salt for a gourmet touch.
One of the standout features of homemade versions is the joy of creativity. You can personalize your bars by incorporating your favorite nut butters or using dairy-free chocolate for a vegan twist. This article from Healthline provides insight into the benefits of using whole ingredients in your recipes, supporting the idea that homemade options often lead to healthier choices.
Moreover, making your Mounds bars from scratch is a fantastic way to bond with friends or family. Imagine a cozy afternoon spent in the kitchen, hands messy with coconut and chocolate, laughing over failed attempts and perfecting your technique. The best part? You’ll have a delicious treat to show for it!
There’s a surprising simplicity to the process as well. With just a handful of ingredients—think shredded coconut, chocolate, and some sweetener—you can whip up a batch in no time. Plus, knowing how to make candy at home can save you money in the long run, especially when those cravings hit.
If you're curious about the nutritional differences, WebMD suggests that homemade sweets can be lower in preservatives and artificial flavors, helping you enjoy something sweet without a guilty conscience.
So why not ditch the store-bought options next time you crave something sweet? Dive into your kitchen and transform those simple ingredients into delightful homemade Mounds bars. Your taste buds will thank you, and you’ll feel great about indulging!

Essential Ingredients for a Delicious Treat
When you set out to create homemade Mounds bars, it's all about the balance between rich flavors and satisfying textures. Let’s dive into the key ingredients you’ll need for this coconut-chocolate delight.
Coconut Sweetness
-
Unsweetened shredded coconut: This is the heart of your Mounds bar. Go for the unsweetened kind to control the sugar levels beautifully.
-
Sweetened condensed milk: This brings a creamy richness that’s hard to resist. Just a small amount adds the right sweetness without overpowering the coconut flavor.
Chocolate Coating
-
Dark chocolate chips: Opt for high-quality dark chocolate for that luxurious coating. Not only does it taste divine, but the antioxidants are a nice bonus!
-
Coconut oil: Adding a bit of coconut oil will help your chocolate melt smoothly and set perfectly, creating that shiny finish we all love.
By sticking to these essentials, you're guaranteed to whip up homemade Mounds bars that are a hit at any gathering. Plus, this simple recipe is an excellent addition to your dessert repertoire! For more inspiration, check out resources like the American Coconut Council for creative ways to use coconut in your cooking.
Step-by-Step Preparation of Homemade Mounds Bars
Creating your own homemade Mounds bars is not only rewarding but also a delightful experience that allows you to customize the sweetness and texture to your taste. With this step-by-step guide, you’ll have an irresistible treat ready to impress friends and family. Let’s dive in!
Gather Your Equipment and Ingredients
Before we get our hands sticky, it’s essential to have everything ready. Start by gathering the following equipment:
- Mixing bowl
- Baking tray
- Parchment paper
- Double boiler or microwave-safe bowl
- Fork or chocolate-dipping tools
Now, let’s look at the ingredients you’ll need to create those luscious bars:
-
Coconut Filling:
-
2 cups shredded unsweetened coconut
-
1 can (14 oz) sweetened condensed milk
-
1 teaspoon vanilla extract
-
Pinch of salt
-
Chocolate Coating:
-
12 oz semi-sweet chocolate chips
-
2 tablespoons coconut oil (for a smoother melt)
It’s always a good idea to measure out your ingredients in advance; this ensures a smooth cooking process and keeps things organized!
Make the Coconut Filling
With your equipment and ingredients at the ready, let’s get to the fun part—making the coconut filling!
- In a mixing bowl, combine the shredded coconut, sweetened condensed milk, vanilla extract, and a pinch of salt.
- Stir until the mixture is well combined and the coconut is evenly coated.
- This should have a slightly sticky, dense texture, perfect for shaping into bars.
Did you know that coconut is rich in fiber and can provide a quick source of energy? It’s a great ingredient to include for those busy workdays when you need a little boost!
Shape and Freeze the Bars
Here comes the exciting part!
- Line your baking tray with parchment paper to prevent sticking.
- Take about a tablespoon of the coconut mixture and shape it into a bar. It doesn’t have to be perfect. The rustic look adds charm!
- Place each bar onto the prepared tray, ensuring they don’t touch.
- Once all the mixture is shaped, freeze the bars for about 30 minutes or until they are solid.
These coconut logs will have the perfect chewiness and stay intact when coated in chocolate.
Melt the Chocolate
While your coconut bars are freezing, it’s time to get that chocolate melting. There are a couple of methods here; choose whichever you prefer:
- Double Boiler:
- Fill a saucepan with water and place it on low heat.
- Put the chocolate chips and coconut oil in a heat-proof bowl, set over the saucepan. Stir until melted and smooth.
- Microwave:
- Place chocolate chips and coconut oil in a microwave-safe bowl.
- Microwave in 30-second intervals, stirring in between, until melted.
Using coconut oil not only helps the chocolate melt smoothly, but it also gives your homemade Mounds bars a lovely sheen.
Assemble Your Bars
Once your chocolate is melted and your coconut filling is frozen, it’s time for the final assembly!
- Take each coconut bar out of the freezer using a fork or dipping tool.
- Dip each bar completely in the melted chocolate, making sure to cover all sides, then lift it out and tap off the excess.
- Place the coated bars back on the parchment paper. If desired, sprinkle a little extra coconut on top before the chocolate sets.
Let the bars cool until the chocolate hardens, about 30 minutes. You can speed up the process by placing them in the fridge.
And there you have it—your very own homemade Mounds bars! Not only are they a satisfying treat, but they also allow you to control the ingredients, making them a more wholesome choice compared to store-bought versions. Enjoy your creative kitchen adventure and savor the delicious rewards!

Variations on Homemade Mounds Bars
Vegan Homemade Mounds Bars
Who says you can’t enjoy homemade Mounds bars on a vegan diet? Simply swap out the traditional sweetened condensed milk with a creamy coconut milk alternative or a cashew cream. Not only does this keep the bars plant-based, but it also contributes a rich, satisfying flavor. Use dark chocolate that's dairy-free for the coating, and you’ll have a delightful treat that’s vegan-friendly. For an extra crunch, toss in some crispy rice cereal. Have you ever tasted a bar that was as good for you as it was delicious? This version might just become your new favorite!
Nutty Mounds Bars with Almonds
If you’re looking to mix things up, why not add a nutty twist to your homemade Mounds bars? By incorporating toasted almonds or almond flour into the coconut mixture, you can introduce a delicious texture. The subtle nuttiness pairs incredibly with the chocolate coating, elevating the flavor profile to new heights! You can either sprinkle chopped almonds on top or even blend them into the coconut filling for a seamless integration.
By experimenting with different nuts, you create unique flavor combinations—feel free to try other complements like walnuts or pecans. The possibilities are endless when you make these bars at home! Finally, if you’re short on time, why not consider making a batch to freeze? Homemade treats are always better when shared, so why not invite some friends over for a taste test?
For more creative ideas, check out these variations on coconut treats that might inspire your next batch. Happy cooking!
Cooking Tips and Notes for Homemade Mounds Bars
Common Pitfalls to Avoid
When making homemade Mounds bars, there are a few common mistakes you might encounter. First, ensure your coconut mixture isn’t too dry. If it is, you may end up with a crumbly texture that doesn’t hold together well. A good rule of thumb is to add just enough sweetened condensed milk until you achieve a moist but firm consistency. Additionally, be cautious with the chocolate coating—make sure it’s tempered properly for that perfect shine and snap. If you're new to melting chocolate, check out this guide for tips and tricks.
Storage Tips for Freshness
To keep your homemade Mounds bars fresh and delicious, store them in an airtight container at room temperature for up to a week. If you’d like to extend their life, consider refrigerating them, which can add an enjoyable chill! Just make sure to separate layers with parchment paper to prevent sticking. For longer-term storage, you can freeze them. Just wrap each bar in plastic wrap and place them in a freezer bag. When you're ready to enjoy, let them thaw in the refrigerator for a few hours before diving in! Your future self will thank you.

Serving Suggestions for Homemade Mounds Bars
Perfect Pairings for Your Sweet Treat
When indulging in homemade Mounds bars, the key to a truly delightful experience lies in what you choose to enjoy alongside them. These chocolate-covered coconut delights pair beautifully with a variety of beverages and snacks, enhancing their flavor and elevating your dessert experience.
-
Coffee: A warm cup of freshly brewed coffee complements the sweetness of the bars perfectly. The rich, bold flavors of coffee balance the creamy coconut, creating a harmonious blend.
-
Tea: For a lighter touch, opt for herbal teas, like chamomile or peppermint. The subtle notes in these teas can elevate the tropical flavors of your bars.
-
Fruits: Fresh fruit, such as strawberries or pineapple slices, adds a refreshing contrast. The acidity in these fruits can cut through the sweetness of the bars, making each bite even more enjoyable.
Whether you're treating yourself or hosting a gathering, consider adding homemade Mounds bars to your dessert table. The combination of flavors and textures is sure to leave a lasting impression on your guests! For more inspiration on delightful pairings, check out Food Network’s Dessert Pairing Guide.
Time Breakdown for Homemade Mounds Bars
Preparation Time
Crafting your own homemade Mounds bars takes approximately 20-30 minutes. During this time, you’ll blend coconut and sweeteners to create that silky base. Trust me, the aroma will tempt your taste buds right away!
Freezing Time
Once shaped, your bars need around 2 hours in the freezer to firm up perfectly. This step is crucial because it ensures that the texture is just right when you coat them in chocolate.
Total Time
Overall, from start to finish, you're looking at around 2 hours and 30 minutes to make these delightful treats. With a little patience, you'll enjoy delicious, chocolatey bites that are sure to impress! For more tips on the science of freezing, check out Food Network for extensive resources.
Nutritional Facts for Homemade Mounds Bars
When it comes to treating yourself, homemade Mounds bars can be a guilt-free indulgence! Here’s a quick look at their nutritional profile so you can savor every bite without compromising your goals.
Calories per Bar
Each bar typically contains around 150-200 calories. This modest caloric count makes them an excellent choice for a sweet treat that won't break the calorie bank.
Macronutrient Breakdown
Understanding the macronutrient composition can help you enjoy these bars more mindfully:
- Fat: Approximately 12-15 grams, primarily from coconut and chocolate, providing a rich mouthfeel.
- Carbohydrates: Roughly 15-20 grams, mostly from natural sweeteners and coconut.
- Protein: Around 2-3 grams, making them a little less substantial in this category.
With homemade Mounds bars, you get a satisfying dessert that balances indulgence and nutrition. Want to learn more about the health benefits of coconut? Check out this Healthline article for a deeper dive!
FAQs about Homemade Mounds Bars
Can I use sweetened coconut instead of unsweetened?
Absolutely! While the traditional recipe for homemade Mounds bars typically calls for unsweetened coconut, you can swap in sweetened coconut if it better suits your taste. Just keep in mind that using sweetened coconut will result in a sweeter final product. To balance the flavor, you can reduce the amount of sugar in the filling or add a touch of sea salt to enhance the overall taste. For some tips on adapting coconut recipes, check out this resource from the Coconut Research Center.
How do I store leftover Mounds Bars?
Storing your delicious homemade Mounds bars is simple! To keep them fresh, place them in an airtight container, separating layers with parchment paper to prevent sticking. They can last up to a week at room temperature or up to two weeks in the refrigerator. If you want to prolong their shelf life even further, consider freezing them. Just wrap each bar tightly in plastic wrap and store them in a freezer-safe container — for up to three months!
Can I customize the sweetness level?
Definitely! One of the great things about making your own homemade Mounds bars is that you control how sweet they are. If you prefer a subtler sweetness, you can gradually adjust the amount of sugar in the filling. Taste as you go! You might even want to experiment with different sweeteners, like honey or maple syrup, to find the flavor that suits your palate best. Don’t hesitate to get creative!
Conclusion on Homemade Mounds Bars
Why You Should Make Them Today
There’s no denying it—homemade Mounds Bars are a delightful treat that you should whip up today! With just a few simple ingredients, you can create a chocolatey, coconut-filled indulgence that tastes even better than store-bought versions. Plus, making them at home means you can control the quality and quantity of each ingredient.
Imagine treating yourself to these delicious bars during your next movie night or sharing them at a gathering. They’re incredibly versatile and perfect for satisfying those sweet cravings. Are you up for the challenge? Dive into this fun project, and you'll be rewarded with mouthwatering bars that friends and family will love!
For a deeper dive into other treat ideas, check out resources from the American Association of Candy Technologists, or explore The Kitchn for more sweet inspiration!
Print
Homemade Mounds Bars: Indulgent Coconut Treats You’ll Love
Enjoy these delicious homemade Mounds Bars that are rich in coconut flavor.
- Total Time: 35 minutes
- Yield: 16 bars
Ingredients
- 2 cups shredded coconut
- 1 cup sweetened condensed milk
- 1 cup dark chocolate chips
- 2 tablespoons coconut oil
Instructions
- Preheat your oven to 350°F (175°C).
- In a mixing bowl, combine shredded coconut and sweetened condensed milk.
- Press the mixture into a lined baking dish.
- Bake for 20 minutes until golden.
- Melt dark chocolate chips with coconut oil.
- Pour the chocolate over the baked coconut layer and let it set.
- Cut into bars and enjoy!
Notes
- For extra flavor, add a splash of vanilla extract to the coconut mixture.
- Store leftover bars in an airtight container.
- Prep Time: 15 minutes
- Cook Time: 20 minutes
- Category: Dessert
- Method: Baking
- Cuisine: American
- Diet: Vegetarian
Nutrition
- Serving Size: 1 bar
- Calories: 200
- Sugar: 15g
- Sodium: 20mg
- Fat: 10g
- Saturated Fat: 8g
- Unsaturated Fat: 2g
- Trans Fat: 0g
- Carbohydrates: 25g
- Fiber: 2g
- Protein: 3g
- Cholesterol: 5mg