Introduction to Peanut Butter Lunch Lady Cookie Bars
Homemade desserts have a special place in our hearts, and few treats resonate quite like peanut butter lunch lady cookie bars. These nostalgic bars are more than just a sweet indulgence; they evoke memories of communal lunches and school bake sales, making them a beloved classic.
Why Peanut Butter Cookie Bars Are a Classic Treat
First and foremost, let’s talk about flavors. Peanut butter has a creamy, rich texture that harmonizes perfectly with sweetness, leading to a delightful experience in every bite. According to a survey by the National Peanut Board, about 94% of American households have peanut butter in their kitchens. It’s no wonder that this ingredient has become a staple in many dessert recipes.
When you think of the quintessential cookie bar experience, peanut butter cookie bars offer the right balance of chewy and crunchy textures, making them delightful companions to a glass of milk or a cup of coffee. They’re simple to prepare, which is a bonus for busy young professionals. You can whip them up in one bowl, reducing both prep and cleanup time. Who doesn’t appreciate that?
A Sweet Slice of Nostalgia
Do you ever recall those lunchroom trays filled with warm cookie bars, fresh out of the oven? Peanut butter lunch lady cookie bars are reminiscent of those carefree school days, where the taste of a homemade treat could brighten even the dullest afternoon. You can try adding some chocolate chips or nuts for an extra crunch—just like the way our lunch ladies used to make them!
If you want to dive deeper into the world of peanut butter flavors, consider exploring some articles like this one on Peanut Butter and Its Health Benefits from Healthline, which delves into the nutritional perks of this versatile nut butter.
So, whether you’re craving a comforting snack after a long workday or looking to impress friends at your next gathering, these peanut butter cookie bars deliver on all fronts. As they bake, the warm, nutty aroma fills your kitchen, inviting everyone to join you for a sweet slice of nostalgia. Ready to make your own? Let’s dive into the recipe!
Adding variety with your favorite flavors is key, and let's not forget about the joy that sharing these bars can bring. So keep that bowl handy, and get ready to create a treat that’s as easy to make as it is delightful to savor!

Ingredients for Peanut Butter Lunch Lady Cookie Bars
Creating delectable peanut butter lunch lady cookie bars is a delightful endeavor, and having the right ingredients on hand is the first step. Let’s dive into what you’ll need for this scrumptious treat!
Essential Ingredients
- 1 cup peanut butter: Opt for creamy for a smooth texture or crunchy if you enjoy those little peanut bits.
- 1 cup granulated sugar: This will add sweetness and help create that chewy texture we all love.
- 1 cup brown sugar: Brown sugar enhances the flavor with its caramel undertones.
- 2 large eggs: These are crucial for binding everything together.
- 1 teaspoon vanilla extract: A splash of vanilla elevates the overall flavor profile.
- 2 cups all-purpose flour: This forms the base of your cookie bars.
- 1 teaspoon baking powder: Essential for a nice rise and soft texture.
- ½ teaspoon salt: Just enough to balance the sweetness.
- Optional mix-ins: Think chocolate chips, nuts, or even sprinkles for a fun twist!
These peanut butter lunch lady cookie bars are surprisingly simple to whip up, making them perfect for both busy weekdays and weekend gatherings. Want to dive deeper into baking secrets? Check out this baking essentials guide for more tips!
Step-by-Step Preparation of Peanut Butter Lunch Lady Cookie Bars
Making peanut butter lunch lady cookie bars is a nostalgic experience that invites warm memories of school cafeteria treats but with a modern twist! These bars are not just easy to whip up, they also offer the perfect balance of chewy and sweet. Let's get right into the preparation to make this delightful snack!
Gather All Your Ingredients
First things first, let’s make sure you have everything you need! Here’s a list of ingredients to gather:
- 1 cup unsalted butter, melted
- 1 cup peanut butter (smooth or crunchy, depending on your preference)
- 1 cup brown sugar, packed
- ½ cup granulated sugar
- 2 large eggs
- 2 cups all-purpose flour
- 1 teaspoon baking soda
- ½ teaspoon salt
- 1 teaspoon vanilla extract
Before you get started, prep your workspace: clear off the kitchen counters and grab your mixing bowls, measuring cups, and a baking dish. Trust me; you’ll enjoy the process much more when everything is in reach!
Combine Melted Butter and Peanut Butter
In a large mixing bowl, pour in your melted butter and peanut butter. If you’re using crunchy peanut butter, consider how those delightful little peanut pieces will give your bars extra texture! Now, take a whisk or a sturdy spatula and mix them together until they form a creamy, luscious mixture. The aroma of this combination is simply irresistible!
Add in Sugars and Eggs
Next up, let’s sweeten the deal! Add in the brown sugar and granulated sugar to the peanut butter mixture. Stir until well combined. Then, crack those two eggs into the bowl and mix until the batter is smooth and fluffy. You should see a lovely, rich color developing—that’s the sugar working its magic with the peanut butter! Finish off this step by adding a splash of vanilla extract for an extra flavor boost; this small addition makes a world of difference.
Mix in Dry Ingredients
Now for the fun part! In another bowl, whisk together the flour, baking soda, and salt. This step ensures your dry ingredients are evenly distributed. Gradually add the dry mixture to the peanut butter batter, folding gently. You don’t want to over-mix; this is what makes your peanut butter lunch lady cookie bars soft and chewy.
Bake and Create the Perfect Texture
Preheat your oven to 350°F (175°C) and prepare a 9x13 inch baking dish by greasing it or lining it with parchment paper. Pour your batter into the dish, spreading it evenly. Bake in the preheated oven for about 20-25 minutes. You’ll know they’re ready when the edges are golden brown but the center is still soft—it will continue to firm up as it cools!
Prepare the Delightful Frosting
While those bars are baking, it's time to prepare the frosting that will take these bars to the next level! For the frosting, you’ll need:
- ½ cup unsalted butter, softened
- 1 cup powdered sugar
- ⅓ cup peanut butter
- A splash of milk (to achieve your desired consistency)
In a mixing bowl, beat the softened butter until creamy. Gradually add the powdered sugar and peanut butter, mixing until smooth. You can add just enough milk to reach your preferred frosting consistency.
Frost the Bars After Cooling
Once your bars have cooled completely—be patient, smells can be tempting!—it’s time to spread that delightful frosting over the top. Grab a spatula and carefully cover every corner. Wish you could dive in already? Just wait a moment! For a finishing touch, consider sprinkling chopped peanuts or chocolate chips on top for some extra flair.
And voila! You’ve successfully made your very own peanut butter lunch lady cookie bars. These bars are perfect for sharing with friends or keeping all to yourself—no judgment here! Enjoy them as an after-work treat or a midday pick-me-up.
For more inspiration, check out this collection of delicious cookie recipes on Epicurious or Food Network and unleash your inner baker!

Variations on Peanut Butter Lunch Lady Cookie Bars
When it comes to peanut butter lunch lady cookie bars, the classic version is just the beginning. There are countless ways to tweak this delightful treat to suit your taste or dietary needs. Let’s explore some fun variations that can elevate your cookie bar game.
Chocolate Chip Peanut Butter Bars
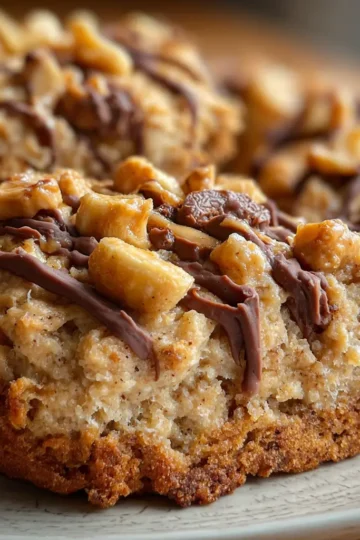
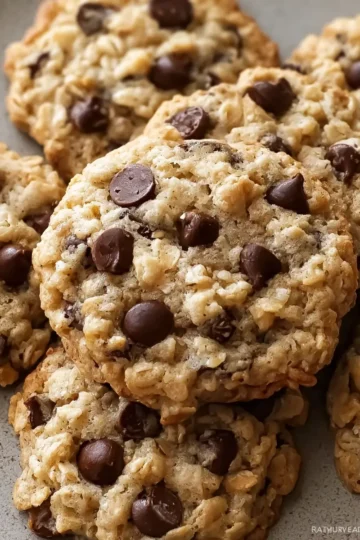
If you’re a fan of the classic flavor combination of chocolate and peanut butter, you’ll love adding chocolate chips to your cookie bars. Simply stir in a cup of semi-sweet or dark chocolate chips to the batter before spreading it in the baking pan. This will create a rich, gooey texture that complements the nutty flavors beautifully. And for a guilty pleasure, consider drizzling melted chocolate on top after baking—just imagine how delicious it would be!
Nut-Free Peanut Butter Cookie Bars
For those with nut allergies, don’t feel left out! You can still enjoy your very own version of peanut butter lunch lady cookie bars with a simple swap. Use sunflower seed butter or soy nut butter as a nut-free alternative. Both will provide a similar texture and flavor profile, ensuring everyone can partake in this delightful treat. Just keep an eye on the baking time; nut-free butters may yield a slightly different bake.
These variations not only cater to different dietary preferences but also keep things exciting in the kitchen. For more ideas and baking tips, check out The Kitchn or Food Network for great resources that can inspire your next baking adventure!
Cooking Tips and Notes for Peanut Butter Lunch Lady Cookie Bars
When making peanut butter lunch lady cookie bars, there are a few tips to ensure your baking experience is smooth and your treats are irresistible.
Measure Your Ingredients Accurately
Precision is crucial in baking. Use a kitchen scale for dry ingredients and measuring cups for liquids. This method guarantees that your cookie bars rise perfectly and have a consistent texture.
Flavor Enhancements
To elevate the flavor of your peanut butter lunch lady cookie bars, consider adding:
- Chopped chocolate or peanut butter chips: A little extra chocolate can never hurt!
- Nuts: Chopped peanuts or walnuts lend a delightful crunch.
Keep an Eye on Baking Times
Ovens can vary, so check your bars a few minutes before the suggested time. The edges should be golden brown, while the center remains slightly soft; they will firm up as they cool.
For storage, keep your bars in an airtight container—perfect for meal prep or snacks throughout the week. If you’re feeling adventurous, you can also try pairing them with a glass of almond milk for a delightful treat!
By following these tips and adding your unique touches, your peanut butter lunch lady cookie bars will surely be a hit! For more baking insights, check out The Kitchn.

Serving Suggestions for Peanut Butter Lunch Lady Cookie Bars
When you whip up a batch of peanut butter lunch lady cookie bars, you’re not just making cookies; you’re creating a delightful treat that can be enjoyed in many ways. Here are some serving suggestions to elevate your cookie experience!
Enjoy Them Warm
For that freshly baked feel, serve the cookie bars warm right out of the oven. A little scoop of vanilla ice cream on top creates a perfect dessert. Who can say no to the classic combo of peanut butter and ice cream?
Pair with a Milk Alternative
Craving something refreshing? Pair these bars with a glass of cold almond milk or oat milk. The nutty flavors complement each other beautifully, making each bite even more satisfying.
Creative Toppings
Think outside the box when it comes to toppings! Drizzle with melted dark chocolate, sprinkle some sea salt, or add chopped nuts for an extra crunch. Each variation will personalize your peanut butter lunch lady cookie bars adventure.
Snack Time at Work
Pack a few bars for your afternoon snack at work. They are easy to store and travel well, making them the perfect pick-me-up when you need a boost. You can also share them with colleagues — who doesn’t love a good snack break?
With these simple serving suggestions, your peanut butter lunch lady cookie bars are sure to impress friends and family alike. If you're looking for ideas on storing them or more recipes, check out The Kitchn’s Guide to Baking Cookies for expert tips! Don’t forget to enjoy every delicious bite!
Time Breakdown for Peanut Butter Lunch Lady Cookie Bars
When it comes to whipping up a delicious treat, knowing how much time you'll need is crucial. Here’s a handy breakdown to guide you through making peanut butter lunch lady cookie bars.
Preparation Time
Getting started is a breeze! You'll need about 10-15 minutes to gather your ingredients and mix everything together. Whether you’re measuring out that creamy peanut butter or preheating your oven, this step sets you up for success.
Baking Time
Once the batter is ready, pop those cookie bars in the oven for about 25-30 minutes. You’ll be greeted by a heavenly aroma as they bake, so keep an eye on them to ensure they’re perfectly golden.
Cooling and Frosting Time
After baking, patience is key. Let your peanut butter lunch lady cookie bars cool in the pan for about 30 minutes. This cooling time allows them to firm up before frosting. Speaking of frosting, add another 15 minutes to spread on that delicious topping. Can you smell the sweetness yet?
For tips on enhancing your frosting skills, check out this guide on frosting techniques.
Now you’re all set to enjoy these delightful bars! Happy baking!
Nutritional Facts for Peanut Butter Lunch Lady Cookie Bars
When you indulge in these peanut butter lunch lady cookie bars, it's good to know what you're enjoying. Here’s a quick breakdown of their nutritional profile:
Calories per Serving
A satisfying treat, each bar contains approximately 150 calories. This allows for a delightful snack that won't completely derail your daily calorie goals.
Sugar Content
With about 10 grams of sugar per serving, these bars offer a touch of sweetness without being overwhelming. For those watching their sugar intake, consider pairing these with fresh fruit for a balanced snack.
Protein and Carbs
Each bar boasts around 4 grams of protein and 20 grams of carbs, making them a decent option for a post-workout treat. If you want to amp up the protein, consider adding a scoop of protein powder to the mix!
For more details on nutritional guidelines, you can check out resources like the USDA FoodData Central or Nutrition.gov to understand how these numbers fit into your daily intake. Enjoy your peanut butter lunch lady cookie bars guilt-free!
FAQs about Peanut Butter Lunch Lady Cookie Bars
Can I use natural peanut butter?
Absolutely! Using natural peanut butter can actually enhance the flavor of your peanut butter lunch lady cookie bars. Just keep in mind that natural peanut butter can be a bit oilier, which may affect the consistency of your dough. To ensure the best results, mix the natural peanut butter well before measuring and consider adjusting the flour slightly if the mixture seems too wet.
How do I store leftover cookie bars?
To keep your delicious peanut butter lunch lady cookie bars fresh, store them in an airtight container at room temperature for up to 5 days. If you want to prolong their shelf life, you can refrigerate them for up to two weeks. For long-term storage, consider freezing them! Slice the bars, wrap them in plastic wrap, and place them in a freezer-safe container. They should maintain their flavor for about 3 months. When you're ready to indulge again, just thaw them in the fridge overnight or pop them in the microwave for a few seconds.
What’s the best way to cut these bars?
Cutting peanut butter lunch lady cookie bars can be a bit tricky, but with the right technique, you’ll achieve clean cuts every time! First, ensure that the bars are completely cooled; this will help them hold their shape. Use a sharp knife and wipe it with a damp cloth between cuts to minimize sticking. For an even cleaner finish, consider using a pizza cutter—it glides through the bars beautifully.
Have more questions? You can always check out Joy of Baking for additional tips and tricks on baking delicious treats!
Conclusion on Peanut Butter Lunch Lady Cookie Bars
When it comes to cozy, nostalgic treats, peanut butter lunch lady cookie bars are a delightful choice that never fails to impress. These bars merge the rich, creamy goodness of peanut butter with the indulgence of dessert, making them perfect for both casual snacking and special occasions.
To elevate your experience, consider pairing them with a hot cup of tea or a refreshing glass of milk. Whether you’re sharing them at a gathering or savoring them solo, these cookie bars are sure to bring a smile to your face. So go ahead, whip up a batch and indulge in some sweet nostalgia today!
For those interested in more recipes, you might explore options at The Kitchn or Bigger Bolder Baking.
Print
Peanut Butter Lunch Lady Cookie Bars: The Best Comfort Treat
Indulge in the nostalgia of Peanut Butter Lunch Lady Cookie Bars that are perfect for sharing and satisfying your sweet tooth.
- Total Time: 35 minutes
- Yield: 16 bars
Ingredients
- 1 cup peanut butter
- 1 cup brown sugar
- ½ cup granulated sugar
- 2 eggs
- 1 teaspoon vanilla extract
- 1 ½ cups all-purpose flour
- 1 teaspoon baking powder
- ½ teaspoon salt
Instructions
- Preheat the oven to 350°F (175°C).
- In a large bowl, mix peanut butter, brown sugar, and granulated sugar until smooth.
- Add eggs and vanilla, mixing until combined.
- In a separate bowl, whisk together flour, baking powder, and salt.
- Gradually add dry ingredients to the wet mixture, stirring until just combined.
- Spread the batter evenly into a greased baking pan.
- Bake for 20-25 minutes or until golden brown.
- Let cool before cutting into bars.
Notes
- For extra flavor, consider adding chocolate chips or nuts to the batter.
- These bars can be enjoyed warm or at room temperature.
- Prep Time: 10 minutes
- Cook Time: 25 minutes
- Category: Dessert
- Method: Baking
- Cuisine: American
- Diet: Vegetarian
Nutrition
- Serving Size: 1 bar
- Calories: 200
- Sugar: 15g
- Sodium: 150mg
- Fat: 10g
- Saturated Fat: 2g
- Unsaturated Fat: 7g
- Trans Fat: 0g
- Carbohydrates: 25g
- Fiber: 1g
- Protein: 4g
- Cholesterol: 30mg