Introduction to Old-Fashioned Apple Crisp
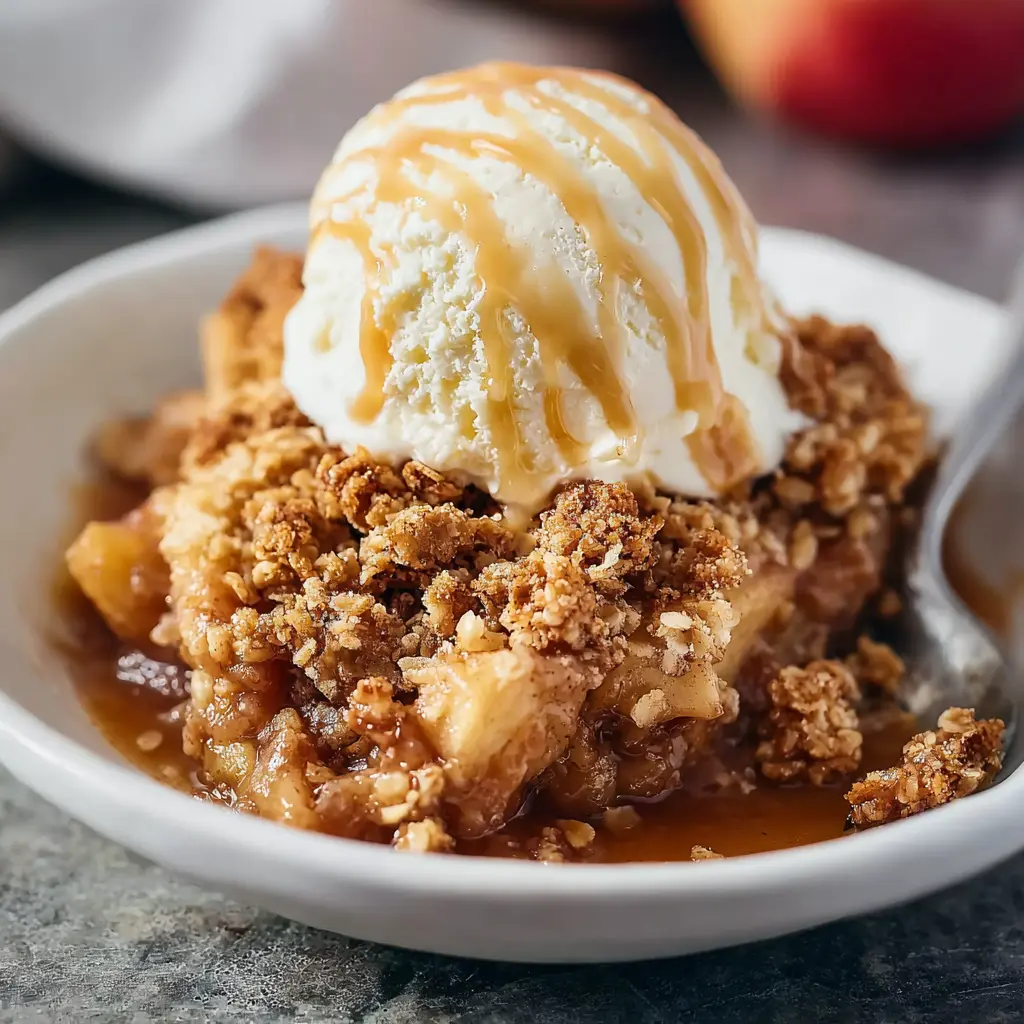
When it comes to classic desserts, few can rival the charm of old-fashioned apple crisp. This comforting treat, boasting a warm, spiced apple filling topped with a buttery, crumbly crunch, has captivated hearts for generations. But what makes this dessert a long-standing favorite in kitchens across the globe?
Why is Old-Fashioned Apple Crisp a Beloved Dessert?
One of the key reasons old-fashioned apple crisp remains so beloved is its simplicity. With just a handful of ingredients, you can create a dish that feels both luxurious and homey. The magic lies in those tender apples—apples that may come straight from your local farmer's market or your own backyard. A classic combination of sweet and tart varieties can bring depth to the dish, making each bite a delightful experience.
Furthermore, the texture is where the real excitement happens. The warm, juicy apple filling contrasts beautifully with the satisfying crunch of the topping. That delectable crumb, often made from oats, flour, and brown sugar, adds an irresistible element to each serving. Studies suggest that the combination of textures enhances overall satisfaction and makes food feel more indulgent.
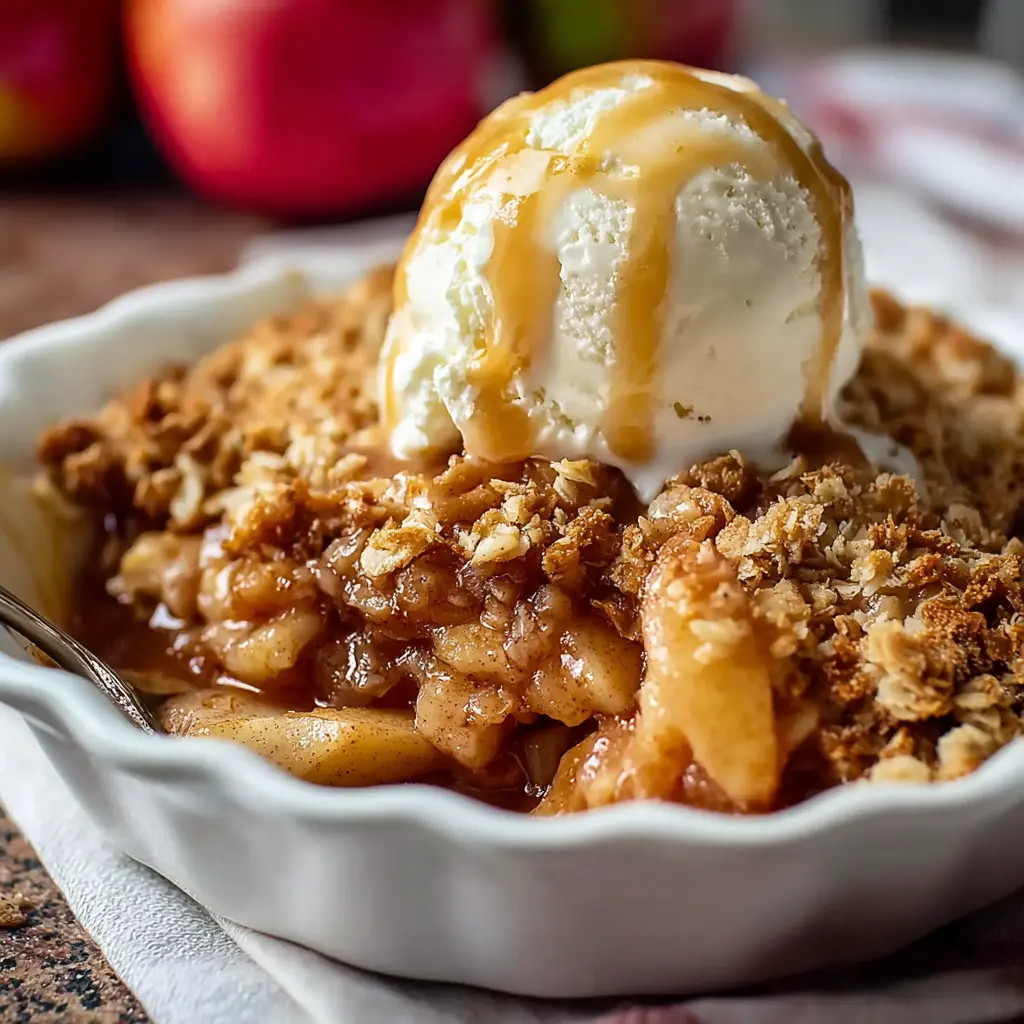
Another aspect to love about old-fashioned apple crisp is its versatility. Serve it warm out of the oven, a la mode with a scoop of vanilla ice cream, or even with a dollop of whipped cream. You can customize it by adding nuts, spices, or even a splash of caramel sauce, elevating it to cater to your personal taste.
Moreover, baking this dessert fills your home with a comforting aroma that invites everyone to gather around the kitchen. It's often a conversation starter, bringing forth stories from family recipes or holiday traditions. If you’re keen on learning more about the delightful impact of comforting food, you might want to explore this article from Food52.
Whether you're preparing for a festive gathering or a cozy night in, old-fashioned apple crisp is the perfect choice. It's more than just dessert—it's a warm hug in a bowl that feels like home. Ready to dive into making this classic dish? Let’s explore the recipe next!
Ingredients for Old-Fashioned Apple Crisp
Creating a delicious old-fashioned apple crisp begins with selecting the right ingredients. Let’s break down what you’ll need for the filling and the crisp topping.
Essential ingredients for the apple filling
To achieve that warm, inviting flavor, here’s what you’ll need for the apple filling:
- Apples: Opt for a mix of tart and sweet varieties, such as Granny Smith and Honeycrisp, for the perfect balance.
- Sugar: A touch of granulated sugar will enhance the natural sweetness of the apples.
- Cinnamon: This warm spice brings a comforting aroma, making your kitchen smell divine.
- Lemon Juice: A splash not only adds brightness but also keeps the apples from browning too quickly.
You can find detailed guidance on choosing apples for baking at Epicurious.
Ingredients for the crisp topping
The crisp topping is what transforms this dish into something truly special. Gather the following:
- Oats: Old-fashioned rolled oats provide that hearty crunch.
- Flour: All-purpose flour binds everything together.
- Brown Sugar: This gives a deeper caramel flavor compared to regular sugar.
- Butter: Use unsalted butter for rich, creamy texture.
- Nuts: Chopped walnuts or pecans add a delightful crunch and nutty flavor.
This blend of ingredients will help you create an old-fashioned apple crisp that's crispy on top and soft underneath, perfect for any occasion!
Step-by-Step Preparation of Old-Fashioned Apple Crisp
Are you ready to dive into the delicious world of old-fashioned apple crisp? This classic dessert brings to mind warm kitchens and the comforting scent of cinnamon. Let’s walk through each step to ensure your crisp comes out perfect every time.
Preheat the oven
Before we even think about mixing ingredients, let’s set the stage for our old-fashioned apple crisp. Preheating your oven is crucial for achieving that perfect texture.
- Set your oven to 350°F (175°C).
- While it heats up, you can gather your ingredients. And yes, we will get to those tart apples soon!
Prepare the apple filling
Now that the oven is ready, let’s focus on the star of this dish: the apples. Choosing the right apples is essential for a balanced filling.
- Recommended varieties: Granny Smith, Honeycrisp, or a mix for added flavor.
- Peel and core about 4 to 6 medium apples. Cut them into thin slices, about ¼-inch thick.
- In a mixing bowl, combine the sliced apples with:
- ½ cup of granulated sugar
- 1 teaspoon of cinnamon
- 1 tablespoon of lemon juice
- Toss everything together until the apples are well-coated. This sweet-tart blend is what makes the filling so enticing.
Transfer the apple mixture to the baking dish
Once you have your apple filling beautifully mixed, transfer it to a baking dish.
- Use a 9x13 inch (or similar size) dish for even baking.
- Spread the apple mixture evenly across the bottom of the dish. This ensures every bite gets that succulent apple goodness.
Make the crisp topping
Now, let’s shift our attention to the crispy goodness that will top our apples.
- In a separate bowl, combine:
- 1 cup rolled oats
- 1 cup all-purpose flour
- 1 cup packed brown sugar
- ½ cup softened butter (or coconut oil for a dairy-free option)
- ½ teaspoon of salt
- Use a fork or your fingers to mix the ingredients until crumbly. The texture should resemble coarse sand with some larger clumps. This will create that irresistible crunch on top.
Assemble the apple crisp
With both the apple filling and the crisp topping prepared, it’s time to bring them together.
- Sprinkle the crisp mixture evenly over the apple filling in the baking dish.
- Don’t be shy—make sure every inch is covered! This allows the topping to evenly bake and brown, providing that satisfying contrast to the tender apples below.
Bake the apple crisp to perfection
It's time to bake!
- Place the assembled dish in your preheated oven.
- Bake for 35 to 45 minutes or until the top is golden brown and the apple filling is bubbly. You'll know it's ready when your kitchen is filled with that amazing aroma of cinnamon and baked apples.
Cool and serve
Once your old-fashioned apple crisp has baked to perfection, it’s important to let it cool for about 10-15 minutes. This cooling period allows the filling to set a little, making it easier to serve.
- Serve warm, ideally with a scoop of vanilla ice cream or a drizzle of cream. Trust me; it’s the ultimate comfort food experience!
This simple step-by-step guide ensures your old-fashioned apple crisp will impress. Whether for a family gathering or a cozy night in, your kitchen will be the heart of the action. Happy baking!
For those who love baking, you can explore more about apple varieties and their uses on AllRecipes and deepen your fruit-picking knowledge at local farms.
Variations on Old-Fashioned Apple Crisp
Apple Crisp with Oats and Nuts
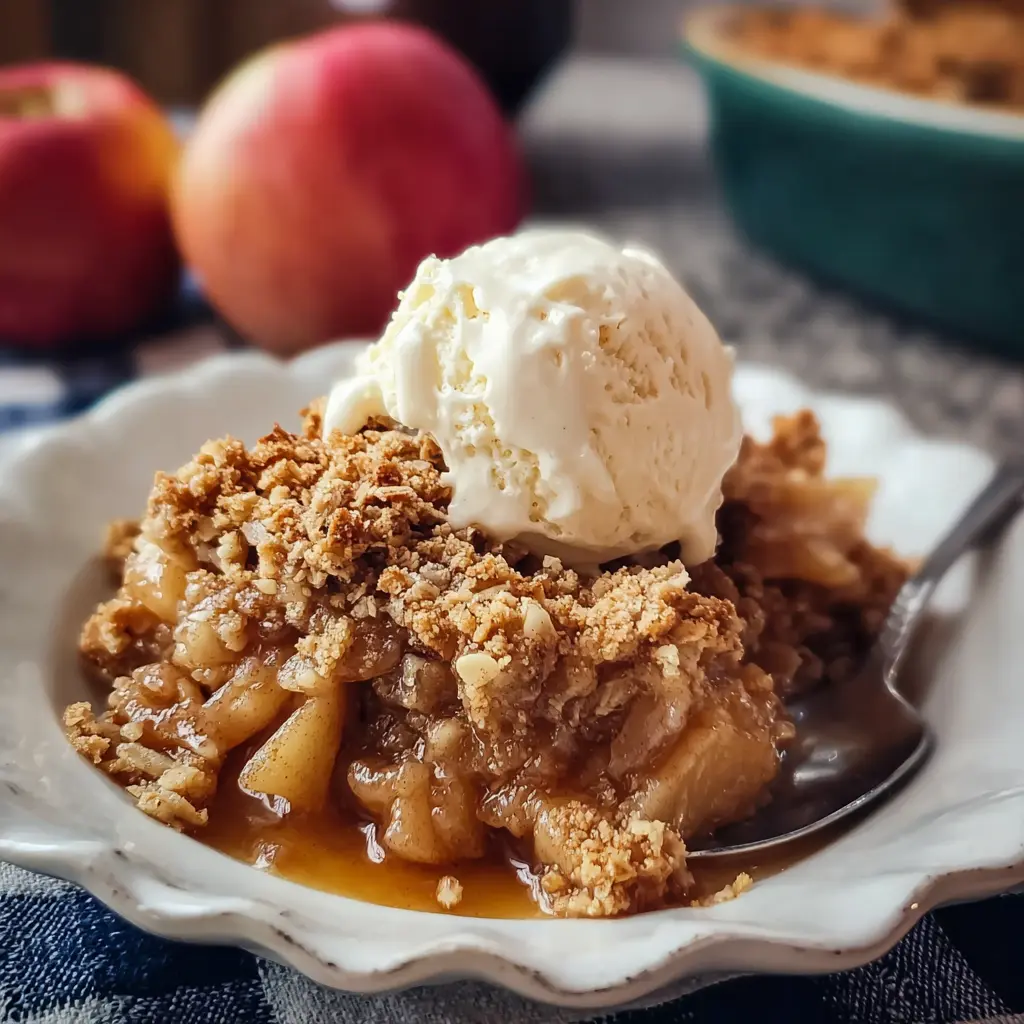
Elevate your old-fashioned apple crisp by incorporating oats and nuts for a delightful crunch! Consider mixing rolled oats with chopped nuts like pecans or walnuts for your topping. The oats add a heartiness, while the nuts provide a protein boost—perfect if you're looking for a wholesome dessert.
- Tip: Toast the nuts lightly before adding them to the crisp for a deeper flavor.
Not only does this variation enhance texture, but it also adds nutritional benefits. According to the USDA, nuts are a great source of healthy fats, protein, and fiber, which can help keep you feeling satisfied.
Gluten-Free Apple Crisp Alternatives
If you're looking for gluten-free options, don’t worry—an old-fashioned apple crisp can still shine! Substitute regular flour with alternatives like almond flour or a gluten-free all-purpose flour blend.
- Suggestion: Use gluten-free oats if you want to keep that chewy topping!
Always check ingredient labels to ensure they’re certified gluten-free. This way, everyone at your gathering can enjoy this delicious dessert without any worries.
Seasonal Fruit Twists for Your Apple Crisp
Why stop at apples? Experiment with seasonal fruits to customize your old-fashioned apple crisp for any time of year. Adding berries, peaches, or pears can provide a refreshing twist.
- Pro tip: Try mixing different fruits together! A mix of apples and cranberries makes for a tart and sweet combo that’s perfect for fall.
These variations not only bring in seasonality, but they also introduce exciting new flavors that can delight your taste buds. For more inspiration, check out this article for creative fruit pairings!
Whether you stick to tradition or venture into new territory, your apple crisp will be a crowd-pleaser every time.
Cooking Tips and Notes for Old-Fashioned Apple Crisp
How to choose the right apples
Selecting the right apples is crucial for a delicious old-fashioned apple crisp. Look for firmer varieties like Granny Smith, Honeycrisp, or Braeburn. These apples offer the perfect balance of sweetness and tartness, ensuring your crisp isn’t overly sweet. When shopping, opt for apples that are free from bruises and have a vibrant color. Check out this guide on apple varieties to discover the best types for your baking adventures.
Tips for achieving the perfect texture
Achieving that heavenly balance of crunchy topping and tender apples is key. For the ideal texture in your old-fashioned apple crisp, consider these handy tips:
- Don’t overmix the topping: Combine your flour, oats, and sugar with melted butter gently for a crumbly texture.
- Layer the filling and topping: Make sure not to pack the apples too tightly; instead, keep them loose so they cook evenly.
- Get that oven temp right: Bake at 350°F (175°C) until golden brown and bubbly—typically 40-45 minutes.
With these tips, your apple crisp will be a delightful treat every time!
Serving Suggestions for Old-Fashioned Apple Crisp
Tasty Topping Options to Enhance Your Dessert
When it comes to your old-fashioned apple crisp, the toppings can really elevate this classic dessert. While the crisp is delicious on its own, enhancing it with a few thoughtful additions can take it to the next level.
- Vanilla Ice Cream: This classic pairing melts deliciously with the warm, cinnamon-spiced apples. The creaminess creates a delightful contrast.
- Whipped Cream: Light and fluffy, a dollop of homemade whipped cream adds wonderful texture and richness.
- Caramel Sauce: Drizzling warm caramel over your crisp offers a sweet, sticky touch that complements the tartness of the apples delightfully.
Want to add a nutty crunch? Consider toasting some pecans or walnuts to sprinkle on top. These not only add flavor but also a nice crunch that enhances the eating experience.
For more variations, add a sprinkle of nutmeg or allspice to your crisp mixture. Your guests will appreciate the unique spin, and who wouldn’t love a bit of old-fashioned charm with their dessert?
Check out Food Network for additional ideas and tips on pairing your apple crisp!
Time Breakdown for Old-Fashioned Apple Crisp
Preparation Time
Getting your ingredients ready for the old-fashioned apple crisp is quite straightforward. You’ll want to set aside about 15 minutes to peel and slice your apples, measure out your flour, oats, and other ingredients. Trust me, your future self will thank you for this step!
Cooking Time
Once your crisp is assembled, it’ll take around 45 minutes in the oven. This is where the magic happens—your kitchen will fill with the comforting aroma of baked apples and cinnamon. It’s almost too good to resist, so maybe prepare some tea while it bakes.
Total Time
All in all, you’ll spend about 1 hour of quality time creating this delightful dessert. Not only is it easy, but you’re also left with an exquisite dish to share with friends and family. Plus, you might even have some leftovers for breakfast—because who doesn’t love apple crisp for breakfast?
If you're looking for tips on using seasonal apples or how to perfectly balance the spices, check out this article for more insights!
Nutritional Facts for Old-Fashioned Apple Crisp
When it comes to indulging in a warm bowl of old-fashioned apple crisp, knowing the nutritional breakdown can guide your choices without sacrificing flavor.
Calories per serving
A typical serving of old-fashioned apple crisp contains around 200-250 calories. This makes it a sensible dessert option, especially when made with whole ingredients.
Sugar content
Depending on the recipe, sugar content can vary but generally falls between 10-20 grams per serving. Opting for less sugar can still yield a deliciously comforting treat.
Healthful ingredients to enjoy
This dessert often features nutritious apples, oats, and nuts. These components are rich in fiber and vitamins. For extra health benefits, consider using whole-grain oats and unsweetened apple sauce in your recipe. To learn more about the benefits of apples, check out this Nutritional Guide from the USDA.
By being mindful of portions and using wholesome ingredients, you can enjoy your old-fashioned apple crisp guilt-free!
FAQs about Old-Fashioned Apple Crisp
Can I make apple crisp ahead of time?
Absolutely! Old-fashioned apple crisp is perfect for preparing in advance. You can assemble the layers of sliced apples and the crumbly topping, then store them separately in the fridge. When you're ready to bake, just combine them and pop it in the oven. This approach not only saves time but also allows the flavors to meld together beautifully.
How do I store leftover apple crisp?
Storing leftover old-fashioned apple crisp is simple. Allow it to cool completely, then cover it tightly with plastic wrap or transfer it to an airtight container. It can be kept in the refrigerator for about 3 to 4 days. If you want to dive into the nostalgia later on, consider freezing it! Just wrap it securely, and it will stay fresh for up to 3 months.
What is the best way to reheat apple crisp?
When it comes to reheating your old-fashioned apple crisp, there are a few great options. If you're not in a hurry, the best method is to warm it up in the oven at 350°F (175°C) for about 15 minutes. This will revive the crispy topping while maintaining the juicy apple filling. Alternatively, if you're craving a quicker fix, pop individual servings in the microwave for about 30 seconds to 1 minute. Either way, serve it with a scoop of vanilla ice cream for a delightful treat!
For more tips on delicious apple desserts, check out this guide on maximizing flavor in fruit-based desserts!
Conclusion on Old-Fashioned Apple Crisp
Embracing homemade desserts and memories
There's something irreplaceable about savoring a warm bowl of old-fashioned apple crisp, especially when it’s made with love and care. This delightful dessert tends to evoke fond memories of gathering with loved ones, enjoying laughter, and sharing stories. The aroma of cinnamon and baked apples brings a level of comfort that store-bought desserts simply can’t match.
Next time you're itching for something sweet, why not take a moment to whip up this classic? It's more than just food; it’s about creating lasting memories and comforting traditions. For great serving suggestions, consider pairing it with a scoop of vanilla ice cream or a dollop of whipped cream. Discover more about the benefits of homemade desserts here. Happy baking!
Print
Old-Fashioned Apple Crisp: A Cozy, Indulgent Autumn Treat
Enjoy the warmth of autumn with a comforting Old-Fashioned Apple Crisp. This delightful dessert pairs perfectly with a scoop of vanilla ice cream.
- Total Time: 1 hour 5 minutes
- Yield: 8 servings
Ingredients
- 6 cups sliced apples
- 1 cup granulated sugar
- 1 teaspoon ground cinnamon
- ½ cup rolled oats
- ½ cup all-purpose flour
- ½ cup brown sugar
- ⅓ cup unsalted butter, softened
Instructions
- Preheat the oven to 350°F (175°C).
- In a large bowl, toss together sliced apples, granulated sugar, and cinnamon. Spread the mixture in a baking dish.
- In another bowl, mix oats, flour, brown sugar, and butter until crumbly. Sprinkle over the apple mixture.
- Bake for 45 minutes, or until the apples are tender and the top is golden brown.
- Serve warm, preferably with ice cream.
Notes
- For added flavor, consider adding nuts or raisins to the topping.
- Feel free to use a mixture of apple varieties for a more complex taste.
- Prep Time: 20 minutes
- Cook Time: 45 minutes
- Category: Dessert
- Method: Baking
- Cuisine: American
Nutrition
- Serving Size: 1 serving
- Calories: 250
- Sugar: 15g
- Sodium: 150mg
- Fat: 10g
- Saturated Fat: 6g
- Unsaturated Fat: 3g
- Trans Fat: 0g
- Carbohydrates: 37g
- Fiber: 3g
- Protein: 2g
- Cholesterol: 30mg