Introduction to Chocolate Cherry Ice Cream Sandwiches
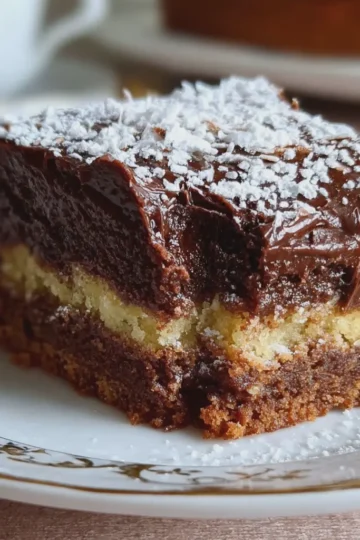
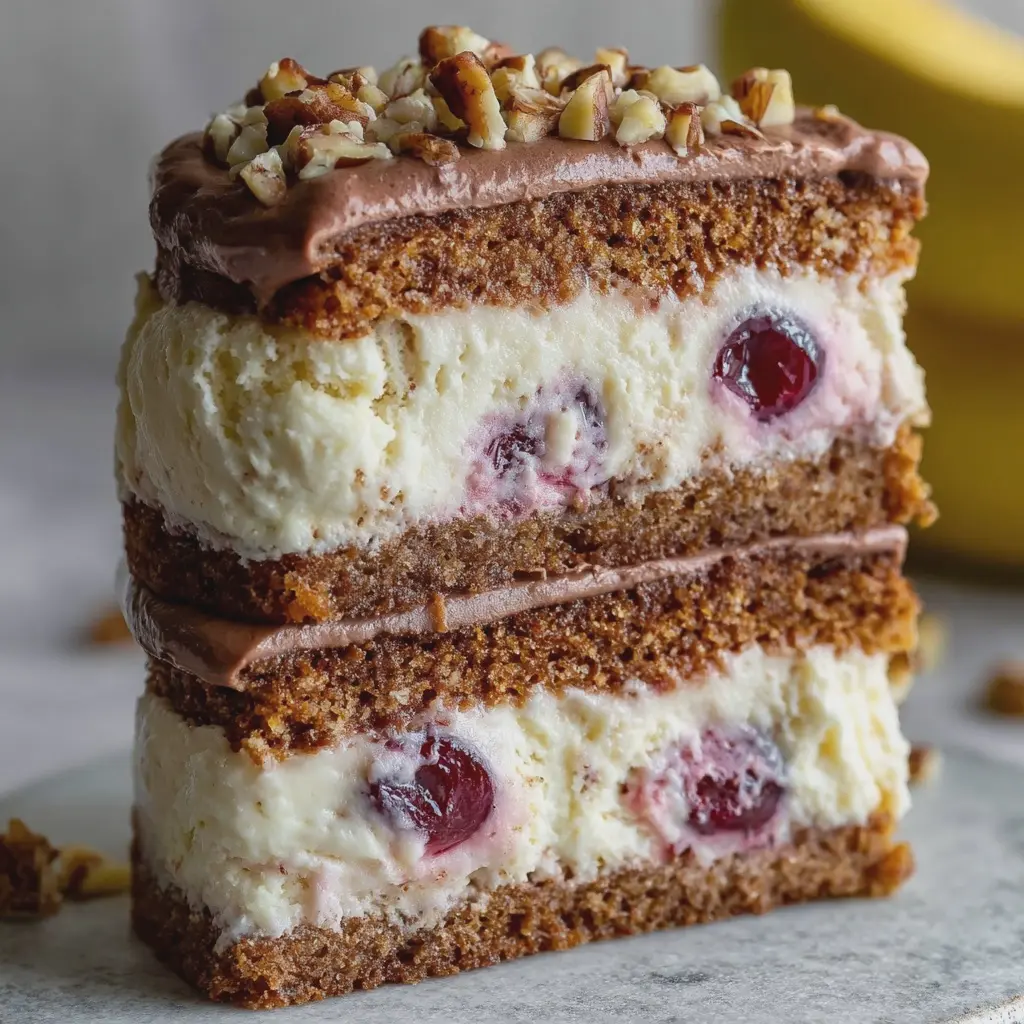
When it comes to summer treats, Chocolate Cherry Ice Cream Sandwiches deserve a special spot in our hearts (and our freezers). Imagine biting into a soft, rich chocolate cookie, only to find a swirl of creamy cherry ice cream nestled inside—it’s pure bliss! This combination of flavors not only satisfies a sweet tooth but also provides a delightful contrast that keeps you coming back for more.
Why Chocolate Cherry Ice Cream Sandwiches are the Perfect Treat
So, why are Chocolate Cherry Ice Cream Sandwiches the ideal choice for your next gathering or a cozy night in? First and foremost, they are incredibly versatile. Whether you’re hosting a backyard barbecue or just looking to reward yourself after a long day, these sandwiches hit the spot. You can experiment by swapping cherries for your favorite fruits like raspberries or strawberries, or even changing up the ice cream flavor!
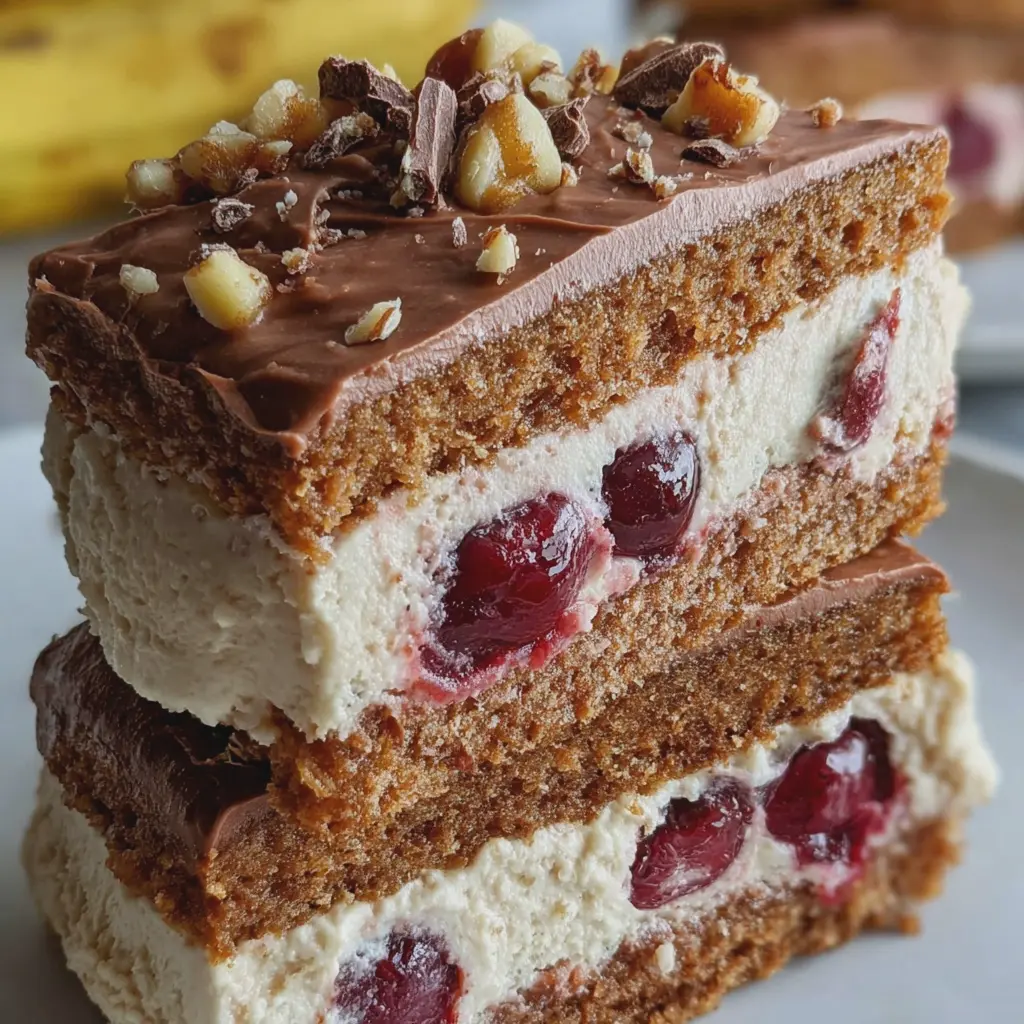
Plus, the balance of flavors creates a unique experience. The deep, rich chocolate complements the tartness of the cherries, providing a refreshing twist that’s different from your typical ice cream sandwich. It's this unexpected flavor pairing that excites the palate and brings joy, making it a favorite among friends and family alike.
And let’s talk about the simplicity of preparation. With just a few basic ingredients needed—think flour, cocoa powder, cherries, and ice cream—you can whip these up in no time. Ideal for young professionals with busy lifestyles, this treat allows for both creativity and ease. Want to make it even simpler? Pre-made cookies are an excellent substitute if you're short on time!
According to a survey conducted by the National Ice Cream Retailers Association, ice cream is a beloved treat among adults, with nearly 90% enjoying it regularly. When combined with the nostalgia of cookies, hitting that sweet spot just got a whole lot easier!
In conclusion, Chocolate Cherry Ice Cream Sandwiches are more than just a snack; they are a celebration of flavors and memories. Why not give this delightful dessert a try? You might just find your new go-to indulgence for summer! If you’re looking for more sweet ideas, check out this delicious ice cream recipe that pairs perfectly with any dessert!
Ingredients for Chocolate Cherry Ice Cream Sandwiches
Essential Ingredients for the Sandwich Cookies
Creating memorable Chocolate Cherry Ice Cream Sandwiches starts with perfectly baked cookies. Here’s what you’ll need:
- All-purpose flour: The base for your cookies, providing structure.
- Unsweetened cocoa powder: For that rich chocolate flavor.
- Baking powder and baking soda: These will give your cookies a nice rise.
- Granulated sugar: Sweetness is key!
- Brown sugar: Adds moisture and a deep flavor.
- Butter: Softened, it’ll help create a chewy texture.
- Egg: Binds everything together.
- Vanilla extract: Enhances the overall flavor.
Want to explore more about baking essentials? Check out this baking guide.
Ingredients for the Cherry Ice Cream Filling
Now let’s talk about the star of the sandwich: the cherry ice cream! Gather up:
- Fresh or frozen cherries: Pitted and chopped for that lovely fruit flavor.
- Vanilla ice cream: Softened, to facilitate easy mixing.
- Cream or half-and-half: For a creamier texture.
- Sugar: Just a little to enhance the natural sweetness of the cherries.
Optional Coating Ingredients
Want to take your Chocolate Cherry Ice Cream Sandwiches to the next level? Consider coating them! Here are a few tasty options:
- Chocolate chips: Perfect for rolling the edges.
- Chopped nuts: Add crunch and a flavor boost.
- Sprinkles: For that festive touch.
Feel free to experiment! The combinations are endless, and the results are sure to impress. Plus, you get a delightful treat that not only looks great but tastes divine too.
Preparing Chocolate Cherry Ice Cream Sandwiches
Making Chocolate Cherry Ice Cream Sandwiches is not just about the end result; it’s a delightful process that allows you to create something delicious and fun. With a bit of time and attention, you can craft a treat that will impress friends, family, or even just yourself on a hot summer day. Here’s a simple guide to help you navigate the process.
Preheat the Oven and Prepare Baking Sheets
First things first, you want to set your kitchen up for success. Start by preheating your oven to 350°F (175°C). While your oven is warming up, take some parchment paper and line two baking sheets. This step prevents the cookies from sticking, allowing for easy removal once they’re baked. If you don’t have parchment paper, a light greasing of the baking sheets will suffice.
Mix the Cookie Dough
Now, let's get to the fun part: mixing up that cookie dough! In a large bowl, cream together 1 cup of softened butter and 1 cup of brown sugar until the mixture is light and fluffy. This usually takes about 3-4 minutes. Once that’s achieved, add in 2 large eggs and a teaspoon of vanilla extract. After incorporating these wet ingredients, gradually mix in 2 cups of all-purpose flour, ½ cup of cocoa powder, and a teaspoon of baking soda. The dough will be thick and slightly sticky, which is exactly what you want.
If you're curious about cocoa powder types, there's an excellent guide available on Serious Eats that breaks it down for you!
Forming the Cookies
Once your dough is ready, take a tablespoon and scoop out portions of the cookie mixture. Roll each scoop into a ball and place them on your prepared baking sheets. Make sure to leave enough space between each cookie, as they will spread while baking. If you want to add a gourmet touch, consider folding in some chopped dark chocolate and dried cherries into the dough before rolling them into balls.
Baking the Cookies
It’s time to bake! Place the baking sheets in the preheated oven and let the cookies bake for about 10-12 minutes. You’ll know they’re done when the edges are firm but the centers look slightly soft—this will ensure they're chewy and delicious once cooled. Resist the urge to open the oven door too early, as it can disrupt the baking process.
Cooling and Pairing the Cookies
After baking, remove the cookies from the oven and let them cool on the sheets for a few minutes before transferring them to a wire rack. Cooling is crucial here; if the cookies are too warm, they might break apart when you start assembling your Chocolate Cherry Ice Cream Sandwiches. While they cool, consider pairing similar-shaped cookies so that you can create uniform sandwiches.
Assembling the Ice Cream Sandwiches
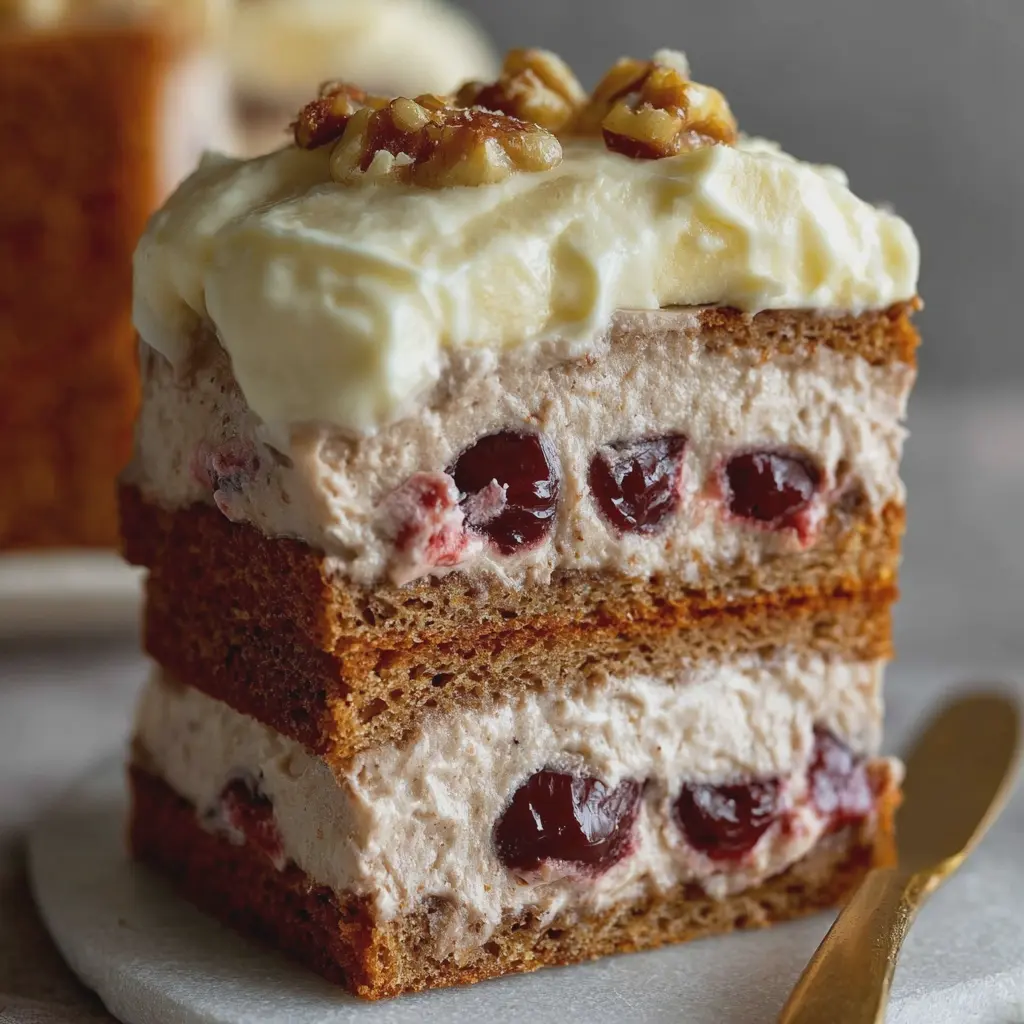
Now comes the most exciting part: assembling your ice cream sandwiches! Take one cookie and place a generous scoop of cherry ice cream on the flat side. Top it with a second cookie to create a sandwich. Gently press the top cookie down, allowing some ice cream to ooze out the sides—this just means you’re in for a treat! Feel free to roll the edges in mini chocolate chips or extra chopped cherries for an extra flair.
Freezing to Perfection
Once you’ve assembled your Chocolate Cherry Ice Cream Sandwiches, it’s important to freeze them for at least 1-2 hours. This helps them firm up and makes for easier handling when it’s time to serve. Wrap each sandwich individually in plastic wrap or wax paper, and you’ll have a delicious dessert ready to go whenever you crave something sweet!
With these steps, you're well on your way to making delightful Chocolate Cherry Ice Cream Sandwiches that will wow anyone lucky enough to have a bite. Grab your ingredients, have fun in the kitchen, and most importantly, enjoy the sweet rewards of your efforts!
Variations on Chocolate Cherry Ice Cream Sandwiches
Swap Cherry Ice Cream for Other Flavors
While chocolate cherry ice cream sandwiches are undoubtedly a delight, consider mixing it up with other ice cream flavors. The beauty of these sandwiches lies in their versatility!
- Vanilla Bean: A classic choice, rich and creamy, pairs beautifully with almost any cookie.
- Mint Chocolate Chip: For a refreshing twist, this combo is a true crowd-pleaser.
- Strawberry Swirl: Bright and fruity, it adds a summery feel to your dessert.
- Coffee Flavor: Perfect for those who crave a little caffeine boost with their sweets.
Feel free to experiment—what flavor combinations get your creative juices flowing?
Alternative Cookie Options
The cookie is just as crucial as the ice cream when crafting your chocolate cherry ice cream sandwiches. Why not branch out from the usual chocolate chip? Here are some delightful alternatives:
- Oatmeal Raisin Cookies: Chewy and hearty, they complement fruity ice cream beautifully.
- Peanut Butter Cookies: The nutty flavor works surprisingly well with chocolate-cherry creations.
- Shortbread Cookies: Buttery and crumbly, these offer an elegant texture contrast to soft ice cream.
Additionally, incorporating whole grains or gluten-free options can make your sandwiches suitable for different dietary needs. Check out King Arthur Baking for some great gluten-free cookie recipes.
The fun of making chocolate cherry ice cream sandwiches is in finding what flavors resonate with you. So get creative, and don't hold back—your next favorite combo is just a scoop away!
Cooking Tips and Notes for Chocolate Cherry Ice Cream Sandwiches
Tips for Perfect Cookies
Getting the cookies just right can make or break your Chocolate Cherry Ice Cream Sandwiches. Here are a few tips to ensure they turn out perfectly every time:
- Chill Your Dough: Letting your dough rest in the refrigerator for at least 30 minutes helps prevent spreading and enhances flavor.
- Uniform Sizing: Use a cookie scoop for even sizes, which ensures they bake evenly. No one likes a sandwich that’s lopsided, right?
- Baking Time: Keep an eye on your cookies! They’re done when the edges are firm but the centers still look soft. They’ll continue to firm up as they cool.
Storing Ice Cream Sandwiches
Once you’ve assembled your delicious Chocolate Cherry Ice Cream Sandwiches, it’s essential to store them properly to maintain their texture and taste:
- Wrap Individually: Use plastic wrap or parchment paper to wrap each sandwich. This prevents freezer burn and keeps them fresh.
- Airtight Container: Store wrapped sandwiches in an airtight container to maintain their flavor and avoid absorbing other odors from the freezer.
For tips on freezing cookies and other delights, check out this helpful resource. Enjoy your ice cream sandwiches!
Serving Suggestions for Chocolate Cherry Ice Cream Sandwiches
Creative Ways to Present Your Ice Cream Sandwiches
When it comes to Chocolate Cherry Ice Cream Sandwiches, presentation can elevate your treat from simple to spectacular. Try using a parchment paper wrap tied with twine for a rustic touch—perfect for picnics or casual gatherings. You can also cut them into fun shapes with cookie cutters! Serve them on a platter decorated with fresh cherries or chocolate shavings for a visually stunning display.
Pairings with Drinks or Other Desserts
Wondering what to pair with your Chocolate Cherry Ice Cream Sandwiches? A rich, creamy hot chocolate can be the perfect complement, especially during cooler months. For summer, consider a refreshing mint-infused iced tea or sparkling lemonade to balance the sweetness. If you're feeling adventurous, how about adding a simple fruit salad on the side? It adds a refreshing zing that makes every bite of your ice cream sandwich even more delightful!
By experimenting with these ideas, you'll create a memorable treat that guests will love. For more inspiration, check out resources on food presentation from sites like Epicurious or Food Network.
Time Breakdown for Chocolate Cherry Ice Cream Sandwiches
Preparation Time
First things first, allow about 15 minutes to whip up the delicious batter for your Chocolate Cherry Ice Cream Sandwiches. This includes gathering your ingredients, mixing everything together, and getting your baking sheets ready. It’s the perfect time to let your creativity shine—maybe even experiment with a twist on the classic recipe!
Baking Time
Once your batter is ready, pop it in the oven for about 10-12 minutes. The scent of chocolate will fill your kitchen, making the wait even more tantalizing. Keep an eye on them to avoid overbaking.
Freezing Time
After cooling, let the sandwiches chill in the freezer for at least 2 hours. This helps the ice cream firm up and makes the sandwiches easier to handle. Patience is key here!
Total Time
In total, you’re looking at around 2 hours and 30 minutes from prep to freeze. But trust me, the reward of those Chocolate Cherry Ice Cream Sandwiches is well worth every minute! For more tips on ice cream making, check out resources from the Ice Cream Makers Association.
Nutritional Facts for Chocolate Cherry Ice Cream Sandwiches
Calories per Sandwich
When indulging in Chocolate Cherry Ice Cream Sandwiches, it's important to be mindful of the calorie count. Each sandwich contains approximately 250-300 calories, depending on the specific ingredients used. This sweetness can easily fit into a balanced diet if enjoyed in moderation, so treat yourself without the guilt!
Key Nutrients
These delightful sandwiches not only satisfy your sweet tooth but also pack some nutritional benefits:
- Protein: The ice cream offers a bit of protein, crucial for muscle repair and overall health.
- Calcium: A wonderful source for those who need bone support, thanks to the dairy in the ice cream.
- Antioxidants: Dark chocolate and cherries are rich in antioxidants, which can boost your immune system and promote heart health.
For a deeper dive into the health benefits of dark chocolate, check out this health article by Healthline. Making informed choices doesn't have to lessen the enjoyment; just remember to savor every bite!
FAQs about Chocolate Cherry Ice Cream Sandwiches
Can I make these sandwiches ahead of time?
Absolutely! Chocolate Cherry Ice Cream Sandwiches can be prepared ahead of time, making them perfect for parties or weekend treats. To do this, assemble your sandwiches, and wrap them tightly in plastic wrap or parchment paper. Store them in the freezer for up to two weeks. Just remember to let them sit at room temperature for a few minutes before serving—they're best slightly softened!
What are some healthy alternatives for the ingredients?
If you're looking to lighten up your Chocolate Cherry Ice Cream Sandwiches, there are several substitutions you can make:
- Ice Cream: Opt for a low-fat or dairy-free ice cream instead. There are many delicious almond or coconut milk options available that will still give you that creamy texture.
- Cookies: Use whole grain or nut-based cookies for a health boost. You could even try making oatmeal cookies, which complement the cherry flavor beautifully.
- Sweeteners: If you want to reduce sugar, consider using natural sweeteners like stevia or honey to sweeten the cookies or the ice cream.
For more health-conscious alternatives, check out resources from nutrition experts like the American Heart Association that provide tips on making healthier food choices.
How should I store leftover ice cream?
If you have leftover ice cream from your sandwiches, store it in an airtight container in the freezer. To keep ice crystals from forming, place a piece of parchment paper directly on the surface of the ice cream before sealing the container. This can help maintain that delightful creamy texture you love. Be sure to enjoy it within a month for the best flavor experience!
Want more tips or delicious recipes? Explore our other articles for more inspiration on sweet treats!
Conclusion on Chocolate Cherry Ice Cream Sandwiches
The Joy of Homemade Ice Cream Sandwiches
Creating Chocolate Cherry Ice Cream Sandwiches is not just about satisfying your sweet tooth; it's an experience that brings joy to any occasion. Each bite combines the richness of chocolate cookies with the tartness of cherries, making a delightful treat that can impress friends and family alike.
Making ice cream sandwiches at home gives you the freedom to experiment with flavors and textures, ensuring a customized dessert that suits your taste. Whether it’s a cozy night in or a summer barbecue, these sandwiches are sure to be a hit.
For more delightful ideas, check out expert resources on dessert pairings and flavor balancing from Serious Eats or The Kitchn.
Print
Chocolate Cherry Ice Cream Sandwiches: Indulgent Treat for Home Chefs
Indulge in a delightful treat with these Chocolate Cherry Ice Cream Sandwiches, perfect for satisfying your sweet tooth.
- Total Time: 40 minutes
- Yield: 12 sandwiches
Ingredients
- 1 cup all-purpose flour
- ½ cup unsweetened cocoa powder
- ½ teaspoon baking powder
- ¼ teaspoon salt
- ½ cup unsalted butter, softened
- ¾ cup granulated sugar
- 1 large egg
- 1 teaspoon vanilla extract
- 1 cup cherry ice cream
- ¼ cup chocolate chips
Instructions
- Preheat your oven to 350°F (175°C).
- In a bowl, mix the flour, cocoa powder, baking powder, and salt.
- In a separate bowl, cream the butter and sugar until fluffy.
- Add the egg and vanilla extract to the butter mixture and mix well.
- Gradually add the dry ingredients to the wet ingredients and stir until combined.
- Fold in the chocolate chips.
- Drop tablespoons of dough onto a baking sheet lined with parchment paper.
- Bake for 10-12 minutes until set, then let cool completely.
- Once cooled, scoop cherry ice cream between two cookies to form sandwiches.
Notes
- For an extra chocolate kick, dip the edges of the ice cream sandwiches in melted chocolate.
- Feel free to substitute vanilla or another ice cream flavor if desired.
- Prep Time: 15 minutes
- Cook Time: 12 minutes
- Category: Dessert
- Method: Baking
- Cuisine: American
- Diet: Vegetarian
Nutrition
- Serving Size: 1 sandwich
- Calories: 250
- Sugar: 20g
- Sodium: 150mg
- Fat: 15g
- Saturated Fat: 9g
- Unsaturated Fat: 5g
- Trans Fat: 0g
- Carbohydrates: 30g
- Fiber: 2g
- Protein: 3g
- Cholesterol: 30mg