Introduction to No-Bake Pear Cheesecake Cups
When it comes to satisfying your sweet tooth, no-bake desserts are often the best choice. They’re simple, quick, and require minimal kitchen equipment, which is a huge plus for young professionals with busy schedules. Imagine enjoying a delightful dessert without having to turn on the oven, keeping your kitchen cool and your energy bill low. Plus, no-bake desserts retain vibrant flavors and textures, allowing fresh ingredients to shine — just like in our delicious no-bake pear cheesecake cups.
Why Choose No-Bake Desserts?
There are numerous reasons to embrace no-bake desserts, especially for those who are always on the go:
-
Time-Saving: With no baking required, you can whip up a delicious treat in under 30 minutes. Perfect for last-minute gatherings or an evening treat after a long day at work!
-
Versatile Ingredients: No-bake recipes often allow for creative substitutions and variations. Feel free to switch up fruits, add nuts, or experiment with different crusts.
-
Healthier Options: Many no-bake desserts can be made with wholesome ingredients like yogurt or cream cheese, giving you a delicious and lower-calorie option.
Did you know that approximately 30% of home cooks prefer no-bake recipes according to a recent survey by The Food Network? It’s a testament to the rising popularity of these easy-to-make treats! In fact, with a little creativity, you can craft desserts that not only look stunning but also taste extraordinary.
Moreover, using seasonal fruits, such as pears, elevates your dessert's flavor and makes it more nutritious. Pears are packed with dietary fiber and vitamin C, making your no-bake pear cheesecake cups not just a treat, but a healthier indulgence too.
So, if you're looking for an impressive dessert that works well for any occasion, consider making these creamy, flavorful cheesecake cups. They're the perfect blend of sweet pears, smooth cream cheese, and a crunchy crust that will have your friends coming back for seconds! Plus, you can easily dress them up with your favorite toppings, like whipped cream or crushed nuts, for added flair.
Get ready to dive into the delightful world of no-bake desserts — your taste buds will thank you!
Ingredients for No-Bake Pear Cheesecake Cups
Creating no-bake pear cheesecake cups is a delightful adventure in the kitchen, and the best part? You don’t need an oven! Here’s everything you need to whip up these tasty treats:
Creamy Cheesecake Base
- Cream Cheese: 8 oz, softened for easy mixing
- Sour Cream: 1 cup, adds tanginess and creaminess
- Powdered Sugar: ½ cup, to sweeten up your filling
- Vanilla Extract: 1 teaspoon, for that aromatic flavor
Pear Topping
- Pears: 2 ripe pears, diced; fresh adds natural sweetness
- Lemon Juice: 1 tablespoon, to enhance the flavor and prevent browning
Crunchy Crust
- Graham Cracker Crumbs: 1 cup, for a classic dessert foundation
- Butter: ¼ cup, melted to hold the crust together
- Cinnamon: ½ teaspoon, optional for that warm, spicy kick
Optional Garnishes
- Whipped Cream: For an extra touch of decadence
- Chopped Nuts: Like almonds or walnuts for crunch
These ingredients not only combine beautifully but also allow you to create a visually stunning and delicious dessert. Don’t forget, you can find more tips on the perfect pear selection at The Spruce Eats. Ready to indulge?
Preparing No-Bake Pear Cheesecake Cups
Creating your own no-bake pear cheesecake cups can be both a charming and delightful experience. Not only is it a fun way to indulge in a sweet dessert, but it also allows for some flexibility in experimentation—perfect for those of us who may not have an extensive culinary repertoire! Let’s dive into the steps so you can whip up these delicious treats with ease.
Blend the base ingredients
First things first! To craft these delightful cheesecake cups, you’ll begin by preparing the base. This mixture is essential for that rich, velvety texture we associate with cheesecakes. You'll need:
- 1 cup of crushed graham crackers or digestive biscuits
- ¼ cup of melted butter
- 2 tablespoons of sugar (consider using honey or agave syrup for a natural sweetener)
Combine the crushed graham crackers with the melted butter and sugar in a mixing bowl. Use a fork to blend everything together until the mixture resembles wet sand. This step is super important; it will serve as the foundation of your no-bake pear cheesecake cups, providing both taste and structure.
For a quick tip, you can pop the base mixture into the fridge for about 10 minutes—this helps it firm up slightly, making it easier to layer later on.
Assemble the cheesecake mixture
Now that you have your base sorted, it's time to move on to the cream cheese mixture. Gather the following ingredients:
- 8 oz of cream cheese (softened at room temperature)
- 1 cup of heavy whipping cream
- ½ cup of powdered sugar
- 1 teaspoon of vanilla extract
- 1-2 ripe pears, cubed
In a separate bowl, blend the softened cream cheese until smooth. Gradually add the powdered sugar and vanilla extract, mixing until it becomes a light and fluffy mixture.
Next, in another bowl, whip the heavy cream until it forms soft peaks. Gently fold the whipped cream into the cream cheese mixture using a spatula. This folding technique is crucial; we want to keep that airy texture in your cheesecake. Incorporate the cubed pears gently to add a fresh, fruity touch that balances the creaminess perfectly.
Divide into serving cups
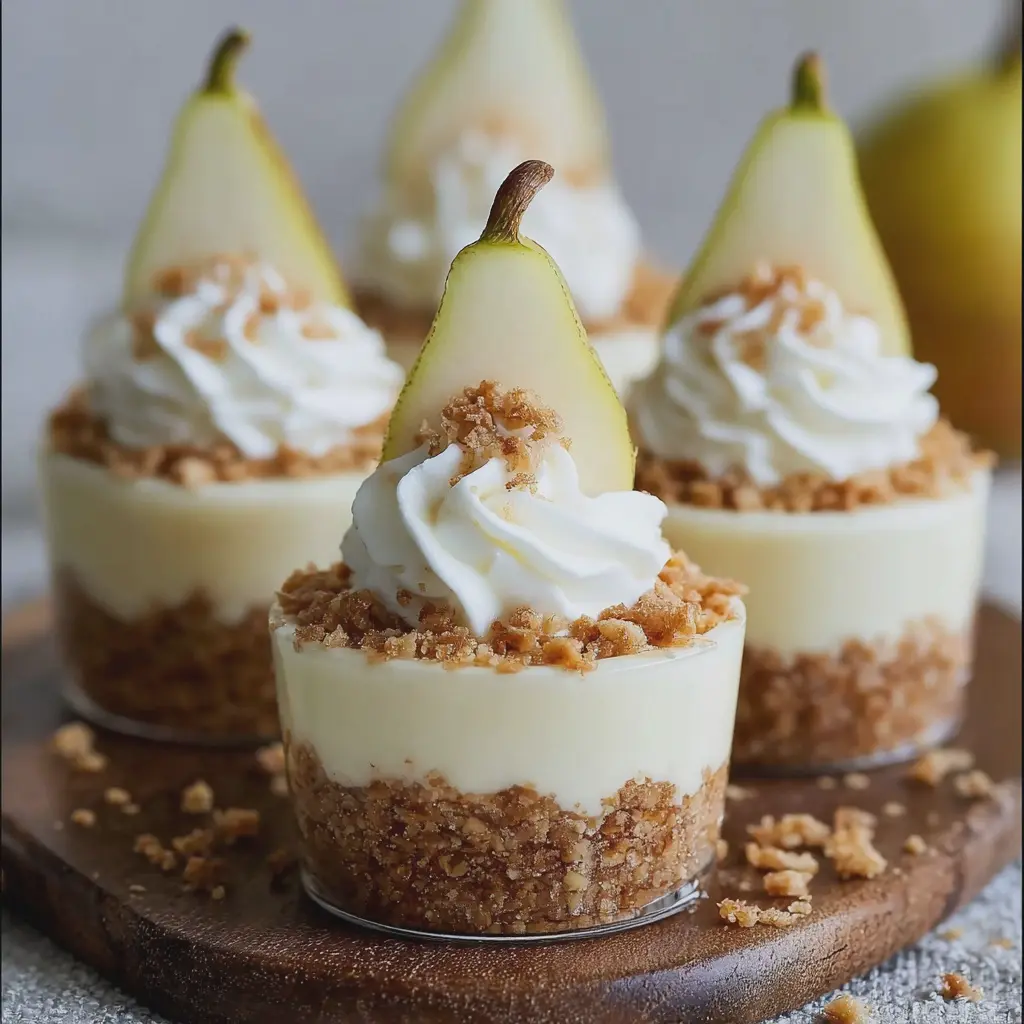
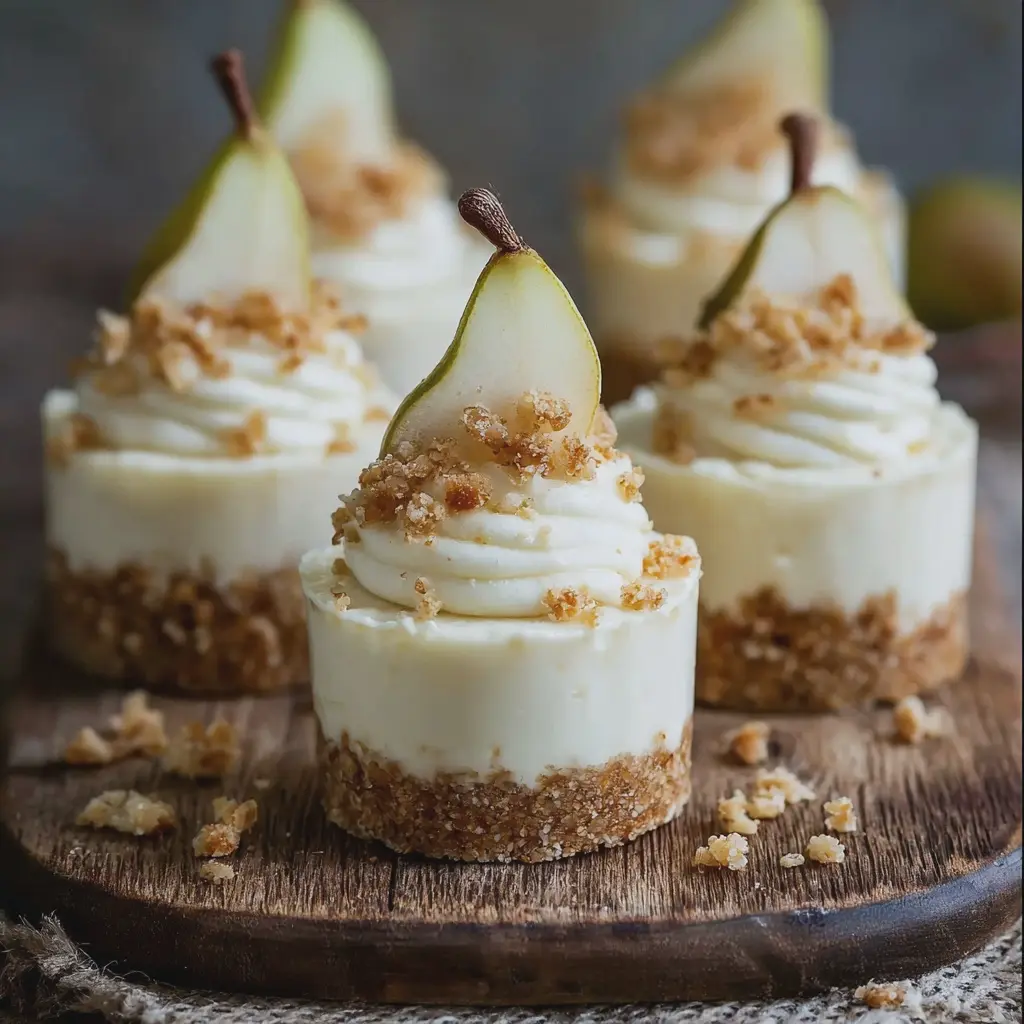
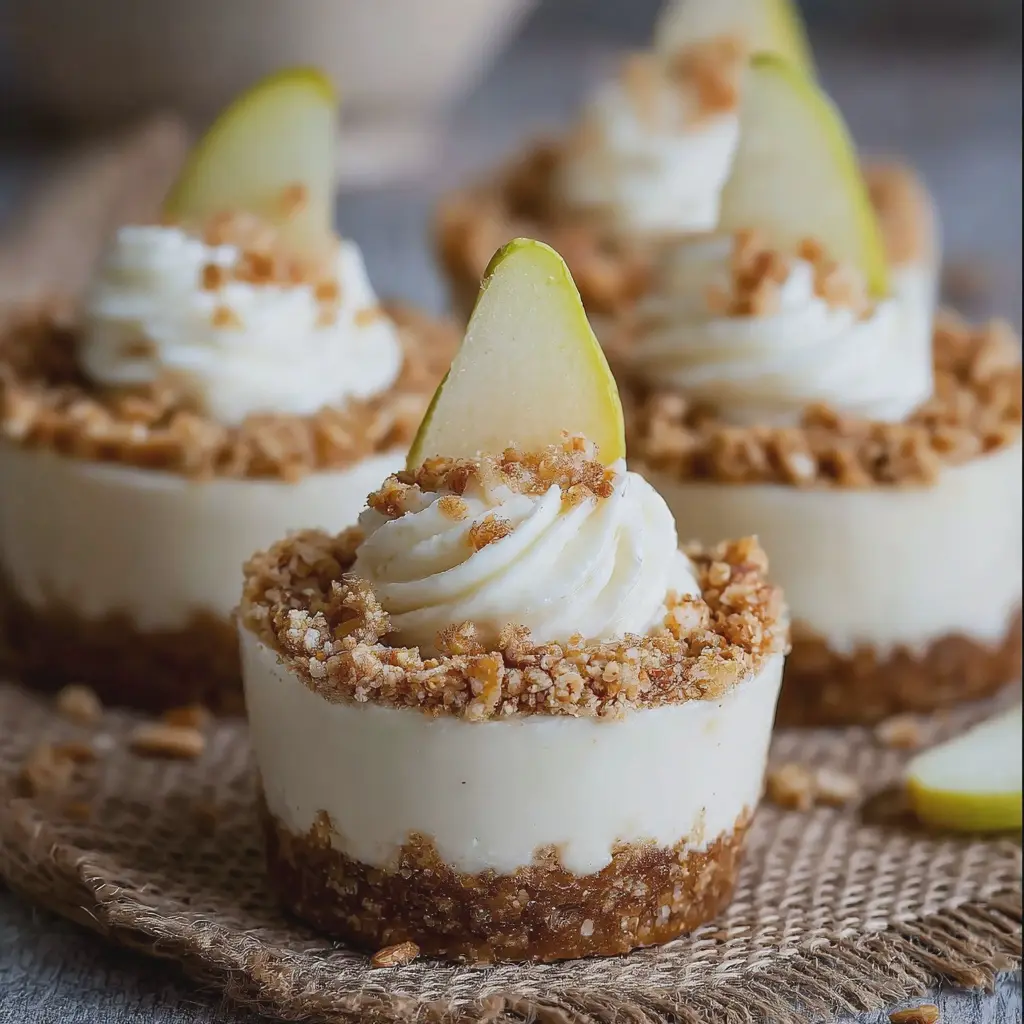
You’re almost there! Prepare some clear dessert cups or small mason jars for that appealing layered effect. Start by spooning a layer of the crushed graham cracker base into the bottom of each cup—about one-third full. Then, layer with the cheesecake mixture until just below the rim.
If you’re looking for a visual treat (because who doesn’t enjoy a pretty dessert?), feel free to alternate layers of pears and the cheesecake mix. It adds a pop of color and a bit more pear goodness!
Chill and set
Mmmm… can you smell that deliciousness? But hold on; patience is key here. Place your assembled no-bake pear cheesecake cups in the refrigerator. Ideally, you want to let them set for at least 4 hours, but overnight is even better. This chilling time allows the flavors to meld beautifully and ensures that your dessert reaches that perfect consistency.
Add the finishing touches
Before serving, it's time to adorn your cheesecake cups! Consider topping them off with:
- Additional pear slices for garnish
- A sprinkle of cinnamon or nutmeg for that cozy flavor
- A drizzle of caramel or chocolate sauce for extra decadence
- Whipped cream for that classic cheesecake aesthetic
And there you have it—perfectly simple and stunning no-bake pear cheesecake cups! These delightful treats are not only impressive but also make a fantastic dessert for gatherings. You can even swap out pears for other fruits like strawberries or blueberries depending on the season.
So, what are you waiting for? Roll up your sleeves and treat yourself to this delightful experience. You can thank yourself later! For more inspiration and recipes, check out thekitchn.com for ideas on how to personalize your cheesecake cups even further. Enjoy this sweet journey!
Variations on No-Bake Pear Cheesecake Cups
No-Bake Strawberry Cheesecake Cups
If you’re a fan of refreshing flavors, no-bake strawberry cheesecake cups are a delightful twist to your cheesecake lineup. Simply replace the pear purée with fresh strawberries or a luscious strawberry compote. Layer the creamy cheesecake filling with sliced strawberries for added texture and flavor.
- Tip: To elevate the experience, add a splash of lemon juice to brighten the strawberry flavor.
- You can find a fantastic strawberry compote recipe here.
Not only are these cups visually stunning, but the balance of creaminess and fruity freshness will leave your guests asking for seconds.
No-Bake Chocolate Cheesecake Cups
For chocolate lovers, no-bake chocolate cheesecake cups bring an indulgent twist that is hard to resist. Start with a chocolate cookie crust instead of graham crackers and incorporate cocoa powder into your cheesecake filling for that rich chocolate flavor.
- Tip: Top with chocolate shavings or a drizzle of ganache to amp up the visual appeal and provide an extra layer of decadence.
- You can check out different chocolate ganache variations here.
These cups are perfect for satisfying that sweet tooth, making them a go-to for gatherings and celebrations.
By exploring these tempting variations, you can enjoy the delightful essence of no-bake pear cheesecake cups while catering to different tastes. Each recipe offers a unique take, ensuring that your dessert table remains diverse and exciting. What’s your favorite way to jazz up classic desserts?
Cooking Tips for No-Bake Pear Cheesecake Cups
Ensuring Smooth Texture
To achieve that perfect creamy blend in your no-bake pear cheesecake cups, start by using room temperature cream cheese. Cold cream cheese can lead to lumps, creating an uneven texture. Whip it together with sugar until light and fluffy, then gradually fold in whipped cream for a luxurious finish. For extra smoothness, consider using a hand-held mixer. It’s a game-changer! And if you prefer an even silkier filling, try adding a splash of heavy cream or sour cream—both can enhance the creaminess.
Choosing the Right Pears
The type of pear you choose can dramatically impact your no-bake pear cheesecake cups. Opt for ripe, juicy Bosc or Bartlett pears, as they bring a lovely sweetness and firm texture that holds up well. Make sure they’re slightly soft to the touch when squeezed gently. For some interesting variations, check out resources on The Spruce Eats for more on fruit choices. Dicing the pears into small pieces also helps distribute their flavor throughout the cups, making every bite deliciously fruity!
Serving Suggestions for No-Bake Pear Cheesecake Cups
Perfect pairings for a delightful dessert
When it comes to serving your no-bake pear cheesecake cups, consider complementary flavors to elevate the experience. The sweetness of the pears pairs beautifully with a dollop of whipped cream or a sprinkle of cinnamon. For an added crunch, try topping with toasted pecans or granola—they add texture while enhancing the nutty flavors of the cheesecake.
To balance the richness, a side of herb-infused tea or even a flavorful sparkling water can cleanse the palate beautifully. For those wanting something exciting, serve with craft sodas or homemade lemonade for a refreshing twist.
Presentation ideas for gatherings
Presentation can transform your dessert into a showstopper. Use charming, individual cups or mason jars to serve your no-bake pear cheesecake cups. Layering the cheesecake, pears, and toppings creates an enticing visual display.
For seasonal flair, garnish with fresh mint leaves or edible flowers. Hosting a gathering? Try setting up a dessert bar with different toppings, letting guests build their own cups, fostering creativity and conversation—this is an experience that resonates!
For more ideas on dessert presentation, check out this guide on making desserts visually appealing.
Remember, the joy of cooking is as much about sharing the experience as it is about delicious recipes!
Time Breakdown for No-Bake Pear Cheesecake Cups
Preparation Time
Getting started on your no-bake pear cheesecake cups is quick and simple! Dedicate about 15 to 20 minutes for prep. This time includes gathering ingredients like cream cheese, pears, and your choice of sweetener. It’s a great chance to crank up your favorite playlist and enjoy the process!
Chilling Time
Once assembled, these delightful cups need some chill time in the refrigerator. Aim for about 2 to 4 hours, or even overnight if you want to prepare ahead. The longer they chill, the more the flavors meld beautifully, creating that irresistible creamy texture.
Total Time
In total, you’re looking at around 2 hours and 20 minutes to 4 hours and 20 minutes, depending on how long you decide to let them chill. These no-bake pear cheesecake cups not only save you oven time but also yield a stunning dessert that’s perfect for any occasion. Dive into this easy recipe, and enjoy a sweet treat that feels gourmet!
For more tips on dessert preparation and the science behind chilling, check out resources like The Kitchn or Serious Eats.
Nutritional Facts for No-Bake Pear Cheesecake Cups
Calories per serving
Each serving of no-bake pear cheesecake cups contains approximately 250 calories. These delightful treats offer a balanced sweetness while satisfying your dessert cravings without overindulging. It’s a tasty way to enjoy a dessert that's lower in calories compared to traditional cheesecakes.
Key nutritional highlights
These no-bake pear cheesecake cups are not just a feast for your taste buds; they come packed with nutritional benefits:
- Healthy Fats: Using cream cheese and your choice of yogurt contributes beneficial fats.
- Fruit Goodness: Pears are rich in fiber and vitamin C, supporting digestive health and boosting immunity.
- Low Added Sugar: With natural sweetness from the pears, you can enjoy a dessert with minimal added sugars.
Whether you're winding down after a long day or hosting friends, these cups provide a guilt-free indulgence. For more about the benefits of pears, check out the Nutritional Guidelines on Fruits to ramp up your knowledge!
FAQs about No-Bake Pear Cheesecake Cups
Can I use different fruits?
Absolutely! While no-bake pear cheesecake cups are delightful with juicy pears, you can easily swap in your favorite fruits. Think ripe peaches, sweet strawberries, or even a medley of mixed berries. Each fruit adds its unique flavor, making the dessert your own. Just ensure the fruit is fresh and in season for the best taste. Feel free to get creative! Need inspiration? Check out this comprehensive list of seasonal fruits from The Seasonal Food Guide.
How long can I store these cups?
These delicious cups are perfect for meal prepping! You can store your no-bake pear cheesecake cups in the refrigerator for up to three days. Make sure to cover them with plastic wrap or airtight lids to keep them fresh. If you’re looking to enjoy them beyond that timeframe, consider freezing them. Just be aware that the texture might change slightly when thawed.
What’s the best way to serve?
Serving your no-bake pear cheesecake cups is part of the fun! For a casual setting, scoop them into cute mason jars for a charming presentation. If you're hosting a dinner party, consider layering them in elegant dessert glasses to impress your guests. Top each cup with graham cracker crumbs or a dollop of whipped cream for an eye-catching finish. Remember, it’s all about making the experience enjoyable—so get creative and share your masterpiece on social media!
Whether you're entertaining or enjoying a quiet night in, these cups are sure to impress. Got any more questions? I'm here to help!
Conclusion on No-Bake Pear Cheesecake Cups
In wrapping up our journey with these no-bake pear cheesecake cups, it’s clear they’re a standout dessert for any gathering or a simple weeknight treat. With their creamy texture and delightful pear topping, they provide a perfect balance of flavor and satisfaction. Plus, they’re incredibly easy to whip up—ideal for busy young professionals like yourself looking to impress without spending hours in the kitchen.
Whether you’re serving them at a party or enjoying them solo, these no-bake pear cheesecake cups are sure to be a hit. For tips on even more delightful no-bake desserts, check out this resource on no-bake recipes. Enjoy creating and sharing this delicious treat!
Print
No-Bake Pear Cheesecake Cups: The Indulgent Treat You Need
Indulge in these creamy and delicious no-bake pear cheesecake cups, perfect for any occasion.
- Total Time: 2 hours 15 minutes
- Yield: 4 servings
Ingredients
- 8 ounces cream cheese
- 1 cup powdered sugar
- 1 teaspoon vanilla extract
- 1 cup heavy cream
- 2 ripe pears, diced
- 1 teaspoon lemon juice
- ½ cup graham cracker crumbs
- 2 tablespoons butter, melted
Instructions
- In a mixing bowl, beat the cream cheese until smooth.
- Add powdered sugar and vanilla extract, mixing until well combined.
- In a separate bowl, whip the heavy cream until stiff peaks form.
- Gently fold the whipped cream into the cream cheese mixture.
- In another bowl, mix diced pears with lemon juice.
- In serving cups, layer the graham cracker crumbs, cream cheese mixture, and diced pears.
- Repeat layers until cups are filled, ending with pears on top.
- Chill in the refrigerator for at least 2 hours before serving.
Notes
- For extra flavor, consider adding cinnamon to the pears.
- These cups can be made a day ahead of time for convenience.
- Prep Time: 15 minutes
- Category: Dessert
- Method: No-Bake
- Cuisine: American
- Diet: Vegetarian
Nutrition
- Serving Size: 1 cup
- Calories: 300
- Sugar: 20g
- Sodium: 50mg
- Fat: 18g
- Saturated Fat: 10g
- Unsaturated Fat: 7g
- Trans Fat: 0g
- Carbohydrates: 32g
- Fiber: 1g
- Protein: 3g
- Cholesterol: 60mg