Introduction to Key Lime Pie Bars
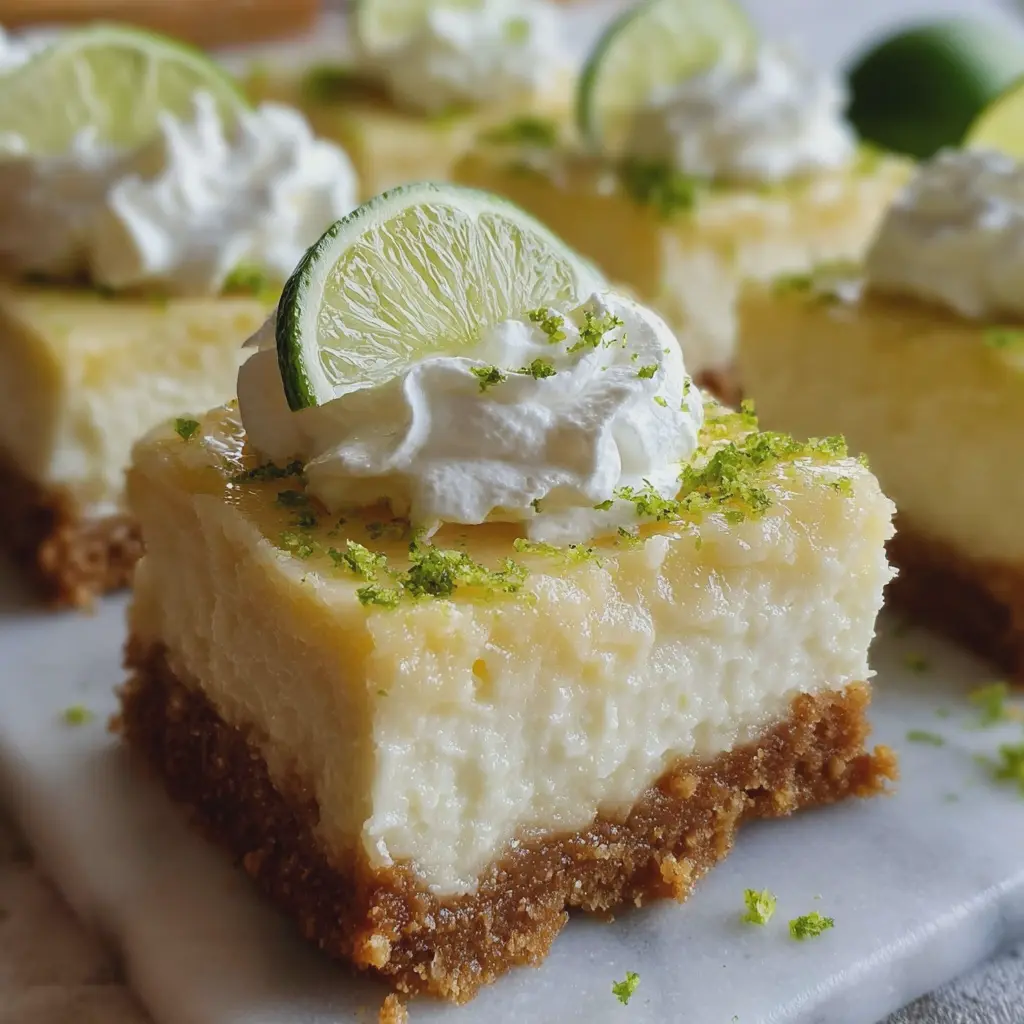
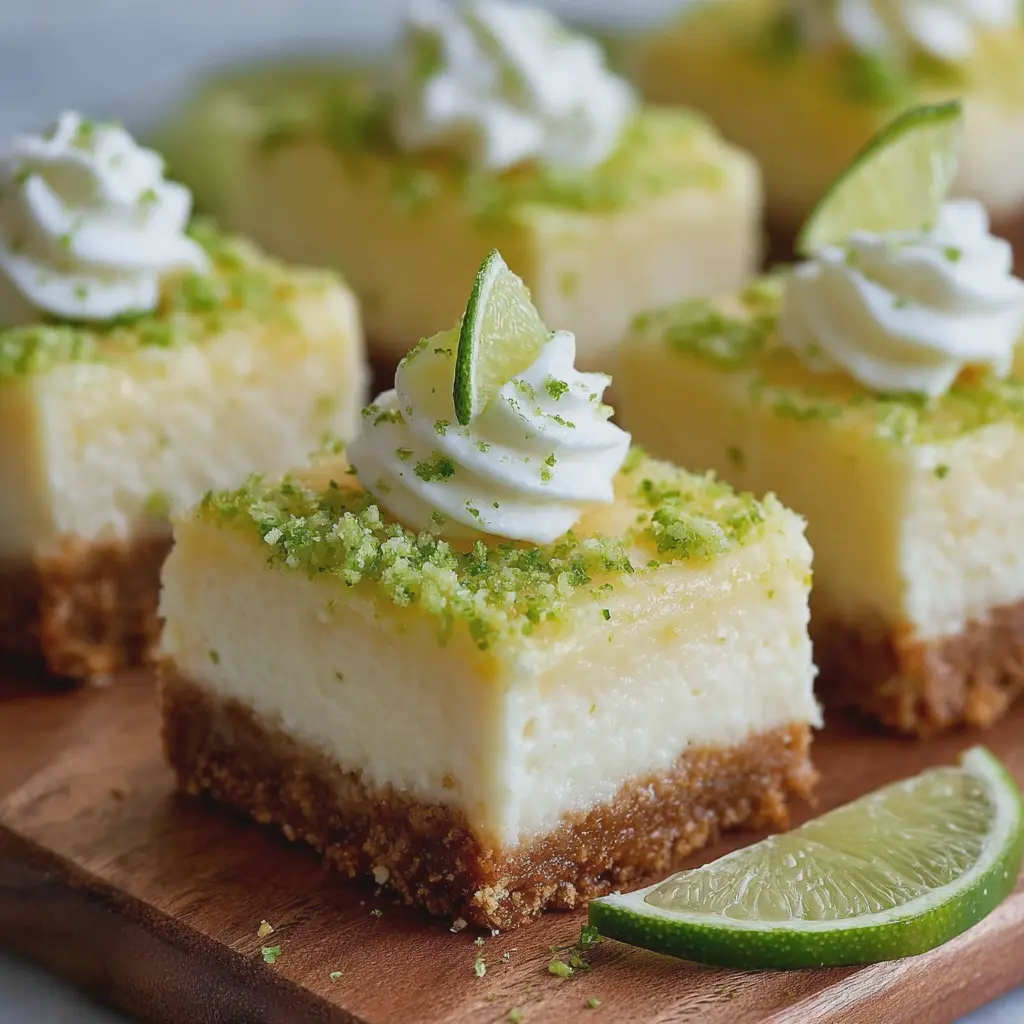
When you think of a refreshing dessert, Key Lime Pie Bars surely come to mind. These bars encapsulate the essence of summer with their zesty lime flavor and creamy texture, making them a go-to choice for any occasion. Whether you're hosting a backyard barbecue, celebrating a birthday, or simply craving something sweet, these bars fit the bill perfectly.
What makes Key Lime Pie Bars a must-have dessert?
There’s something truly special about Key Lime Pie Bars. Here’s why they have become a beloved favorite:
-
Simple to Make: Unlike traditional Key lime pies that require careful crafting and a time-consuming crust, these bars streamline the process. You can whip them up in no time, allowing more moments of enjoyment and less time in the kitchen.
-
Perfectly Balanced Flavors: The combination of tart key lime juice and sweetened condensed milk creates a deliciously balanced flavor profile that tantalizes the taste buds. Trust me, the zing from the lime paired with a buttery crust hits all the right notes.
-
Portable and Shareable: Cut into delightful squares, Key Lime Pie Bars are perfect for sharing. They can be easily transported to potlucks or picnics without the worry of a pie slice falling apart. Plus, who doesn't love a bite-sized treat?
-
Versatile Serving Options: Top them with whipped cream, fresh fruit, or even a sprinkle of coconut for an extra touch. The possibilities are endless, catering to various palates while ensuring everyone walks away happy.
For more insights into why chilled desserts like these are perfect for warm days, you might find this Nutritional Science article enlightening!
Lastly, these Key Lime Pie Bars not only taste good, but they also make you feel good, especially during those sunny days when you need a refreshing pick-me-up. With just a handful of ingredients and a little bit of love, you can create a dessert that brings joy to your friends and family. So, let’s dive in and discover how to make these delectable bars right at home!
Ingredients for Key Lime Pie Bars
Making Key Lime Pie Bars is a breeze, especially once you gather the right ingredients. Here’s what you’ll need to create this creamy, tangy treat that’s perfect for any occasion.
For the Crust
- 1 ½ cups graham cracker crumbs
- ½ cup sugar
- ½ cup unsalted butter, melted
This crust serves as a delicious foundation, blending the sweetness of sugar and buttery richness to complement the tartness of the lime.
For the Filling
- 2 cups sweetened condensed milk
- ½ cup freshly squeezed lime juice (about 4-5 limes)
- Zest of 2 limes
- 3 large egg yolks
The acidity from the lime juice expertly balances the sweetness in the condensed milk, creating that iconic key lime flavor!
Optional Toppings
- Whipped cream
- Lime slices for garnish
Feel free to get creative with your toppings. Perhaps a dollop of whipped cream or some zest on top would elevate your Key Lime Pie Bars! For more tips on enhancing flavors, check out this resource for inspiring ideas.
Now that you have all your ingredients, you're one step closer to indulging in these delicious bars!
Step-by-Step Preparation of Key Lime Pie Bars
Making Key Lime Pie Bars is not just a treat; it’s a fabulous experience! These bars are an effortless way to enjoy that classic key lime flavor, making them perfect for summer gatherings, potlucks, or just a relaxing evening at home. Ready to dig in? Let’s get started!
Gather Your Ingredients
Before you embark on this delicious journey, you’ll want to make sure you have all the right ingredients on hand. Here’s what you’ll need to prepare your Key Lime Pie Bars:
-
For the crust:
-
1 ½ cups graham cracker crumbs
-
½ cup granulated sugar
-
½ cup unsalted butter, melted
-
For the filling:
-
2 (8-ounce) packages cream cheese, softened
-
1 cup granulated sugar
-
½ cup freshly squeezed key lime juice (about 5-6 limes)
-
Zest of 2 limes
-
3 large eggs
Having these ingredients ready will streamline your cooking process—less time rushing to the store means more time to enjoy your Key Lime Pie Bars!
Create the Graham Cracker Crust
A good crust is essential for a great bar! To make your graham cracker crust:
- Preheat your oven to 350°F (175°C).
- In a medium-sized bowl, combine the graham cracker crumbs and sugar. Mix well!
- Pour in the melted butter, and stir until the mixture resembles wet sand.
- Press this mixture into the bottom of a greased 9 x 13-inch baking dish evenly and firmly.
Why not add a pinch of salt for a flavor boost? If you’re feeling adventurous, you could even sprinkle some toasted coconut for an extra twist.
Mix the Cheesecake Filling
Now that your crust is set, let’s whip up the filling!
- In a large bowl, beat the softened cream cheese until smooth and creamy.
- Gradually add in the sugar, mixing until completely blended.
- Squeeze in the fresh key lime juice and add the zest. This is where the magic happens!
- Finally, add the eggs, one at a time, mixing thoroughly after each addition.
This creamy mixture should be fragrant and vibrant, making it impossible not to taste just a little!
Combine Filling and Crust
Once your filling is ready, it’s time to marry it with your crust.
- Pour the cream cheese filling over the prepared graham cracker crust.
- Use a spatula to spread it evenly, ensuring that every corner is filled.
At this stage, you might grab a spoon for a sneaky taste—just a little, I won’t tell!
Bake to Perfection
Let’s get this dessert sizzling!
- Place the baking dish in the preheated oven and bake for 20-25 minutes, or until the filling is set but still slightly jiggly in the center.
Did you know that baking breaks down some of the cream cheese, which contributes to that rich, creamy texture? To ensure even cooking, you might want to rotate your dish halfway through, especially if your oven has hot spots.
Chill and Set the Bars
The final step before you indulge is crucial: chilling.
- Once baked, remove the dish from the oven and let it cool at room temperature for about 30 minutes.
- Transfer to the fridge and chill for at least 4 hours, though overnight is even better!
Chilling allows the flavors to meld wonderfully, giving your Key Lime Pie Bars that tangy and creamy profile they’re famous for.
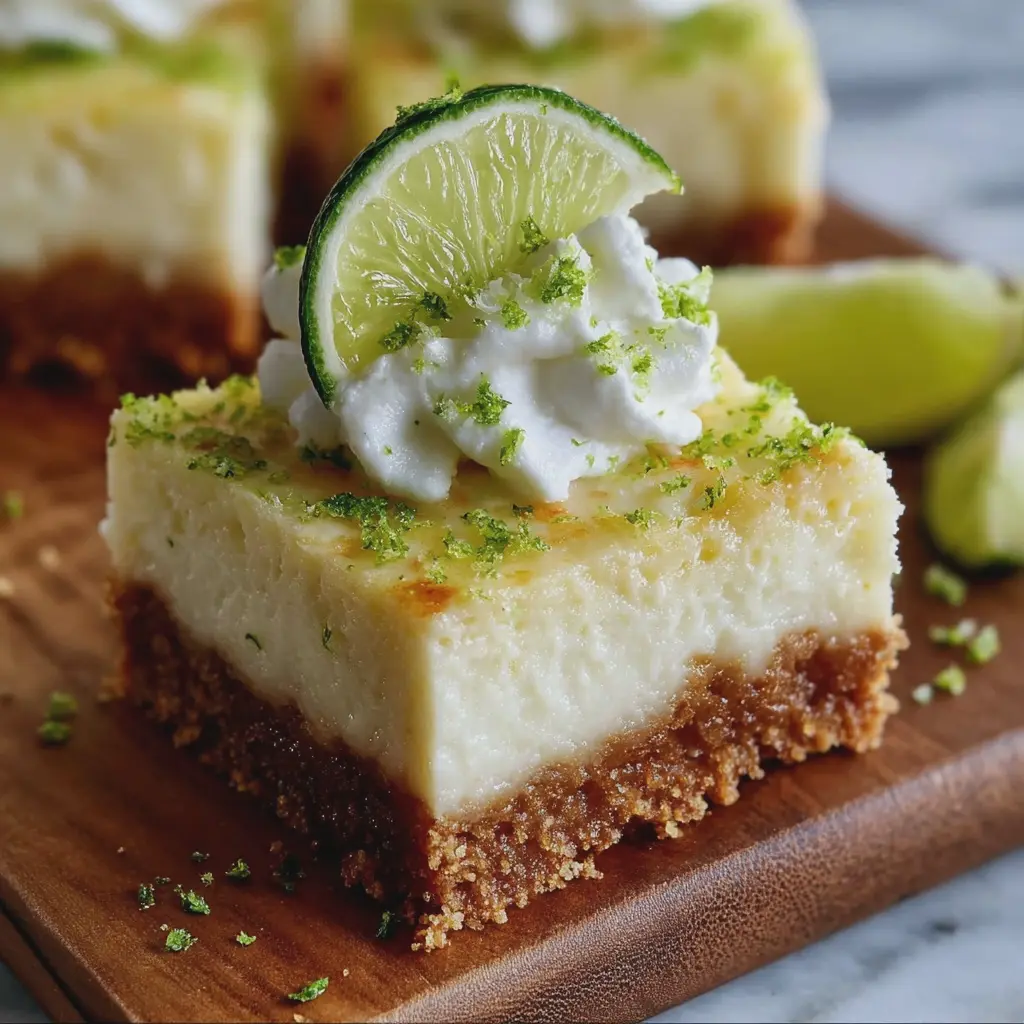
After the wait, use a sharp knife to slice them into perfect squares. Serve cool, perhaps topped with whipped cream or fresh lime slices for that finishing touch.
And there you have it—delicious, homemade Key Lime Pie Bars! Share them with friends, enjoy them solo, or bring them to gatherings; trust me, they’ll disappear faster than you can say “key lime”! Happy baking!
Variations of Key Lime Pie Bars
Gluten-free Key Lime Pie Bars
For those seeking a gluten-free alternative, making Key Lime Pie Bars without traditional flour is a breeze. You can substitute regular flour with almond flour or coconut flour for the crust. These options not only maintain that delightful crunch but also add a nutty flavor that complements the tangy lime filling. Additionally, ensure your sweetened condensed milk is certified gluten-free. These tweaks can help everyone enjoy this classic dessert, regardless of dietary restrictions!
Vegan Key Lime Pie Bars
If you’re looking for a vegan version of Key Lime Pie Bars, don’t worry! Plant-based cooking has come a long way, and you can easily create a creamy filling using cashews. Just soak them beforehand, then blend with fresh lime juice, maple syrup, and a splash of coconut milk for a luscious texture. For the crust, consider using dates blended with oats or nuts for a sweet, chewy base. By opting for these vegan-friendly ingredients, you can whip up a dessert that’s just as delicious while accommodating various diets.
Conclusion
With these variations, you'll open the door to new flavors and dietary options without losing the essence of what makes Key Lime Pie Bars so special. Whether you're entertaining guests or satisfying a sweet tooth on a cozy night in, these adaptations ensure everyone can indulge. Remember, food is all about creativity and sharing joy; so why not explore these versions and make new memories? For more ideas on gluten-free or vegan desserts, check out sources like Minimalist Baker for inspiration.
Cooking Tips and Notes for Key Lime Pie Bars
When making Key Lime Pie Bars, the balance of sweet and tart is crucial. Here are some tips to ensure your bars come out perfectly every time.
-
Choose Fresh Limes: Use fresh limes for the best flavor. The zest and juice combined will make your bars burst with vibrant taste. Did you know that the fresher the lime, the more fragrant it is?
-
Graham Cracker Crust: A well-compressed crust is key. Press the crumbs firmly into the pan for a sturdy base. If you're looking for a twist, try adding a pinch of coconut or almond extract to the crust mix for an extra layer of flavor.
-
Cool Gradually: Once baked, let your Key Lime Pie Bars cool slowly at room temperature before refrigerating. This helps achieve that smooth texture and prevents cracks.
-
Creamy Topping: For an extra touch, pair your bars with lightly whipped cream or a dollop of sour cream to enhance the citrus notes.
Cooking is a blend of science and art, and these little touches can elevate your bars from good to unforgettable! For further inspiration, check out the benefits of cooking with fresh ingredients.
Serving Suggestions for Key Lime Pie Bars
When it comes to enjoying your delectable Key Lime Pie Bars, a few thoughtful serving suggestions can elevate your dessert experience to new heights. Here’s how to serve this mouthwatering treat:
Presentation Ideas
- Chill Before Serving: For the best experience, chill your bars in the refrigerator for at least an hour before slicing. This enhances the flavors and gives a refreshing feel, especially on warm days.
- Garnish Wisely: Top with a dollop of whipped cream or a sprinkling of zesty lime zest for that extra pop! Fresh mint leaves can also add a lovely color and aroma.
Pairing Recommendations
- Beverage Buddies: Consider serving your Key Lime Pie Bars alongside a glass of iced tea or refreshing coconut water. The flavors complement each other beautifully without overpowering the zesty lime tartness.
- Simple Sides: A scoop of vanilla ice cream or a side of fresh berries not only adds color but creates a lovely contrast of flavors that pulls everything together.
Exploring unique serving methods can completely change your dessert game, turning a humble bar into a culinary star at your gathering. Grab some inspiration and make your Key Lime Pie Bars the talk of the town!
Time Breakdown for Key Lime Pie Bars
Preparation Time
Getting your Key Lime Pie Bars started is a breeze! You’ll typically spend about 15 minutes gathering ingredients and preparing your crust and filling. Gather fresh key limes, cream cheese, and a few pantry staples for that zesty flavor.
Baking Time
Once your crust is ready, pop it into the oven. Baking these bars will take around 25 minutes. The goal here is to achieve that perfect balance of firmness and creaminess, so keep an eye on them as they bake.
Chilling Time
After baking, allow your Key Lime Pie Bars to chill in the fridge for at least 2 hours. This step is crucial for enhancing flavors and achieving the right texture. Patience pays off when that first tangy bite makes you smile!
For more tips on citrus desserts, you might enjoy this article over at The Kitchn.
Nutritional Facts for Key Lime Pie Bars
When indulging in homemade Key Lime Pie Bars, it’s good to know what you’re treating yourself to. Here’s a quick dive into their nutritional facts:
Calories per bar
Each delicious Key Lime Pie Bar typically contains around 150 calories. It’s a rich, sweet treat that’s perfect for a special occasion or to satisfy a summer craving without going overboard.
Sugar content
On average, expect about 10 grams of sugar per bar. While that certainly contributes to the delightful sweetness, it’s worth balancing it out with a healthy meal alongside your dessert.
Protein
These bars might not be a protein powerhouse, with only about 2 grams of protein per serving. Pair them with a protein-rich snack, like Greek yogurt, if you’re looking to boost your protein intake without sacrificing on dessert!
For a deeper exploration of nutrition and dessert choices, check out sources like Healthline or The Academy of Nutrition and Dietetics. Knowing what’s in your treats can help you enjoy them even more!
FAQs about Key Lime Pie Bars
Can I substitute fresh lime juice for key lime juice?
Absolutely! While key lime juice is distinctly tart and aromatic, you can substitute fresh lime juice in your Key Lime Pie Bars if that’s what you have on hand. However, keep in mind that regular lime juice can be a bit sweeter and may alter the final taste slightly. If you're after that signature zesty kick, opt for the key limes if possible. For more tips on lime varieties, check out The Spruce Eats.
How long can I store Key Lime Pie Bars?
When stored correctly, homemade Key Lime Pie Bars can last up to 5 days in the refrigerator. Just make sure to keep them covered to maintain freshness. If you want to have some ready for an occasion later on, you can freeze them for up to three months! Simply thaw in the fridge overnight before serving, and you'll enjoy that vibrant flavor just like day one.
What can I use if I don’t have graham crackers?
No graham crackers? No problem! You can easily swap them out with other pantry staples, such as:
- Crushed digestive biscuits
- Shortbread cookies
- Vanilla wafer cookies
Each alternative will bring a slightly different flavor profile but will still create a delightful crust for your Key Lime Pie Bars. Just blend them with melted butter as you would graham crackers!
For more secrets on achieving the perfect crust, visit Love and Olive Oil. Enjoy baking!
Conclusion on Key Lime Pie Bars
In wrapping up your culinary adventure with Key Lime Pie Bars, it’s clear they are not just a dessert; they're an experience. The balance of tart and sweet makes them a refreshing treat perfect for any gathering or a quiet night in. Whether you enjoy them at a summer barbecue or on a cozy evening, their bright flavor will surely impress.
Why These Bars Are a Must-Try
- Simplicity: With just a few ingredients, you can whip them up in no time.
- Versatility: These bars are ideal for dressing up a special occasion or a last-minute snack.
- Healthier Alternative: Opt for a healthier crust by using nuts and oats.
For more tips on perfecting your dessert game, check out articles from Bon Appétit or Food52.
Embrace the joy of baking and share these bars with friends or family; they’re bound to become a favorite in your dessert repertoire!
Print
Key Lime Pie Bars: Easy, Indulgent Treat for Homemade Bliss
These Key Lime Pie Bars are the perfect blend of tart and sweet, offering a refreshing dessert that captures the essence of summer.
- Total Time: 45 minutes
- Yield: 16 servings
Ingredients
- 1 ½ cups graham cracker crumbs
- ⅓ cup granulated sugar
- ½ cup unsalted butter, melted
- 2 cans (14 ounces each) sweetened condensed milk
- ¾ cup fresh key lime juice
- 4 large egg yolks
- ½ teaspoon lime zest
- whipped cream for topping (optional)
Instructions
- Preheat your oven to 350°F (175°C).
- In a bowl, mix graham cracker crumbs, sugar, and melted butter until well combined.
- Press the mixture into the bottom of a greased 9x9 inch baking pan.
- Bake for 10 minutes and then allow to cool slightly.
- In another bowl, whisk together sweetened condensed milk, key lime juice, egg yolks, and lime zest until smooth.
- Pour the filling over the cooled crust.
- Bake for an additional 15-20 minutes until the filling is set.
- Let cool completely before cutting into bars.
- Top with whipped cream if desired.
Notes
- Using fresh key limes will provide the best flavor.
- These bars can be garnished with lime slices for decoration.
- Prep Time: 15 minutes
- Cook Time: 30 minutes
- Category: Dessert
- Method: Baking
- Cuisine: American
- Diet: Vegetarian
Nutrition
- Serving Size: 1 bar
- Calories: 200
- Sugar: 12g
- Sodium: 100mg
- Fat: 8g
- Saturated Fat: 5g
- Unsaturated Fat: 2g
- Trans Fat: 0g
- Carbohydrates: 28g
- Fiber: 1g
- Protein: 3g
- Cholesterol: 60mg