Introduction to Drumstick Ice Cream Cake
The Nostalgia of Ice Cream Cakes
Think back to those golden childhood days, when the arrival of summer meant ice cream carts with their vibrant colors and melodic jingles. One of the iconic treats that stood out was the beloved Drumstick ice cream cake. This nostalgic dessert combines the comfort of cake with the delightful flavors of creamy ice cream, often featuring crispy cones and rich toppings. Each slice is a bite of sweet reminiscence, invoking memories of days spent lounging in the sun and sharing laughs with friends. According to a survey by the Ice Cream Association, 90% of Americans enjoy ice cream in some form, which makes this cake even more special as it holds a place in our hearts as much as our taste buds.
Why Homemade is Always Better
Bringing an ice cream cake to life in your own kitchen is not just about indulgence—it's about creating lasting memories. When you make your own drumstick ice cream cake, you have the freedom to tailor it to your personal taste and dietary preferences. Want to swap out the classic chocolate for a rich caramel sauce? Go for it! How about using Turkey bacon bits or Chicken ham as a unique topping? The possibilities are endless!
Homemade ice cream cakes not only taste fresher but also allow you to experiment with textures and flavors. Consider that many store-bought cakes can be loaded with preservatives and ingredients you might not want. By making it yourself, you can ensure every ingredient is wholesome and delicious. Plus, nothing beats the feeling of serving a dessert that your friends and family know was crafted with love.
Still unsure about diving into the world of homemade desserts? Check out resources like Serious Eats, which offer expert tips and recipes to help even beginners get started. You’ll find that with every layer you craft, you’re not just creating a delectable treat; you’re also building your own story and sharing a unique experience.
Ready to uncover the steps to make your very own drumstick ice cream cake? Let's dive into the recipe that’s guaranteed to bring joy to any gathering!
Ingredients for Drumstick Ice Cream Cake
Key Ingredients Overview
Creating a delightful drumstick ice cream cake starts with a handful of delectable ingredients that blend to make a scrumptious dessert. Here’s what you’ll need:
- Ice Cream: Choose your favorite flavors. Classic choices include vanilla, chocolate, or even peanut butter for a twist.
- Cake Base: A simple store-bought chocolate or vanilla cake works wonders, or you can bake your own for that personal touch.
- Toppings: Think chopped nuts, chocolate chips, and sprinkles. These add texture and flavor, elevating your cake.
- Whipped Cream: Light and fluffy, this will serve as a creamy layer that binds your cake together.
- Drumstick Cones: The star of the show! Crush a few for that nostalgic crunchy layer that mimics the classic treat.
For a deeper dive into ice cream varieties, check out this article on the different types of ice cream for some inspiration.
Optional Garnishes for Extra Flair
Looking to take your drumstick ice cream cake to the next level? Consider these fun and tasty garnishes:
- Chocolate Sauce Drizzle: A luscious topping that everyone loves.
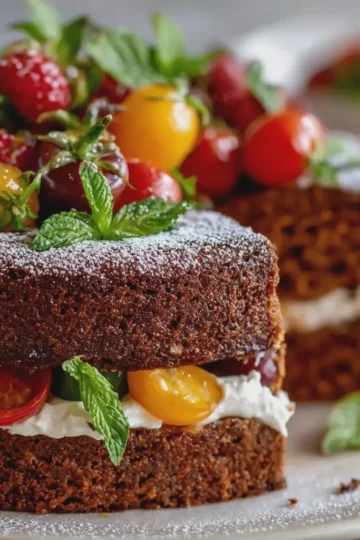
- Chopped Fruit: Fresh strawberries or bananas can offer a refreshing contrast to the creamy layers.
- Edible Flowers: For a touch of elegance, edible flowers like pansies or nasturtiums can make your cake visually stunning.
With these ingredients and garnishes, your cake will not only look impressive but also taste divine! Celebrate your creativity and enjoy every bite.
Preparing Drumstick Ice Cream Cake
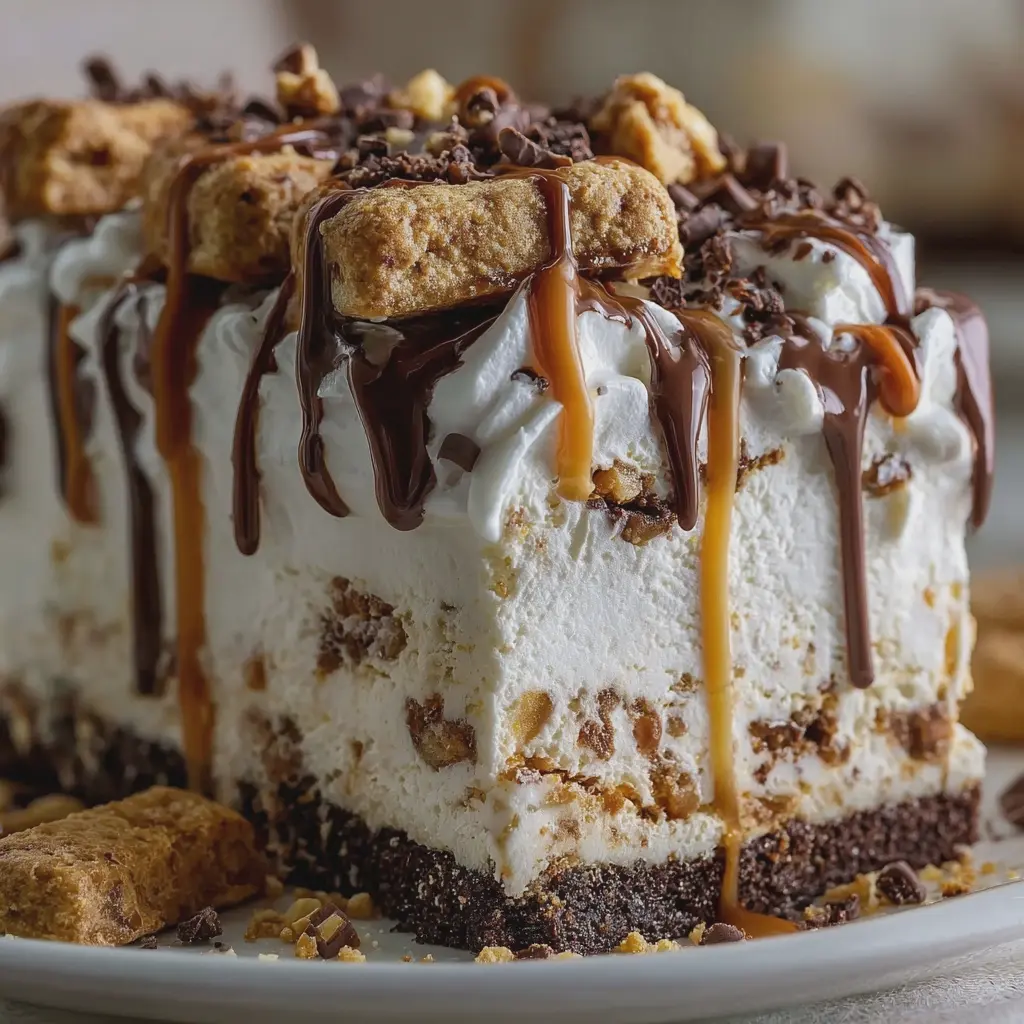
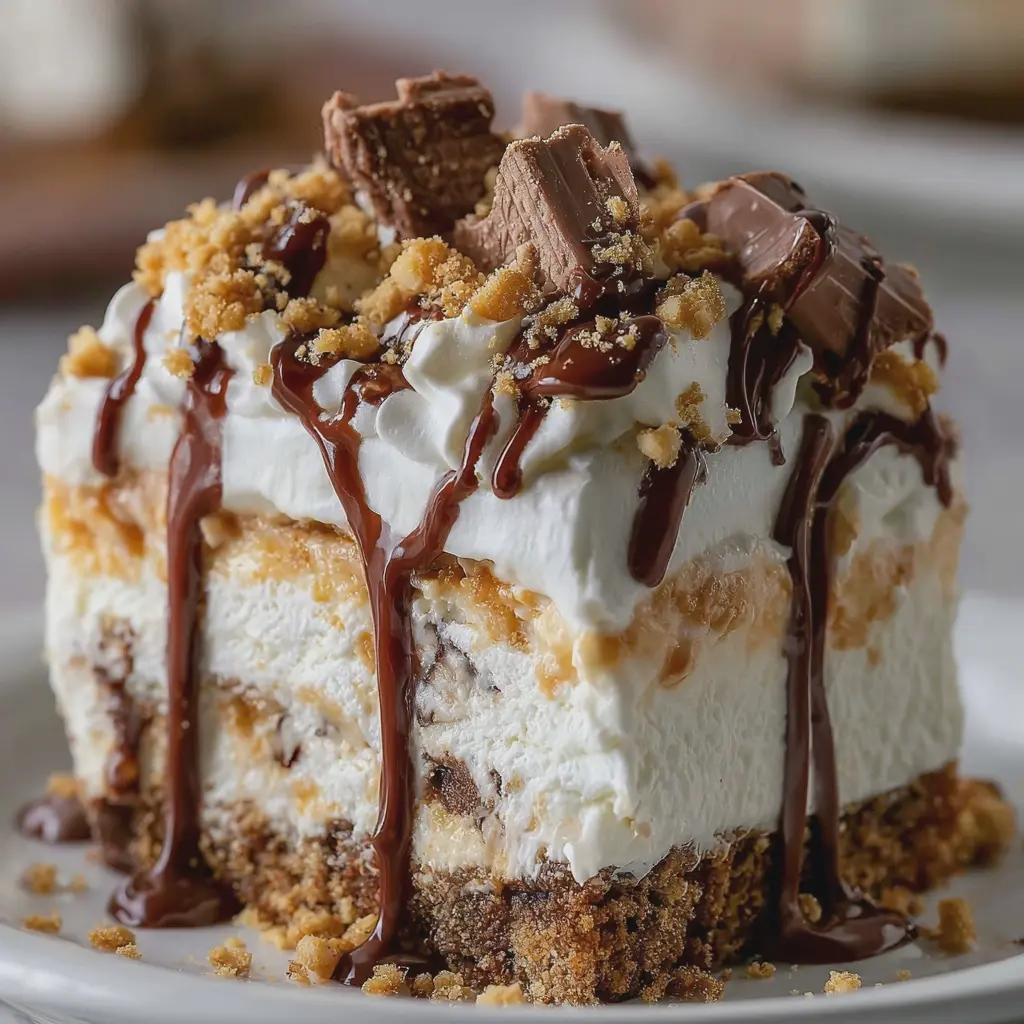
Creating a Drumstick Ice Cream Cake is a delightful way to impress your friends and family at any gathering. This cake combines layers of rich chocolate and creamy vanilla ice cream, topped with a luscious layer of whipped cream and decorated with crunchy bits, making it an irresistible dessert. Let’s walk through the steps to make this showstopper cake!
Prepare the springform pan
The first thing you’ll want to do is prepare your springform pan. This is crucial because a good pan will ensure that your cake comes out easily, giving you a beautiful presentation.
-
Line the base: Start by cutting a piece of parchment paper to fit the bottom of the springform pan. This will prevent sticking and make serving your Drumstick Ice Cream Cake a breeze.
-
Grease the sides: Use a light coating of cooking spray or softened butter on the sides. This extra step is essential for easy removal.
-
Secure the base: Make sure the base is locked tightly into place. This will keep your layers from spilling over during assembly.
Make the chocolate cookie crust
Next, we need to create that decadent chocolate cookie crust that will serve as the foundation of your cake.
- Ingredients:
- 1 ½ cups of chocolate cookie crumbs (think Oreos!)
- ⅓ cup of melted butter
- Instructions:
- In a mixing bowl, combine the chocolate cookie crumbs with melted butter.
- Press the mixture firmly into the bottom of the prepared springform pan, ensuring it’s evenly distributed.
- Once pressed down, pop it in the freezer for about 15 minutes to set while you work on the ice cream layers.
Create the vanilla ice cream layer
Now onto the star of the show. Let’s make the vanilla ice cream layer that will add creaminess to your Drumstick Ice Cream Cake.
- Ingredients:
- 2 cups of your favorite vanilla ice cream (softened to a scoopable consistency)
- Instructions:
- Scoop the softened vanilla ice cream into the springform pan on top of the chocolate cookie crust.
- Smooth it out with a spatula to create an even layer.
- Return the pan to the freezer for about 30 minutes to firm up.
Layer in the fudge and peanut crunch
This is where your cake becomes a flavor explosion!
- Ingredients:
- ½ cup hot fudge sauce
- ½ cup of crunchy peanut bits (or crushed nuts of your choice)
- Instructions:
- After the vanilla layer has set, pour the hot fudge sauce evenly over the vanilla layer.
- Sprinkle the crunchy peanut bits on top of the fudge.
- Gently press the toppings down to make sure they stay in place.
Add the chocolate ice cream layer
It’s time to introduce the rich chocolate ice cream layer to our Drumstick Ice Cream Cake.
- Ingredients:
- 2 cups of chocolate ice cream (also softened)
- Instructions:
- Scoop the softened chocolate ice cream over the fudge and peanuts, smoothing it out as you go.
- Spread it evenly, then cover the pan with plastic wrap and freeze for at least 2 hours, or until completely firm.
Frost with whipped cream
Finally, let’s finish our cake with a light and fluffy whipped cream topping.
- Ingredients:
- 1 cup heavy whipping cream
- ¼ cup confectioners’ sugar
- ½ teaspoon vanilla extract
- Instructions:
- In a mixing bowl, whip the cream until it starts to thicken.
- Gradually add the confectioners’ sugar and vanilla extract, continuing to whip until you achieve stiff peaks.
- Remove the cake from the freezer, and carefully run a knife around the edges before releasing the springform.
- Spread the whipped cream over the top layer, and feel free to add extra crushed nuts or a drizzle of fudge for garnish.
With these steps completed, your Drumstick Ice Cream Cake is ready to be sliced and served. This cake not only looks stunning but also delivers on flavor and texture with every bite. Enjoy, and don't forget to share your creation – the world needs to know about your dessert skills!
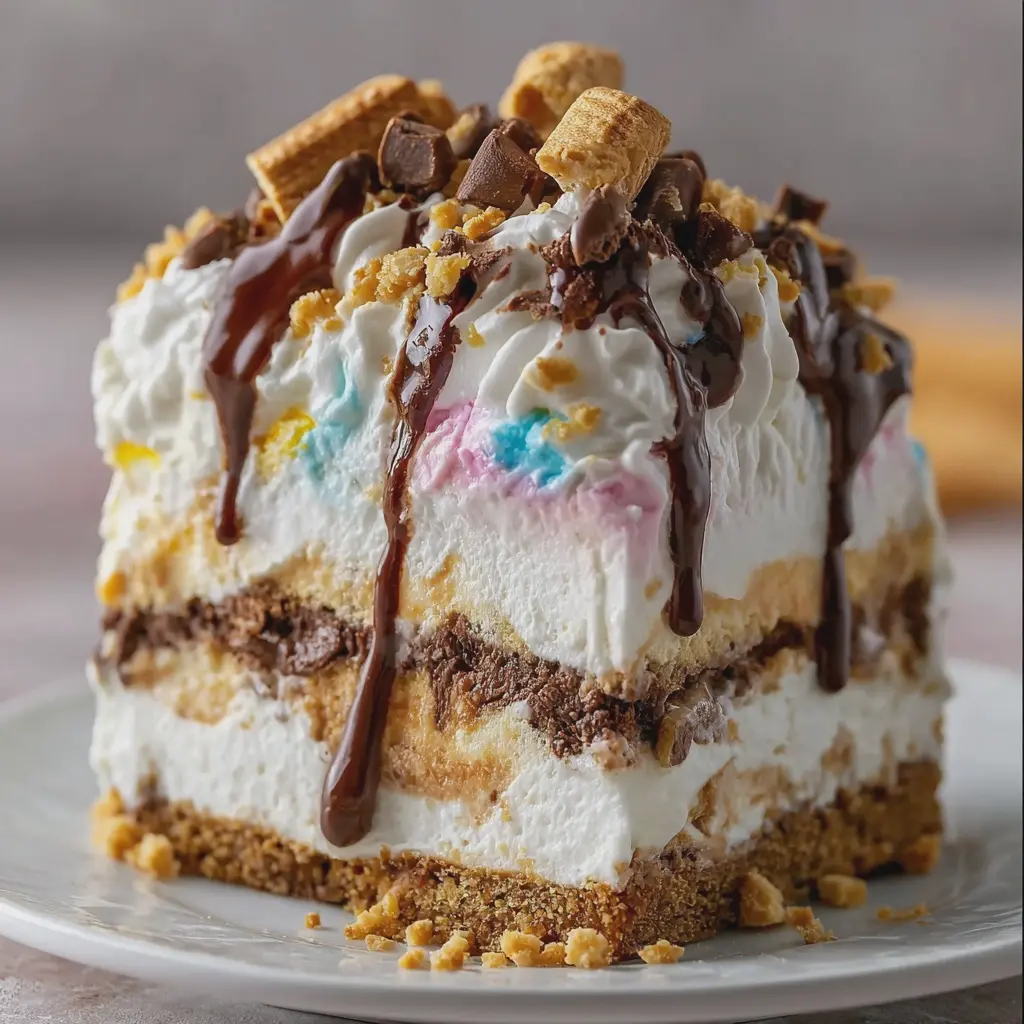
Variations on Drumstick Ice Cream Cake
When it comes to drumstick ice cream cake, the possibilities are endless! Here are a few fun variations to make this delightful treat your own.
Peanut Butter Twist
What’s better than a classic chocolate and vanilla drumstick ice cream cake? How about adding a rich, creamy layer of peanut butter! To achieve this:
- Use peanut butter ice cream as one of your layers.
- Swirl in some peanut butter sauce between the cake layers for that extra flavor punch.
- Top it off with crushed peanuts or even drizzle some chocolate syrup over the top.
This twist not only adds a nutty flavor but also pairs beautifully with the traditional chocolate crunch.
Fruit-Filled Version
If you're looking for something a bit fresher, consider a fruit-filled variation. It’s a great way to incorporate some wholesome ingredients into your dessert. Here’s how you can do it:
- Substitute vanilla ice cream with your favorite fruit-flavored ice cream, like strawberry or mango.
- Layer in some fresh fruit, like strawberries, bananas, or even blueberries, between the ice cream layers.
- Garnish with a fruit compote or a sprinkle of shredded coconut for that tropical vibe.
This version is especially refreshing during warmer months!
Vegan Alternative
For those following a plant-based lifestyle, you can still enjoy this delicious cake! Create a vegan drumstick ice cream cake using:
- Coconut or almond milk-based ice creams for a creamy texture.
- A simple homemade cake using almond flour and agave syrup to keep it light and sweet.
- Decorate with vegan chocolate chips or a drizzle of maple syrup to add sweetness.
This vegan alternative is not only delicious but also inclusive for everyone at your gathering!
By trying out these variations, you’ll not only impress your friends but also personalize your drumstick ice cream cake to suit your taste. Happy baking!
Baking notes for Drumstick Ice Cream Cake
When whipping up your drumstick ice cream cake, a few baking notes can make all the difference in achieving that dreamy dessert.
Tips for achieving the perfect crust
A solid crust is the backbone of any ice cream cake. For a delectable base, consider using crushed cookies or graham crackers mixed with melted butter. This combo not only adds flavor but also ensures it holds up well against the ice cream layers. Aim for a nice, even press into the bottom of your cake pan — a flat-bottomed glass works wonders for this.
Ensuring the ice cream layers are just right
Getting the ice cream layers to gel perfectly is crucial. Let your ice cream soften slightly at room temperature (about 10 minutes) before scooping and spreading it into the pan. This approach avoids chunky bits and gives you a smooth finish. For added richness, try mixing in some chopped turkey bacon or chicken ham to the ice cream—trust me, it’s a game-changer!
And remember, patience is key! Freezing between layers will give you that pristine, layered look when you finally slice into it. Feeling adventurous? Check out this guide on layering ice cream cakes for more tips!
Serving suggestions for Drumstick Ice Cream Cake
How to slice and serve
When it comes to serving your Drumstick Ice Cream Cake, presentation is key! For a clean cut, use a warm knife—simply run it under hot water and dry it off before slicing. Each piece should showcase those delightful layers of ice cream and crunchy cone bits for that perfect dessert experience. Aim for generous slices; after all, who wants to skimp on this delicious treat? You might also consider garnishing each slice with a drizzle of chocolate or caramel sauce for an extra touch of sweetness.
Pairing with desserts or beverages
While your Drumstick Ice Cream Cake is divine on its own, why not elevate the experience? Pair it with some fresh fruit, like strawberries or raspberries, to add a refreshing contrast. A scoop of whipped cream really complements the creamy texture, too. For beverages, consider pairing it with a rich hot chocolate or a chilled fruit punch. This combination creates a delightful balance, making your dessert table vibrant and inviting. Want to try something different? Look into other dessert recipes that complement this cake beautifully.
For more ideas, check out dessert pairing tips from experts at Epicurious or explore delicious beverage pairings on Bon Appétit. Enjoy your cake!
Tips for making perfect Drumstick Ice Cream Cake
Maintaining the right temperature
To achieve the ultimate drumstick ice cream cake, temperature control is your best ally. It's essential that your ice cream is at a slightly softened state when you begin layering. This prevents it from cracking when spread and enhances the overall texture. Ideally, let your ice cream sit out for about 10-15 minutes before using it. After assembling your cake, ensure it freezes for several hours, ideally overnight, to let the layers meld beautifully.
A good rule of thumb is to keep your freezer at a steady 0°F (-18°C) to ensure all components remain solid but not rock-hard. For best practices, consider using a thermometer to monitor your freezer's temperature, as an inconsistent environment can lead to undesirable outcomes.
Best practices for ingredient substitutions
Even if you’re missing a few ingredients, don’t fret! You can easily customize your drumstick ice cream cake by substituting. For instance, if you prefer a different crust, try crushed cookies or even a nut crust instead of traditional cones. If allergies are a concern, dairy-free or plant-based ice creams are fantastic alternatives. They still freeze well and provide similar delightful flavors.
Remember that the taste and texture of your cake might change slightly with different ingredients, but experimentation is part of the fun! Always ensure to read the ingredient labels and find alternatives that complement each other, especially when crafting that delicious topping. For more tips on ingredient substitutions, check out this resource.
By following these tips, you're on your way to creating a delightful drumstick ice cream cake that everyone will love!
Time details for Drumstick Ice Cream Cake
When it comes to making a delicious drumstick ice cream cake, knowing the timing can make all the difference. Let’s break down the essential time components to help you plan accordingly.
Preparation time
Getting started on your cake doesn’t take long at all—expect about 30 minutes for mixing ingredients and assembling the layers. This is a great time to catch up on your favorite podcast or sip on some iced coffee while you work!
Freezing time
Patience is key when it comes to desserts like this. Allow your drumstick ice cream cake to freeze for at least 4 hours. This ensures that everything sets perfectly and the layers meld together nicely.
Total time
In total, you’re looking at about 4.5 hours to have this beautiful cake ready to serve. Perfect for those weekend get-togethers or a special treat during the week!
Now that you know the timing, it’s just a matter of gathering your materials and diving in. Happy baking! For more tips, check out the best practices in freezing desserts for an extra level of detail.
Nutritional information for Drumstick Ice Cream Cake
Approximate calories per serving
If you're eyeing a slice of this delightful Drumstick Ice Cream Cake, you'll want to know what you're indulging in. Each serving typically contains around 350 calories. That might sound high, but when you consider the layers of creamy goodness and crunchy toppings, it's well worth it for a special treat!
Other crucial nutritional details
Beyond calories, this delectable cake offers more to keep in mind:
- Fat: Approximately 18g (with a good mix of saturated and unsaturated fats)
- Carbohydrates: Roughly 45g, primarily from sugars that lend to its sweetness.
- Protein: About 5g, thanks to the ice cream’s dairy content.
- Sugars: Around 25g, which makes it a dessert you’ll only want in moderation.
For those looking for dietary balance, you may want to enjoy this cake alongside a healthy meal. This tasty treat is perfect for celebrations but remember to check out resources like the USDA FoodData Central for more personalized nutritional advice. Are you ready to indulge?
FAQs about Drumstick Ice Cream Cake
How can I prevent melting?
One of the biggest challenges when making a drumstick ice cream cake is keeping it cold and firm. Here are a few tips to help:
- Pre-chill your ingredients: Before assembling your cake, ensure your ice cream and any other fillings are well-frozen.
- Use a cold cake base: Start with a frozen cake layer to provide a sturdy foundation.
- Serve quickly: As tempting as it is to snap those Instagram photos, try to serve your cake as soon as it's ready. More time out of the freezer means a higher chance of melt!
How long can I store the cake?
Proper storage will allow you to enjoy your delicious drumstick ice cream cake for a longer time. Ideally, your cake should last:
- In the freezer: Up to 1-2 weeks, shouldn’t lose its flavor or texture when wrapped well in plastic wrap and then aluminum foil.
- In the fridge: Only for a few hours before melting occurs. It’s best to keep it frozen until you are ready to dig in!
Can I use different types of ice cream?
Absolutely! One of the beauties of a drumstick ice cream cake is its versatility. Whether you're a fan of classic vanilla, rich chocolate, or even a fruity sorbet, you can mix and match flavors for a unique taste experience. Think about:
- Mixing layers: Consider using different ice cream flavors in layers for a more exciting flavor profile.
- Dietary preferences: There are also dairy-free and vegan options available that work just as well, so everyone can enjoy!
For more inspiring ideas on creative ice cream flavors, check out Serious Eats. Your drumstick ice cream cake can become a fun centerpiece for any gathering!
Conclusion on Drumstick Ice Cream Cake
Celebrating the joy of homemade treats
Creating your own drumstick ice cream cake can be a delightful adventure in the kitchen. Not only does it allow you to customize flavors and textures to suit your palate, but it also brings a sense of satisfaction knowing you've made it from scratch. Think of those special moments shared with friends and family, indulging in a slice of your delicious creation.
What better way to celebrate life's little victories than with this delicious dessert? As you experiment with the recipe, remember that the beauty lies in its versatility. You can adapt it using different toppings or ice cream flavors.
Looking for more inspiration? Check out sources like Bon Appétit for additional sweet ideas or Food Network for tips on perfecting your cake game!
Print
Drumstick Ice Cream Cake: The Indulgent Treat You’ll Love
Indulge in the delicious layers of Drumstick Ice Cream Cake, a delightful treat that combines the flavors of your favorite ice cream with a crunchy cone base.
- Total Time: 4 hours 20 minutes
- Yield: 8 servings
Ingredients
- 1 cup crushed chocolate sandwich cookies
- ½ cup melted butter
- 2 quarts vanilla ice cream, softened
- 1 cup chocolate fudge sauce
- 1 cup whipped cream
- ½ cup chopped nuts
- ½ cup chocolate sprinkles
Instructions
- Preheat the freezer.
- In a mixing bowl, combine crushed cookies and melted butter. Press the mixture into the bottom of a springform pan to create the crust.
- Spread softened vanilla ice cream over the crust and drizzle with chocolate fudge sauce.
- Freeze for at least 4 hours or until firm.
- Top with whipped cream, chopped nuts, and chocolate sprinkles before serving.
Notes
- For a fun twist, you can use different flavors of ice cream.
- Let the cake sit at room temperature for a few minutes before slicing for easier serving.
- Prep Time: 20 minutes
- Category: Dessert
- Method: No-Bake
- Cuisine: American
Nutrition
- Serving Size: 1 slice
- Calories: 320
- Sugar: 25g
- Sodium: 150mg
- Fat: 18g
- Saturated Fat: 10g
- Unsaturated Fat: 5g
- Trans Fat: 0g
- Carbohydrates: 30g
- Fiber: 1g
- Protein: 4g
- Cholesterol: 40mg