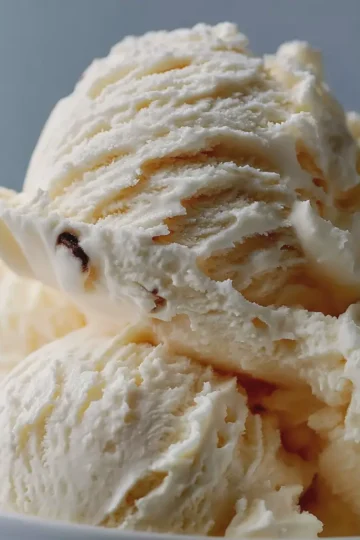
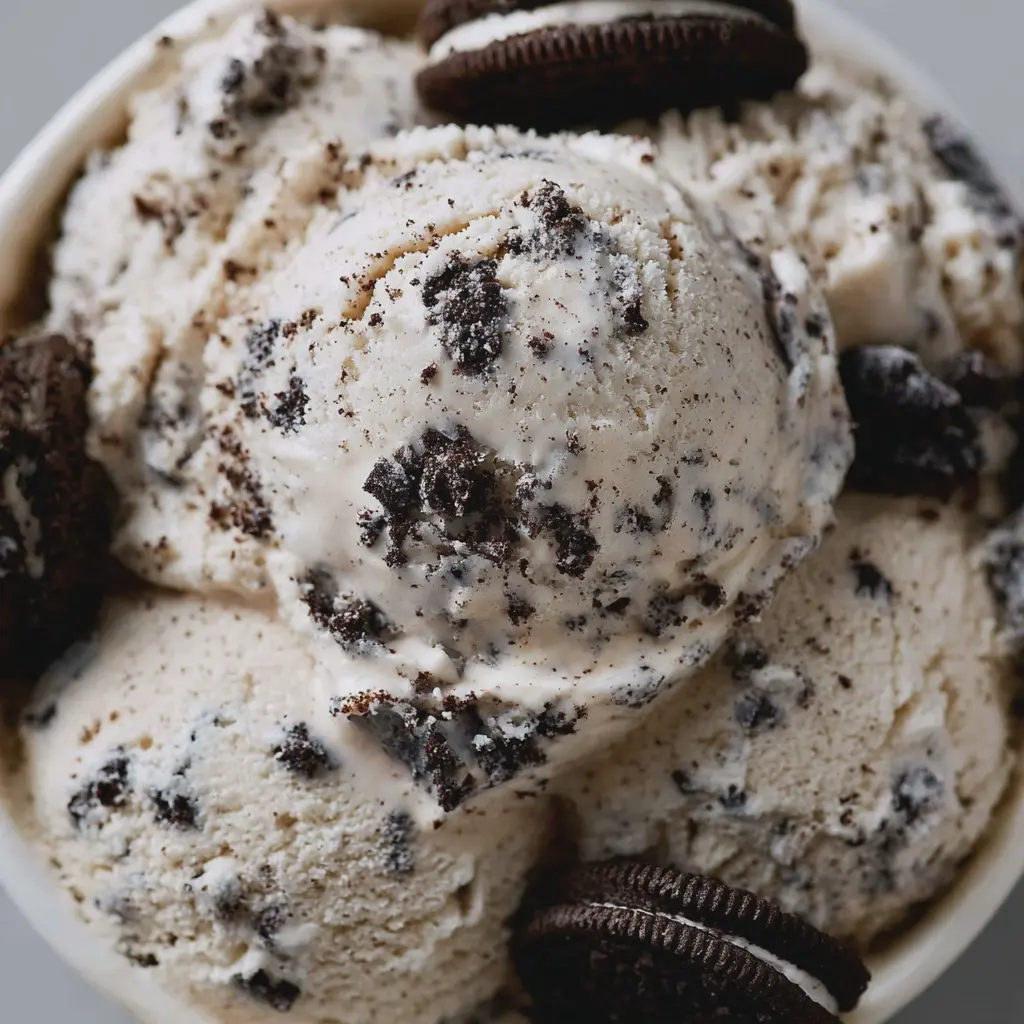
Introduction to No-Churn Cookies & Cream Ice Cream
When it comes to desserts, ice cream has a special place in many of our hearts. But have you ever considered making your own? Enter the delightful world of No-Churn Cookies & Cream Ice Cream. This homemade treat not only satisfies those sweet cravings, but it also offers a fun and creative experience in your kitchen.
Why Choose Homemade Ice Cream Over Store-Bought?
You might be wondering, why take the time to whip up a batch of this creamy delight when you could just grab a pint from the grocery store? Here are a few compelling reasons to grab your mixing bowl instead:
-
Control Over Ingredients: When you make your own cookies & cream ice cream, you get to choose high-quality ingredients. This means no artificial flavors or preservatives, just pure deliciousness! For those who are mindful of what they consume, this is a huge plus.
-
Customization is Key: Homemade ice cream opens a world of flavor possibilities. Want to add more chocolate cookies? Go for it! Prefer a mint twist? You can do that too. The joy of creating your own dessert is in the personalization, so make it your own!
-
Budget-Friendly Delight: While store-bought ice cream can add up, making your own can be quite economical—especially if you're feeding a crowd. Plus, you can experiment with different cookie combinations without breaking the bank.
-
Satisfying Experience: There’s something incredibly rewarding about making ice cream from scratch. The anticipation as you wait for it to freeze, the rich aroma that fills your kitchen—these little moments can turn an ordinary day into something special.
According to a study by the Institute of Food Technologists, homemade ice cream generally contains fewer additives than commercial brands. So, not only are you indulging in a tasty treat, but you're also embracing a healthier lifestyle.
Why not bring this delightful experience to your kitchen? Get ready to wow your friends or simply treat yourself with this easy and delicious No-Churn Cookies & Cream Ice Cream. Trust us, once you try it, you'll wonder why you ever settled for store-bought!
Ingredients for No-Churn Cookies & Cream Ice Cream
Creating your own No-Churn Cookies & Cream Ice Cream at home is both fun and incredibly rewarding. You don’t need an ice cream maker to whip up this delicious treat; just a few simple ingredients will do!
Essential Components
To get started, here's what you'll need:
- 2 cups heavy cream: This will give your ice cream that creamy texture we all love.
- 1 cup sweetened condensed milk: It's the secret ingredient that adds a rich sweetness without the need for extra sugar.
- 1 teaspoon pure vanilla extract: For that classic vanilla base flavor that complements the cookies perfectly.
- 1 cup crushed chocolate sandwich cookies: The heart of your cookies and cream ice cream! Feel free to use your favorite brand.
- Pinch of salt: A little salt to balance the sweetness.
These straightforward ingredients ensure that your No-Churn Cookies & Cream Ice Cream is not just easy to make, but outrageously delicious! If you want to know more about the science of ice cream making, check out Serious Eats for deeper insights.
Why settle for store-bought when you can create a unique and personalized treat right in your kitchen? Happy churning—whoops, I mean mixing!
Step-by-Step Preparation of No-Churn Cookies & Cream Ice Cream
Making homemade ice cream has never been easier! With this No-Churn Cookies & Cream Ice Cream recipe, you'll discover how simple it can be to whip up a delicious dessert without any fancy equipment. Let’s get started on this creamy adventure!
Whip the Cream
The first step to achieving that light, fluffy texture is to whip heavy cream until it forms stiff peaks.
- Ingredients Needed: You’ll need about 2 cups of heavy whipping cream.
- Instructions: Using a hand mixer or a stand mixer, whip the cream on medium to high speed until it thickens. You should see soft peaks first—keep going until you reach those glorious stiff peaks! This step is vital as it creates the base for your No-Churn Cookies & Cream Ice Cream.
Whipped cream adds a delightful lightness and richness that makes this ice cream feel decadent but is surprisingly easy to make. Have you ever tried it with flavored extracts like vanilla or almond? A splash could elevate your dessert even more!
Incorporate the Sweetened Condensed Milk
Next up, it’s time to add some sweetness.
- Ingredients Needed: Grab a 14 oz. can of sweetened condensed milk.
- Instructions: Gently pour the sweetened condensed milk into the whipped cream. Using a spatula, fold the two together carefully. You want to maintain the aeration from the whipped cream, so be cautious not to overmix. This creaminess will form the heart of your No-Churn Cookies & Cream Ice Cream.
Why is sweetened condensed milk so special? It adds a rich, creamy texture and sweetness that’s hard to replicate. You can even find more about its versatility in desserts from sources like Serious Eats.
Fold in the Crushed Oreos
Here comes the fun part—adding the cookies!
- Ingredients Needed: Grab about 15-20 Oreos and crush them into chunks (you can adjust based on your cookie preference).
- Instructions: Gently fold the crushed Oreos into the cream mixture. Make sure to distribute them evenly for that perfect cookie bite in every spoonful.
The Oreos not only add flavor but also give the ice cream that beautiful, speckled appearance that screams indulgence. Remember—choose between chunky pieces for a richer texture or finely crushed for a uniform taste.
Transfer the Mixture to a Container
With your mix all set, it's time to get the No-Churn Cookies & Cream Ice Cream ready for its chilly transformation.
- Instructions: Find a suitable container—an airtight, freezer-safe dish works best. Carefully pour your ice cream mixture into it, smoothing the top with a spatula.
This step is incredibly satisfying, as you can already start to visualize the delicious ice cream awaiting you. If you have any leftover crushed Oreos, sprinkle them on top for a decorative touch!
Freeze the Ice Cream
Now comes the hardest part—waiting!
- Instructions: Cover the container with a lid or plastic wrap and pop it in the freezer. Let your ice cream freeze for at least 6 hours, but overnight works best for that perfect scoopable consistency.
While you're waiting, think about fun toppings! From chocolate syrup to whipped cream, or even a sprinkle of nuts, the possibilities are endless.
Serve and Enjoy
Finally, it's time to indulge!
- Instructions: After freezing, let the No-Churn Cookies & Cream Ice Cream sit at room temperature for about 5 minutes to soften before serving. Scoop away and enjoy!
Whether you choose to serve it in a cone, a bowl, or straight from the container (no judgment here!), this creamy delight is bound to impress friends and family. Don’t forget to snap a picture for your social media—you might want to share this deliciousness with the world!
Making your own ice cream at home can be a fulfilling experience. So the next time a craving hits, this simple recipe should guide your cravings into a creamy, dreamy treat!
Variations on No-Churn Cookies & Cream Ice Cream
Creating your own No-Churn Cookies & Cream Ice Cream opens the door to endless possibilities. Let’s explore some fun variations to elevate your homemade treat!
Add-ins and Toppings to Consider
While the classic combo of crushed cookies and creamy ice cream is unbeatable, consider adding a few mix-ins to jazz things up. Here are some ideas:
- Chopped Nuts: Add a crunchy texture with almonds or pecans.
- Chocolate Sauce or Caramel: Drizzle some sweetness throughout the mixture for a decadent touch.
- Marshmallow Fluff: Swirl in some marshmallow for a unique marshmallow-chocolate twist.
- Fresh Fruit: Berries or sliced bananas can add a refreshing note that balances the rich flavors.
Feel free to get creative! Personalizing your No-Churn Cookies & Cream Ice Cream not only makes it unique but also shows off your culinary prowess.
Flavor Twists: Mint, Peanut Butter, or Chocolate Chips
Why stick to tradition when flavors like mint, peanut butter, or even chocolate chips can downplay the ordinary? Here’s how you can infuse these exciting flavors:
- Mint: Stir in mint extract and fold in some crushed mint cookies for a refreshing take.
- Peanut Butter: Swirl in your favorite peanut butter throughout the ice cream for that creamy, nutty goodness. You can also add bits of peanut butter cups to enhance the flavor!
- Chocolate Chips: Give your ice cream a richer texture by mixing in chocolate chips or chunks along with the cookies.
With these variations, your No-Churn Cookies & Cream Ice Cream will be deliciously different every time you make it. Plus, inviting friends over for an ice cream night? You’ll score major points by surprising them with these unique flavors!
Cooking Tips and Notes for No-Churn Cookies & Cream Ice Cream
Making No-Churn Cookies & Cream Ice Cream is a delightful way to treat yourself, and a few helpful tips can make your experience even better!
Choose the Right Cream
Opt for heavy whipping cream for a rich and luscious texture. It whips up beautifully and provides the creaminess that makes this ice cream so delectable.
Mix-In Variations
While crushed cookies are essential, consider adding a swirl of chocolate sauce or a sprinkle of sea salt to elevate the flavor. Experimenting with different types of cookies, like chocolate sandwich cookies or even homemade ones, can also give your ice cream a unique spin.
Freeze Strategically
After mixing, spread your ice cream mixture in an airtight container and smooth the top. This minimizes air exposure and prevents those pesky ice crystals from forming.
Let It Sit
Once done, let the No-Churn Cookies & Cream Ice Cream soften a bit at room temperature for about 5-10 minutes before scooping. This makes serving easier and ensures a truly creamy experience.
For detailed tips on cream types, check out this resource that dives deeper into ingredient choices! Enjoy crafting your ice cream masterpiece!
Serving Suggestions for No-Churn Cookies & Cream Ice Cream
When it comes to No-Churn Cookies & Cream Ice Cream, the fun doesn’t have to end at just scooping it straight from the tub! Here are some delightful serving suggestions that will elevate your dessert experience and impress your friends.
Sundae Extravaganza
Transform your ice cream into a sundae masterpiece. Start with a scoop (or two) of your No-Churn Cookies & Cream Ice Cream, then top it off with:
- Whipped cream
- Chocolate syrup or hot fudge
- Crushed cookies for added crunch
- A cherry on top for a classic touch
Milkshake Magic
Why not blend your favorite ice cream into a rich milkshake? Combine a generous scoop of your No-Churn Cookies & Cream Ice Cream with some whole milk in a blender, and blend until smooth. For extra indulgence, sprinkle in more crushed cookies or drizzle with chocolate syrup.
Ice Cream Sandwiches
Make your own delightful ice cream sandwiches! Sandwich your No-Churn Cookies & Cream Ice Cream between two chocolate chip or sugar cookies. This nostalgic treat is perfect for gatherings or a quick snack.
These tasty ideas are just the beginning! Experimenting with different toppings and combinations is part of the joy of homemade ice cream. For more sweet inspirations, you can check out sources like the Ice Cream Alliance for tips and creative serving ideas. Enjoy!
Time Breakdown for No-Churn Cookies & Cream Ice Cream
Preparation time
Making your own No-Churn Cookies & Cream Ice Cream is both easy and quick! You’ll need about 15 minutes to whip up the mixture. This involves gathering your ingredients—like heavy cream, sweetened condensed milk, and, of course, chopped cookies—then mixing everything together for that creamy goodness.
Freezing time
After prep, the hardest part is waiting! Pop your mix into the freezer for approximately 6 hours to allow it to firm up perfectly. For best results, I recommend freezing overnight if you can resist the temptation.
Total time
In total, you’re looking at around 6 hours and 15 minutes, but most of that is just chilling. This makes it a fantastic treat for a mid-week indulgence or a special occasion. Enjoy digging into this delicious homemade ice cream!
For more delightful dessert ideas, check out sources like the American Ice Cream Association for tips and inspiration on ice cream-making techniques.
Nutritional Facts for No-Churn Cookies & Cream Ice Cream
When whipping up your No-Churn Cookies & Cream Ice Cream, it's important to understand its nutritional profile to enjoy it guilt-free.
Calories
A serving of this delightful treat generally contains around 300 calories. That’s a reasonable indulgence for a hot summer day or as a sweet reward after a long week.
Fat Content
Expect about 18 grams of fat per serving, most of it coming from the cream. While it’s a higher fat dessert, it’s a far cry from some processed options you’ll find in stores, making it a more wholesome choice.
Sugar Levels
This recipe usually has around 25 grams of sugar per serving. While this sounds like a lot, it’s far less than many commercially available ice creams. You can also adjust the sugar to your taste by using alternatives like honey or maple syrup for a lighter version.
For a deeper dive into healthy dessert options or sugar alternatives, check out resources like Healthline to keep your indulgence in check!
FAQs about No-Churn Cookies & Cream Ice Cream
Can I use different cookies in this recipe?
Absolutely! One of the best things about No-Churn Cookies & Cream Ice Cream is its versatility. While classic sandwich cookies are a favorite, feel free to experiment with other cookies. Try using crushed chocolate wafer cookies, peppermint patties for a festive twist, or even oatmeal cookies for a chewy texture. Just keep in mind that different cookies will bring unique flavors, so select ones you love.
How long can I store homemade ice cream?
Great question! You can store your homemade No-Churn Cookies & Cream Ice Cream in an airtight container for about two to three weeks. Beyond that, it may start to lose its creamy texture and flavor due to freezer burn. If you find it hard to finish your batch, consider sharing with friends or planning a small ice cream party! For tips on proper storing techniques, check out this helpful guide from FDA.
What should I do if the ice cream is too hard to scoop?
If your ice cream seems too hard to scoop, don’t worry—this is a common issue! Simply let it sit out at room temperature for about 5–10 minutes before diving in. This gives it a chance to soften up and become more scoopable. It’s a great reminder that, like all good things, a little patience goes a long way.
Feel free to enjoy your No-Churn Cookies & Cream Ice Cream in cones, bowls, or straight from the container. It's all about indulging in your homemade creation!
Conclusion on No-Churn Cookies & Cream Ice Cream
In wrapping up our delightful exploration of No-Churn Cookies & Cream Ice Cream, it’s clear that this treat is as easy to make as it is delicious. With no fancy machines required, you can whip it up in no time, making it perfect for casual get-togethers or quiet evenings at home. Imagine satisfying your sweet tooth without the hassle of an ice cream maker!
Whether you opt for classic Oreo cookies or explore other variations, the texture and flavor are bound to amaze your friends and family. So, why not take a moment to treat yourself? A scoop of your own homemade ice cream is just a blend away!
For more ice cream inspiration, check out sources like Bon Appétit or Serious Eats for additional recipes.
Print
No-Churn Cookies & Cream Ice Cream: A Simple Indulgence at Home
Indulge in the deliciousness of homemade No-Churn Cookies & Cream Ice Cream without the need for an ice cream maker!
- Total Time: 4 hours 15 minutes
- Yield: 6 servings
Ingredients
- 2 cups heavy cream
- 1 cup sweetened condensed milk
- 1 teaspoon vanilla extract
- 1 cup crushed chocolate sandwich cookies
Instructions
- In a large mixing bowl, whip the heavy cream until stiff peaks form.
- In another bowl, mix the sweetened condensed milk and vanilla extract until combined.
- Gently fold the whipped cream into the condensed milk mixture until fully combined.
- Add the crushed cookies and fold gently to distribute.
- Pour the mixture into a loaf pan or ice cream container and smooth the top.
- Freeze for at least 4 hours or overnight until firm.
- Scoop and serve, enjoying the rich cookies and cream flavor!
Notes
- For an extra treat, add more crushed cookies on top before freezing.
- Let the ice cream sit at room temperature for a few minutes before scooping for easier serving.
- Prep Time: 15 minutes
- Category: Dessert
- Method: No-Churn
- Cuisine: American
- Diet: Vegetarian
Nutrition
- Serving Size: ½ cup
- Calories: 300
- Sugar: 28g
- Sodium: 50mg
- Fat: 20g
- Saturated Fat: 12g
- Unsaturated Fat: 8g
- Trans Fat: 0g
- Carbohydrates: 30g
- Fiber: 1g
- Protein: 4g
- Cholesterol: 60mg