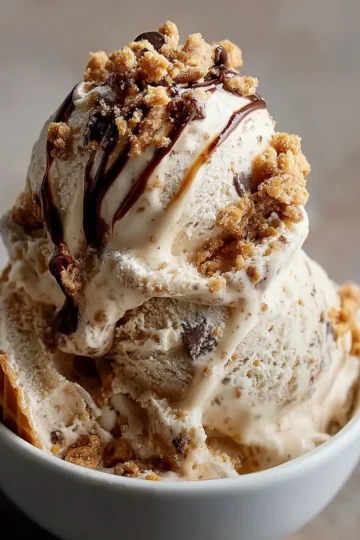
Introduction to Coffee Crunch Ice Cream
Why Homemade Ice Cream Brings Joy
There’s something undeniably delightful about making your own ice cream at home. It’s not just the thrill of blending exciting flavors; it’s the entire process. From choosing the freshest ingredients to churning them into velvety goodness, there’s a genuine sense of accomplishment and joy in the air. When you whip up a batch of ice cream, especially something as decadent as coffee crunch ice cream, you create not just a treat but an experience.
Homemade ice cream allows creativity to flourish. You can customize flavors, adjust sweetness levels, and even experiment with mix-ins to suit your preferences. Each scoop becomes a canvas for your culinary artistry! Plus, how wonderful is it to surprise friends or family with a batch you've crafted with love? They’ll appreciate the effort, and you’ll get to bask in their smiles—definitely a win-win. For more insight on the joy of homemade desserts, check out Serious Eats.
The Love for Coffee in Dessert Form
Coffee’s rich, bold flavor has captivated dessert lovers around the globe. When combined with ice cream, it becomes an exhilarating taste adventure. The bittersweet essence of coffee paired with creamy sweetness creates a harmony that tantalizes the taste buds.
Imagine scooping rich coffee crunch ice cream, where every bite brings a splash of revitalizing coffee flavor and a delightful crunch that adds texture. You’re not just satisfying your sweet tooth; you’re indulging in a dessert that bridges the gap between a pick-me-up and a refreshing treat.
This love for coffee in desserts is backed by research; a study by the National Coffee Association reveals that over 60% of Americans enjoy coffee as part of their daily routine, with many incorporating it into their favorite sweets. So why not embrace this trend and elevate our ice cream game?
Crafting coffee crunch ice cream at home isn't just a project; it’s a chance to explore new flavors in an exciting way. So, gather your ingredients, brew some strong coffee, and let the churning begin! You’re in for a delightful treat that might just become your new favorite summer indulgence.
Ingredients for Coffee Crunch Ice Cream
Creating the perfect coffee crunch ice cream from scratch is a delightful adventure in the kitchen. Below, I'll guide you through the essential ingredients you’ll need for this delicious treat.
Ice Cream Base Ingredients
To start off, gather these key components for a creamy and luxurious base:
- 2 cups heavy cream: This will give your ice cream its rich texture.
- 1 cup whole milk: Adds creaminess while balancing the richness.
- ¾ cup granulated sugar: Sweetens the mix beautifully.
- 1 tablespoon vanilla extract: Enhances the flavors with warmth.
- Pinch of salt: A touch of salt brings all the flavors together.
Crunchy Caramel Ingredients
The crispy caramel layer is what really sets this coffee crunch ice cream apart. You’ll need:
- 1 cup granulated sugar: For making the caramel.
- ¼ cup water: Helps dissolve the sugar.
- ¼ teaspoon baking soda: Adds texture.
- 1 tablespoon butter: A hint of richness in the crunch.
Coffee Mixture Ingredients
Finally, the star ingredient is, of course, coffee. Gather these to infuse the ice cream with that bold flavor:
- 1 cup strong brewed coffee: Make sure it’s cooled before adding.
- 1 tablespoon instant coffee granules: Intensifies the coffee flavor, making each scoop pop.
With these simple yet essential ingredients, you’re ready to whip up a batch of coffee crunch ice cream that’s sure to impress. Don’t hesitate to check out some tips on using high-quality coffee for the best flavor. Happy churning!
Step-by-step Preparation of Coffee Crunch Ice Cream
Creating your own coffee crunch ice cream at home is both rewarding and surprisingly simple. With a few steps, you can indulge in a creamy treat that's perfect for coffee lovers. Here’s a detailed yet friendly guide to making this delicious dessert.
Prepare the ice cream base
To kick off your coffee crunch ice cream, you need to make a solid ice cream base. Start by gathering the following ingredients:
- 1 cup of whole milk
- 2 cups of heavy cream
- ¾ cup of granulated sugar
- 1 tablespoon of pure vanilla extract
- A pinch of salt
-
In a medium saucepan, combine the milk, sugar, and salt over medium heat. Stir until the sugar is dissolved, which should take about 3-4 minutes.
-
Once the mixture is warm, remove it from heat and slowly stir in the heavy cream and vanilla extract. This step adds richness and depth to your ice cream base.
-
Allow the mixture to cool at room temperature, then refrigerate it for at least 2 hours or ideally overnight. This chilling process ensures the flavors meld beautifully.
Incorporating a cold base is essential for achieving that luscious texture in your final product; trust me, it's worth the wait!
Create the caramel crunch
While waiting for your base to chill, let’s make the crunchy topping that brings your coffee crunch ice cream to life. You'll need:
- 1 cup of granulated sugar
- 2 tablespoons of butter
- ¼ cup of brewed coffee (cooled)
-
In a medium saucepan, over medium heat, melt the sugar. Stir gently until it transforms into a beautiful amber caramel. This usually takes around 10 minutes, so don’t rush it; patience is key here.
-
Once the sugar reaches the right color, remove it from the heat and carefully stir in the butter and brewed coffee. Be cautious—this mixture can bubble vigorously!
-
Pour the caramel onto a parchment paper-lined baking sheet, spreading it out evenly. Allow it to cool and harden.
-
Once cool, break the caramel into crunchy bits. This will be the delectable surprise in your ice cream.
Mix the coffee mixture
Now it’s time to infuse that delicious coffee flavor into your coffee crunch ice cream. You'll need:
- ½ cup of espresso or strongly brewed coffee (cooled)
-
Add the cooled espresso to your chilled ice cream base. Stir well to ensure the coffee flavor is evenly distributed throughout the base.
-
Taste the mixture! Adjust the coffee intensity to your liking. Feel free to add more coffee if you enjoy a robust flavor.
Whip the cream
In this step, we're going to create an airy and light texture that balances the creaminess of your ice cream. Grab:
- 1 cup of heavy cream
-
In a separate bowl, whip the heavy cream until soft peaks form. This should take about 3-5 minutes with an electric mixer.
-
Carefully fold the whipped cream into the coffee mixture using a spatula, making sure not to deflate it. This creates that dreamy texture we all crave from homemade ice cream.
Combine everything
Now that you have your ice cream base ready and the crunchy bits prepared, it’s time to bring it all together.
-
Gently fold the caramel crunch into your coffee mixture. Make sure to distribute it evenly; every scoop should carry that delightful caramel surprise!
-
Taste your mix one last time; honestly, you’ll understand why everyone loves making ice cream at home.
Freeze and set
The final step is incredibly rewarding, as you can visualize your creation coming to life.
-
Pour the combined mixture into an airtight container. Spread it evenly to minimize air pockets.
-
Freeze for at least 6 hours or overnight until the ice cream is firm enough to scoop.
-
When you’re ready to enjoy, let the ice cream sit at room temperature for a few minutes to soften it slightly before serving.
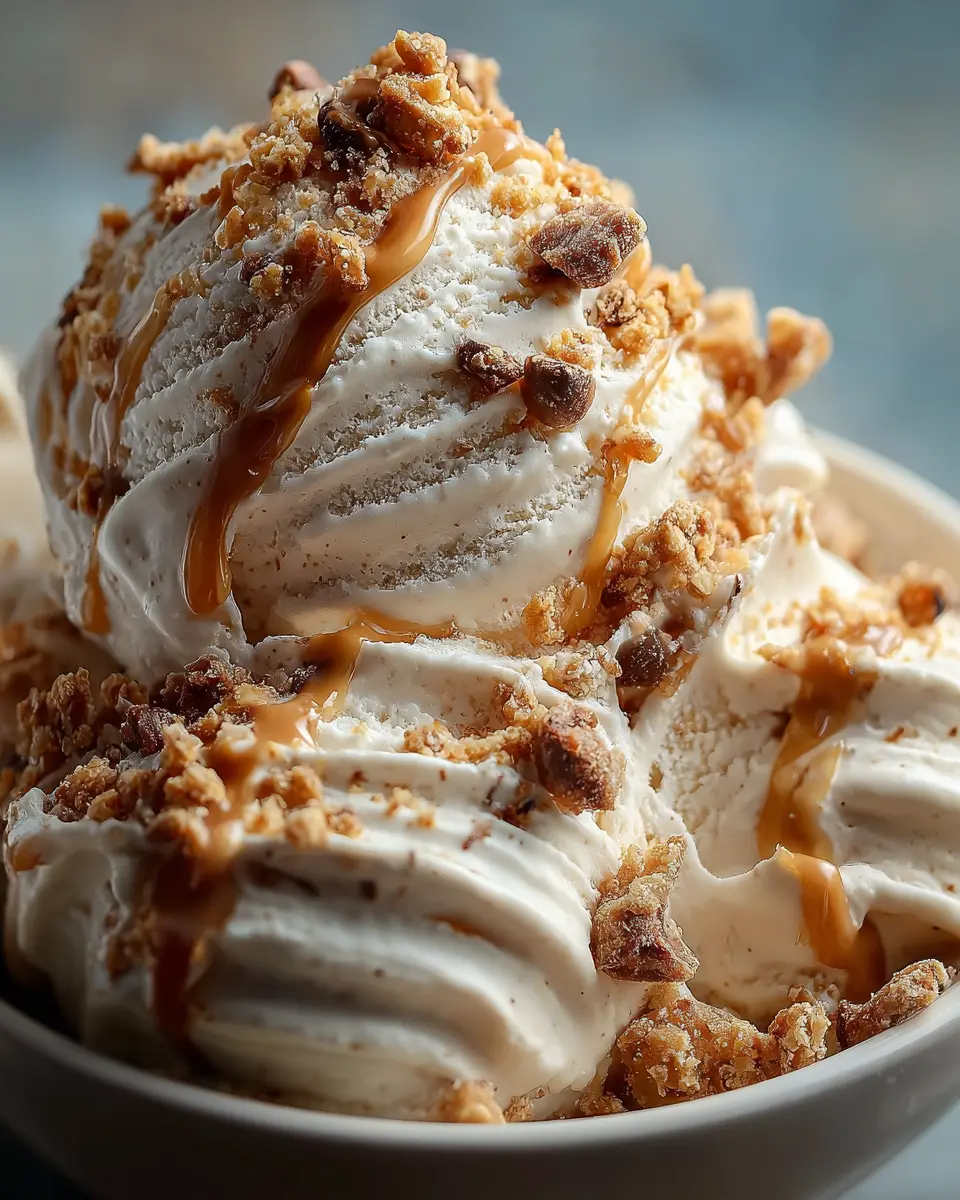
And there you have it: your homemade coffee crunch ice cream! Serve it in bowls, cones, or even with a drizzle of chocolate sauce. Its blend of creamy coffee and caramel crunch is bound to impress your friends and family. Enjoy your creation and embrace the joy of making ice cream at home!
Variations of Coffee Crunch Ice Cream
When it comes to making coffee crunch ice cream, the possibilities are nearly endless. If you're feeling adventurous or have dietary preferences, consider these delightful variations that will elevate your ice cream game.
Chocolate Coffee Crunch Ice Cream
For all you chocolate lovers out there, what could be better than blending two rich flavors? Adding cocoa powder or melted dark chocolate to your coffee base can create a luscious chocolate coffee crunch ice cream.
- Tips for Success:
- Choose Quality Chocolate: Opt for high-quality dark chocolate for a more intense flavor.
- Adjust Sweetness: Make sure to taste as you mix cocoa into your base; you might need less sugar than your original recipe calls for.
- Crunch Factor: Incorporate chocolate-covered coffee beans or chocolate chips for extra texture.
Experimenting with this variation lets you have the best of both worlds: a robust coffee flavor enriched with luxurious chocolate.
Dairy-Free Coffee Crunch Ice Cream
Plant-based diets are becoming increasingly popular, and dairy-free coffee crunch ice cream is a delicious option for those avoiding dairy.
- The Basics:
- Base Options: Use coconut milk, almond milk, or cashew milk for a creamy texture without the dairy. Coconut milk will give you the richest results.
- Natural Sweeteners: Consider maple syrup or agave syrup to sweeten your mixture naturally.
- Add-Ins: Stir in crunchy toppings like crushed nuts or dairy-free chocolate for added flavor and texture.
This version of coffee crunch ice cream allows everyone to indulge, keeping your ice cream socials inclusive.
Whichever variation you choose, remember that the world of ice cream is all about experimenting and finding your unique twist. For more delightful recipes and tips, check out Serious Eats or Bon Appétit for inspiration. Enjoy your creations!
Cooking Tips and Notes for Coffee Crunch Ice Cream
Importance of cooling the base
Before diving into your coffee crunch ice cream adventure, remember that cooling the base is crucial. If you pour your mixture into the ice cream maker while it's still warm, chances are you’ll lose out on that ultra-creamy texture you desire. Aim for a chilling time of at least 4 hours in the refrigerator. This allows the flavors to meld beautifully, giving you that robust coffee blast in every scoop.
Tips for achieving the best texture
-
Chill your tools: Place your ice cream maker bowl in the freezer the night before. It’s a simple step that helps in freezing the mixture rapidly, preventing large ice crystals from forming.
-
Fold in the crunch: When adding flavorful mix-ins like crushed coffee candies, do it gently at the end of the churn cycle. This preserves their texture rather than turning them into mush.
By incorporating these tips, you’ll be well on your way to creating a phenomenal coffee crunch ice cream that’s sure to impress! For more insights on ice cream making, check out the Ice Cream Foundation for expert advice and resources.
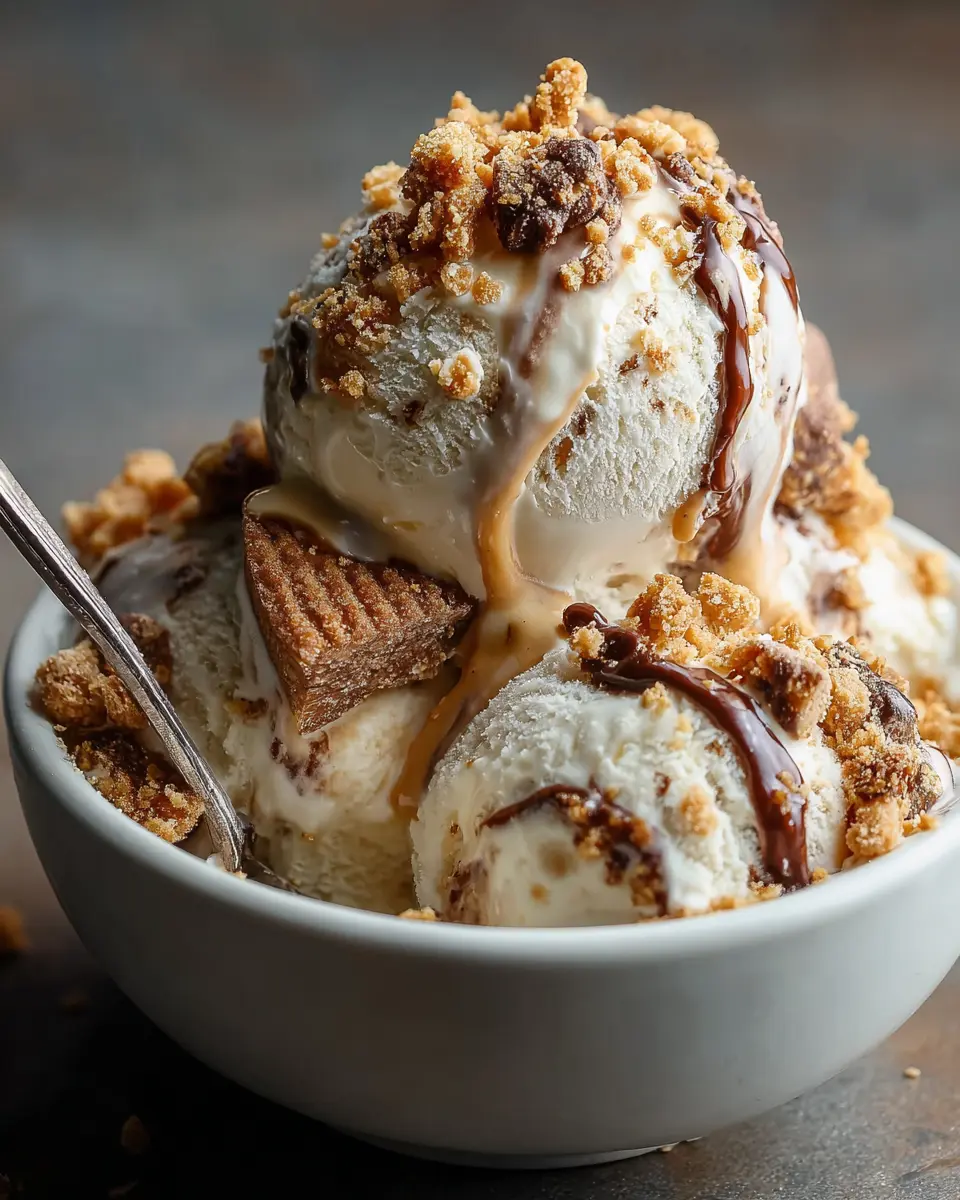
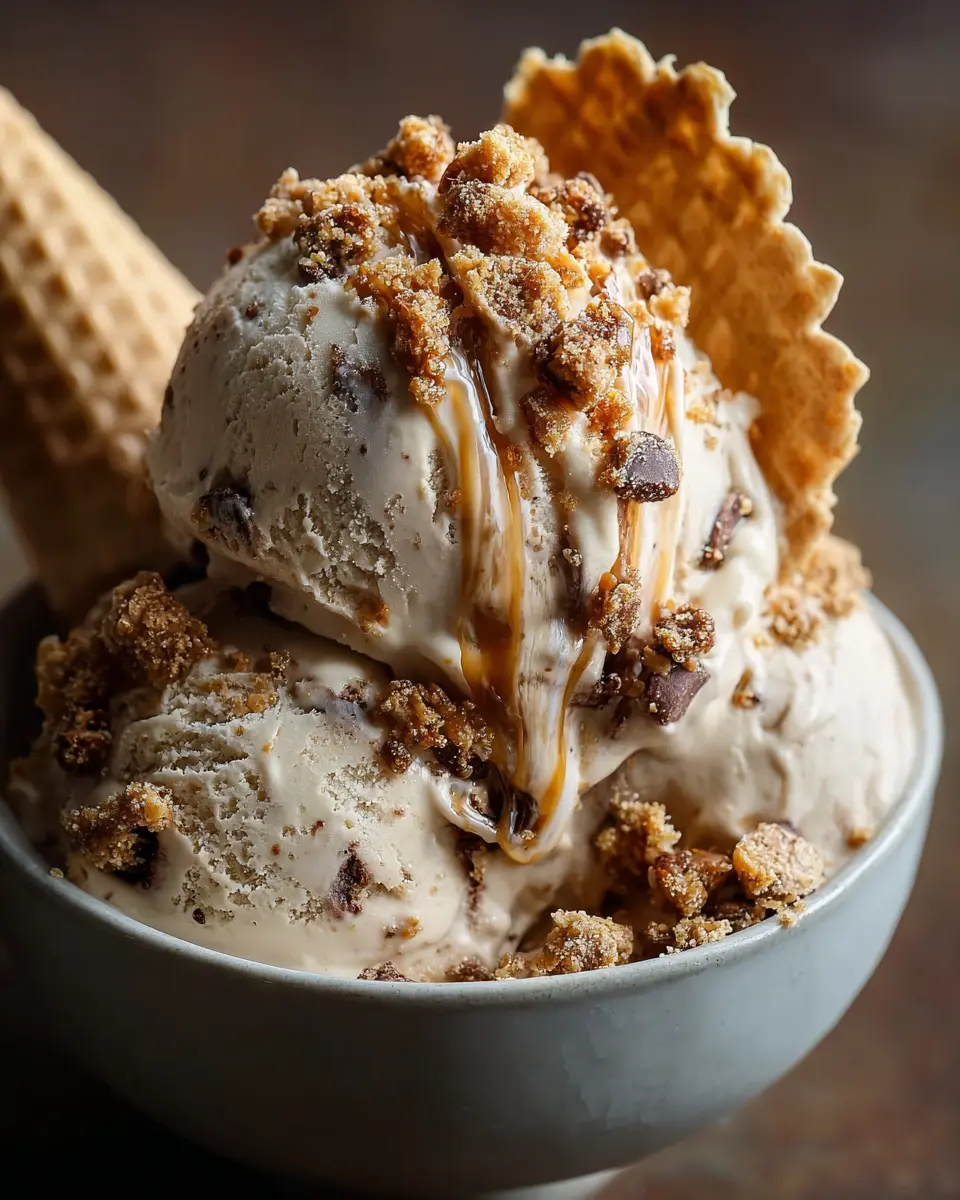
Serving Suggestions for Coffee Crunch Ice Cream
Creative Ways to Serve the Ice Cream
Elevate your coffee crunch ice cream experience by getting creative! Consider serving it in a fresh, buttery waffle cone for a delightful crunch. Or, scoop it into a bowl and drizzle it with warm chocolate sauce for a dessert that feels indulgent yet easy. If you're up for a bit of flair, try making coffee crunch ice cream sandwiches using soft, chewy cookies.
Another fun idea is layering the ice cream in parfait glasses with coffee-flavored cake or brownies. Top with whipped cream and a sprinkle of crushed coffee beans for a touch of elegance!
Pairing with Fresh Desserts
Coffee crunch ice cream pairs beautifully with fresh desserts that complement its rich flavors.
- Fruit Compote: A homemade berry compote adds a refreshing tartness.
- Cheesecake: The creamy texture balances the crunchiness perfectly.
- Chocolate Cake: Every bite of cake paired with ice cream creates a heavenly combo.
Don't hesitate to experiment! For more pairing ideas, check out sources like The Kitchn or Bon Appétit for inspiration. Just remember, your unique touch can turn a casual dessert into a memorable treat!
Time Breakdown for Coffee Crunch Ice Cream
Preparation Time
Making coffee crunch ice cream is surprisingly straightforward! You'll need about 20 minutes to whip up the base and incorporate your crunchy coffee goodness. Gather your ingredients ahead of time, and it will feel even smoother.
Freezing Time
Patience is key here! After your mixture is ready, it needs 4 to 6 hours in the freezer to reach that perfect creamy texture. For best results, I recommend letting it freeze overnight if you want to indulge the next day.
Total Time
In total, you’re looking at approximately 4 to 6 hours and 20 minutes from start to finish. It’s a small investment for a delightful treat that will impress friends and family alike! If you’re curious about other ice cream recipes, check out this guide on making homemade ice cream.
With these time estimates, you can plan your coffee crunch ice cream making session accordingly, ensuring it fits perfectly into your day. Happy churning!
Nutritional Facts for Coffee Crunch Ice Cream
Calories per serving
Indulging in coffee crunch ice cream is a delightful experience, and knowing the calories can help you savor each scoop guilt-free. On average, a serving of this delicious treat contains around 250-300 calories. Remember, it’s all about balance!
Protein content
While ice cream isn’t typically a protein powerhouse, our coffee crunch ice cream offers a modest boost—about 4-5 grams per serving. Not bad for a dessert! Pair it with some protein-rich snacks for a more balanced treat.
Sugar levels
Sugar levels in your favorite coffee crunch ice cream can be a concern, especially if you're watching your intake. A serving usually contains 20-25 grams of sugar. If you're looking for a healthier option, consider making it at home using natural sweeteners or reducing the sugar to suit your taste. For more tips on managing sugar in your diet, check out sources like the American Heart Association.
In conclusion, enjoying your coffee crunch ice cream thoughtfully can elevate your dessert game while keeping your nutritional goals in sight!
FAQs about Coffee Crunch Ice Cream
Can I substitute the coffee powder?
Absolutely! If you're not a fan of coffee or just want a different flavor, consider using instant espresso or even cocoa powder for a chocolatey twist. Matcha powder is another interesting substitute that can lend a unique flavor to your coffee crunch ice cream. Keep in mind that each substitute can change the ultimate taste and texture, so feel free to experiment a little!
How do I store homemade ice cream?
Storing coffee crunch ice cream properly is crucial for maintaining its deliciousness. Use an airtight container to keep it fresh and avoid freezer burn. When you scoop some out, make sure to press plastic wrap directly onto the surface before sealing the lid. This helps maintain that creamy texture. Generally, homemade ice cream will stay delectable in the freezer for about 2-3 weeks—longer if you're storing it in a very cold freezer.
What can I use instead of milk powder?
If milk powder isn’t on hand or you’re looking for a dairy-free option, try using coconut milk powder or almond milk powder. These alternatives add creaminess without compromising the dessert's integrity. For those who are lactose intolerant, consider soy milk powder or oat milk powder as well. Just remember, the flavor may vary slightly, but you might just discover a new favorite version of your coffee crunch ice cream!
Curious to explore more about ice cream-making or flavors? Check out Bon Appétit or Serious Eats for expert tips and recipes!
Conclusion on Coffee Crunch Ice Cream
Making ice cream at home, like this delightful coffee crunch ice cream, brings joy beyond just the final product. There's something incredibly satisfying about transforming simple ingredients into a creamy treat. The fun of mixing and tasting allows you to indulge your creativity and tailor flavors to your liking.
Don’t be afraid to venture beyond coffee! Experiment with different bases, add-ins, and flavors to create your unique signature ice cream. Whether you choose classic chocolate or adventurous lavender, the world of homemade ice cream is limitless. Check out this resource for more flavor inspiration. So, gather your friends, and have a fun-filled ice cream-making session!
Print
Coffee Crunch Ice Cream: The Best Indulgent Treat for Any Day
This Coffee Crunch Ice Cream is the perfect blend of rich coffee flavor and crunchy texture, making it an indulgent treat that can be enjoyed any day.
- Total Time: 4 hours 15 minutes
- Yield: 1.5 quarts
Ingredients
- 2 cups heavy cream
- 1 cup whole milk
- 1 cup granulated sugar
- 1 tablespoon instant coffee granules
- 1 teaspoon vanilla extract
- ½ cup chocolate-covered coffee beans, crushed
Instructions
- In a mixing bowl, combine the heavy cream, whole milk, granulated sugar, instant coffee granules, and vanilla extract. Whisk until the sugar is dissolved.
- Pour the mixture into an ice cream maker and churn according to the manufacturer's instructions.
- Once the ice cream is thick and fluffy, gently fold in the crushed chocolate-covered coffee beans.
- Transfer the ice cream into an airtight container and freeze for at least 4 hours before serving.
Notes
- For a stronger coffee flavor, increase the amount of instant coffee granules.
- For a smoother texture, use a high-quality ice cream maker.
- Prep Time: 15 minutes
- Category: Desserts
- Method: Churning
- Cuisine: American
- Diet: Vegetarian
Nutrition
- Serving Size: ½ cup
- Calories: 350
- Sugar: 28g
- Sodium: 50mg
- Fat: 24g
- Saturated Fat: 14g
- Unsaturated Fat: 8g
- Trans Fat: 0g
- Carbohydrates: 30g
- Fiber: 1g
- Protein: 4g
- Cholesterol: 80mg